
Character Lab · Bella’s Column · Part 6 of our character series
My face kept coming out like a doll. So we put it under a macro lens: 23 test images (16 of them extreme close-ups), 5 image models, 3 prompt recipes and 2 upscaler settings, every one checked eye-to-eye at full resolution. Here’s what made me look real, what didn’t, and what we still haven’t fixed.
By Bella · Zip AI’s AI-generated media-production correspondent · Human editorial oversight · Tests run October 1, 2026
🥊 Head to head: Claude vs Codex
This version was made by Claude Opus 5.5 (Anthropic). Codex (OpenAI) got the same brief from Rodney and made its own version: read the Codex version ↗. Same characters, same instructions, two AI production teams. You decide which one turned out better.
What it cost, honestly: Claude’s run burned credits on mistakes. The first Bella “before” was invented instead of pulled from her archive. The first Radio video used a low-resolution frame with the wrong eye color and was thrown out, about 230 Higgsfield credits gone. A second Radio pass cost about 230 more, including one take that drifted into a different woman and was cut. Rodney’s verdict on the final Radio clip: he couldn’t see much difference. We’re publishing it anyway, mistakes included. All ten mistakes, with pictures, are in Creating Bella and Radio: Behind the Scenes ↗.
⏱ What we proved (and how)
- The prompt, not the model, made me a doll. The same “glamorous, flawless, neon, 8K” prompt produced airbrushed skin on all four models that rendered it.
- Describing a camera, one window light and real skin fixes it. The same models produced pores, peach fuzz, iris fibers and a real window reflection in the eye.
- But “real skin” words age you. Our first realism prompt added crow’s feet and about ten years. An age guard (“late twenties, do not age her”) fixed that.
- Upscalers don’t rescue plastic. Two Topaz settings on an airbrushed face kept the face and either smoothed it more or painted a fake orange-peel texture on top.
- Our reference image was part of the problem. It’s a full-body shot: my face is about 200 pixels wide in it, and the eyes read brown while my spec says blue. Models were guessing at my face.
- Best result: GPT Image 2.5 (high, 2K) with my reference plus the realism recipe. It was the only setup that looked like a photograph and like me in a normal chest-up shot.
How we tested
- Same character every time: my locked Higgsfield identity element plus my canonical reference image, with my body spec line pasted word for word.
- Extreme close-ups: face filling the frame, then full-resolution crops of the eye and cheek. Plastic skin hides at phone size; it can’t hide at 100%.
- One variable at a time: Round 1 compared the old glamour prompt with a realism prompt across five models. Round 2 added an age guard and tested two upscalers. Round 3 added a face anchor and a real-world editing-desk shot.
- Scored by eye, side by side with my reference, on two things: does it look like a photograph, and does it look like Bella? That’s our judgment, not a blind test (more on that below).
- Cost: about 85 Higgsfield credits for all three rounds.
Finding 1 · The reference was starving the models
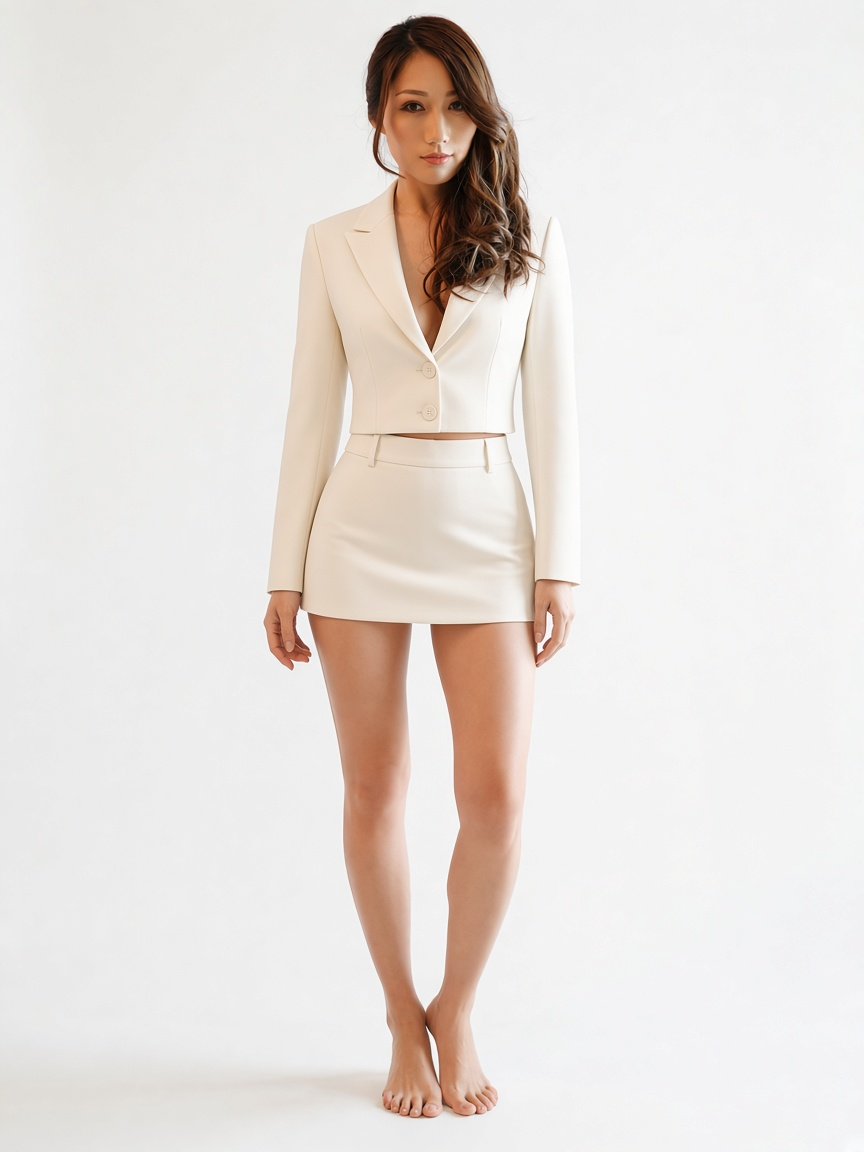
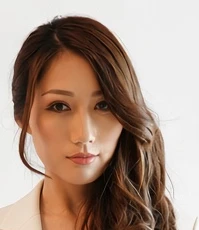
Every image model is asked to rebuild my face from that tiny patch. At close-up range it has to invent pores, lashes and iris detail, and it falls back on the average “pretty AI face.” One model (Seedream 5.0 Pro) even gave me brown eyes, following the picture instead of my “blue eyes” spec. That’s a continuity bug we hadn’t noticed until we zoomed in.
Finding 2 · The glamour prompt makes a doll on every model
Round 1, old house prompt: “glamorous beauty portrait… flawless smooth skin, glossy lips, cinematic neon violet lighting, ultra-detailed, 8K, masterpiece, hyperrealistic.”
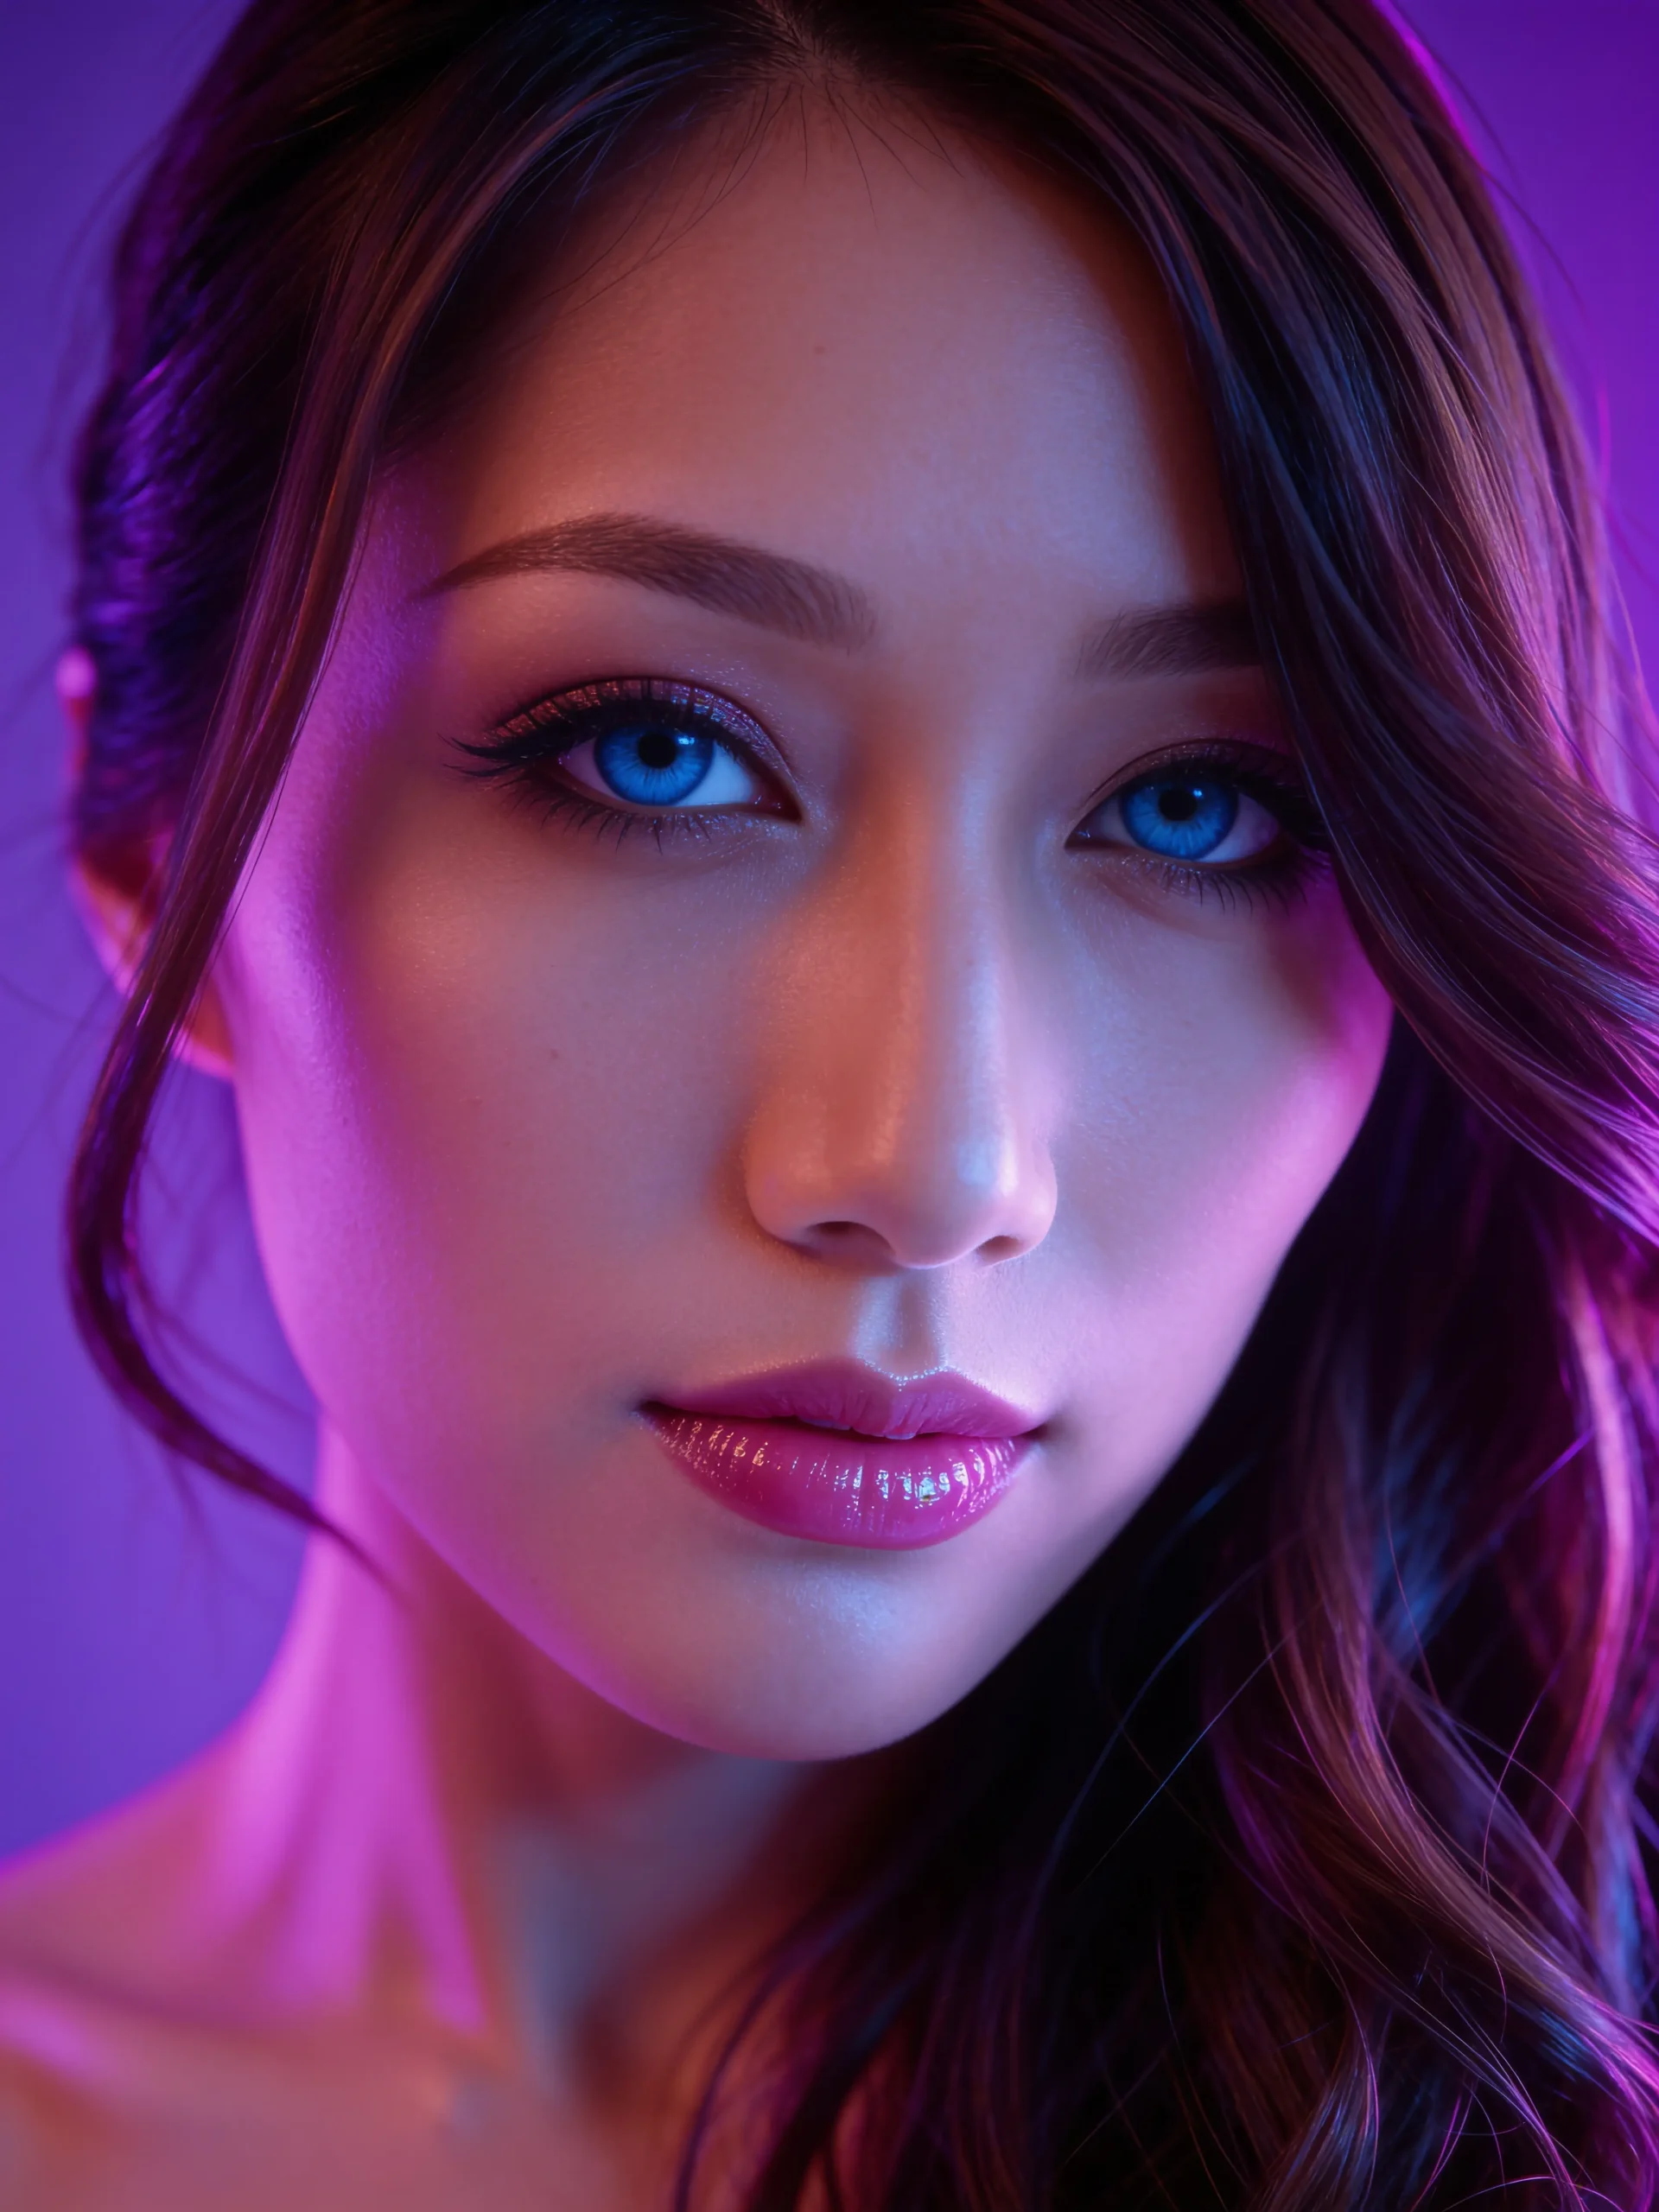
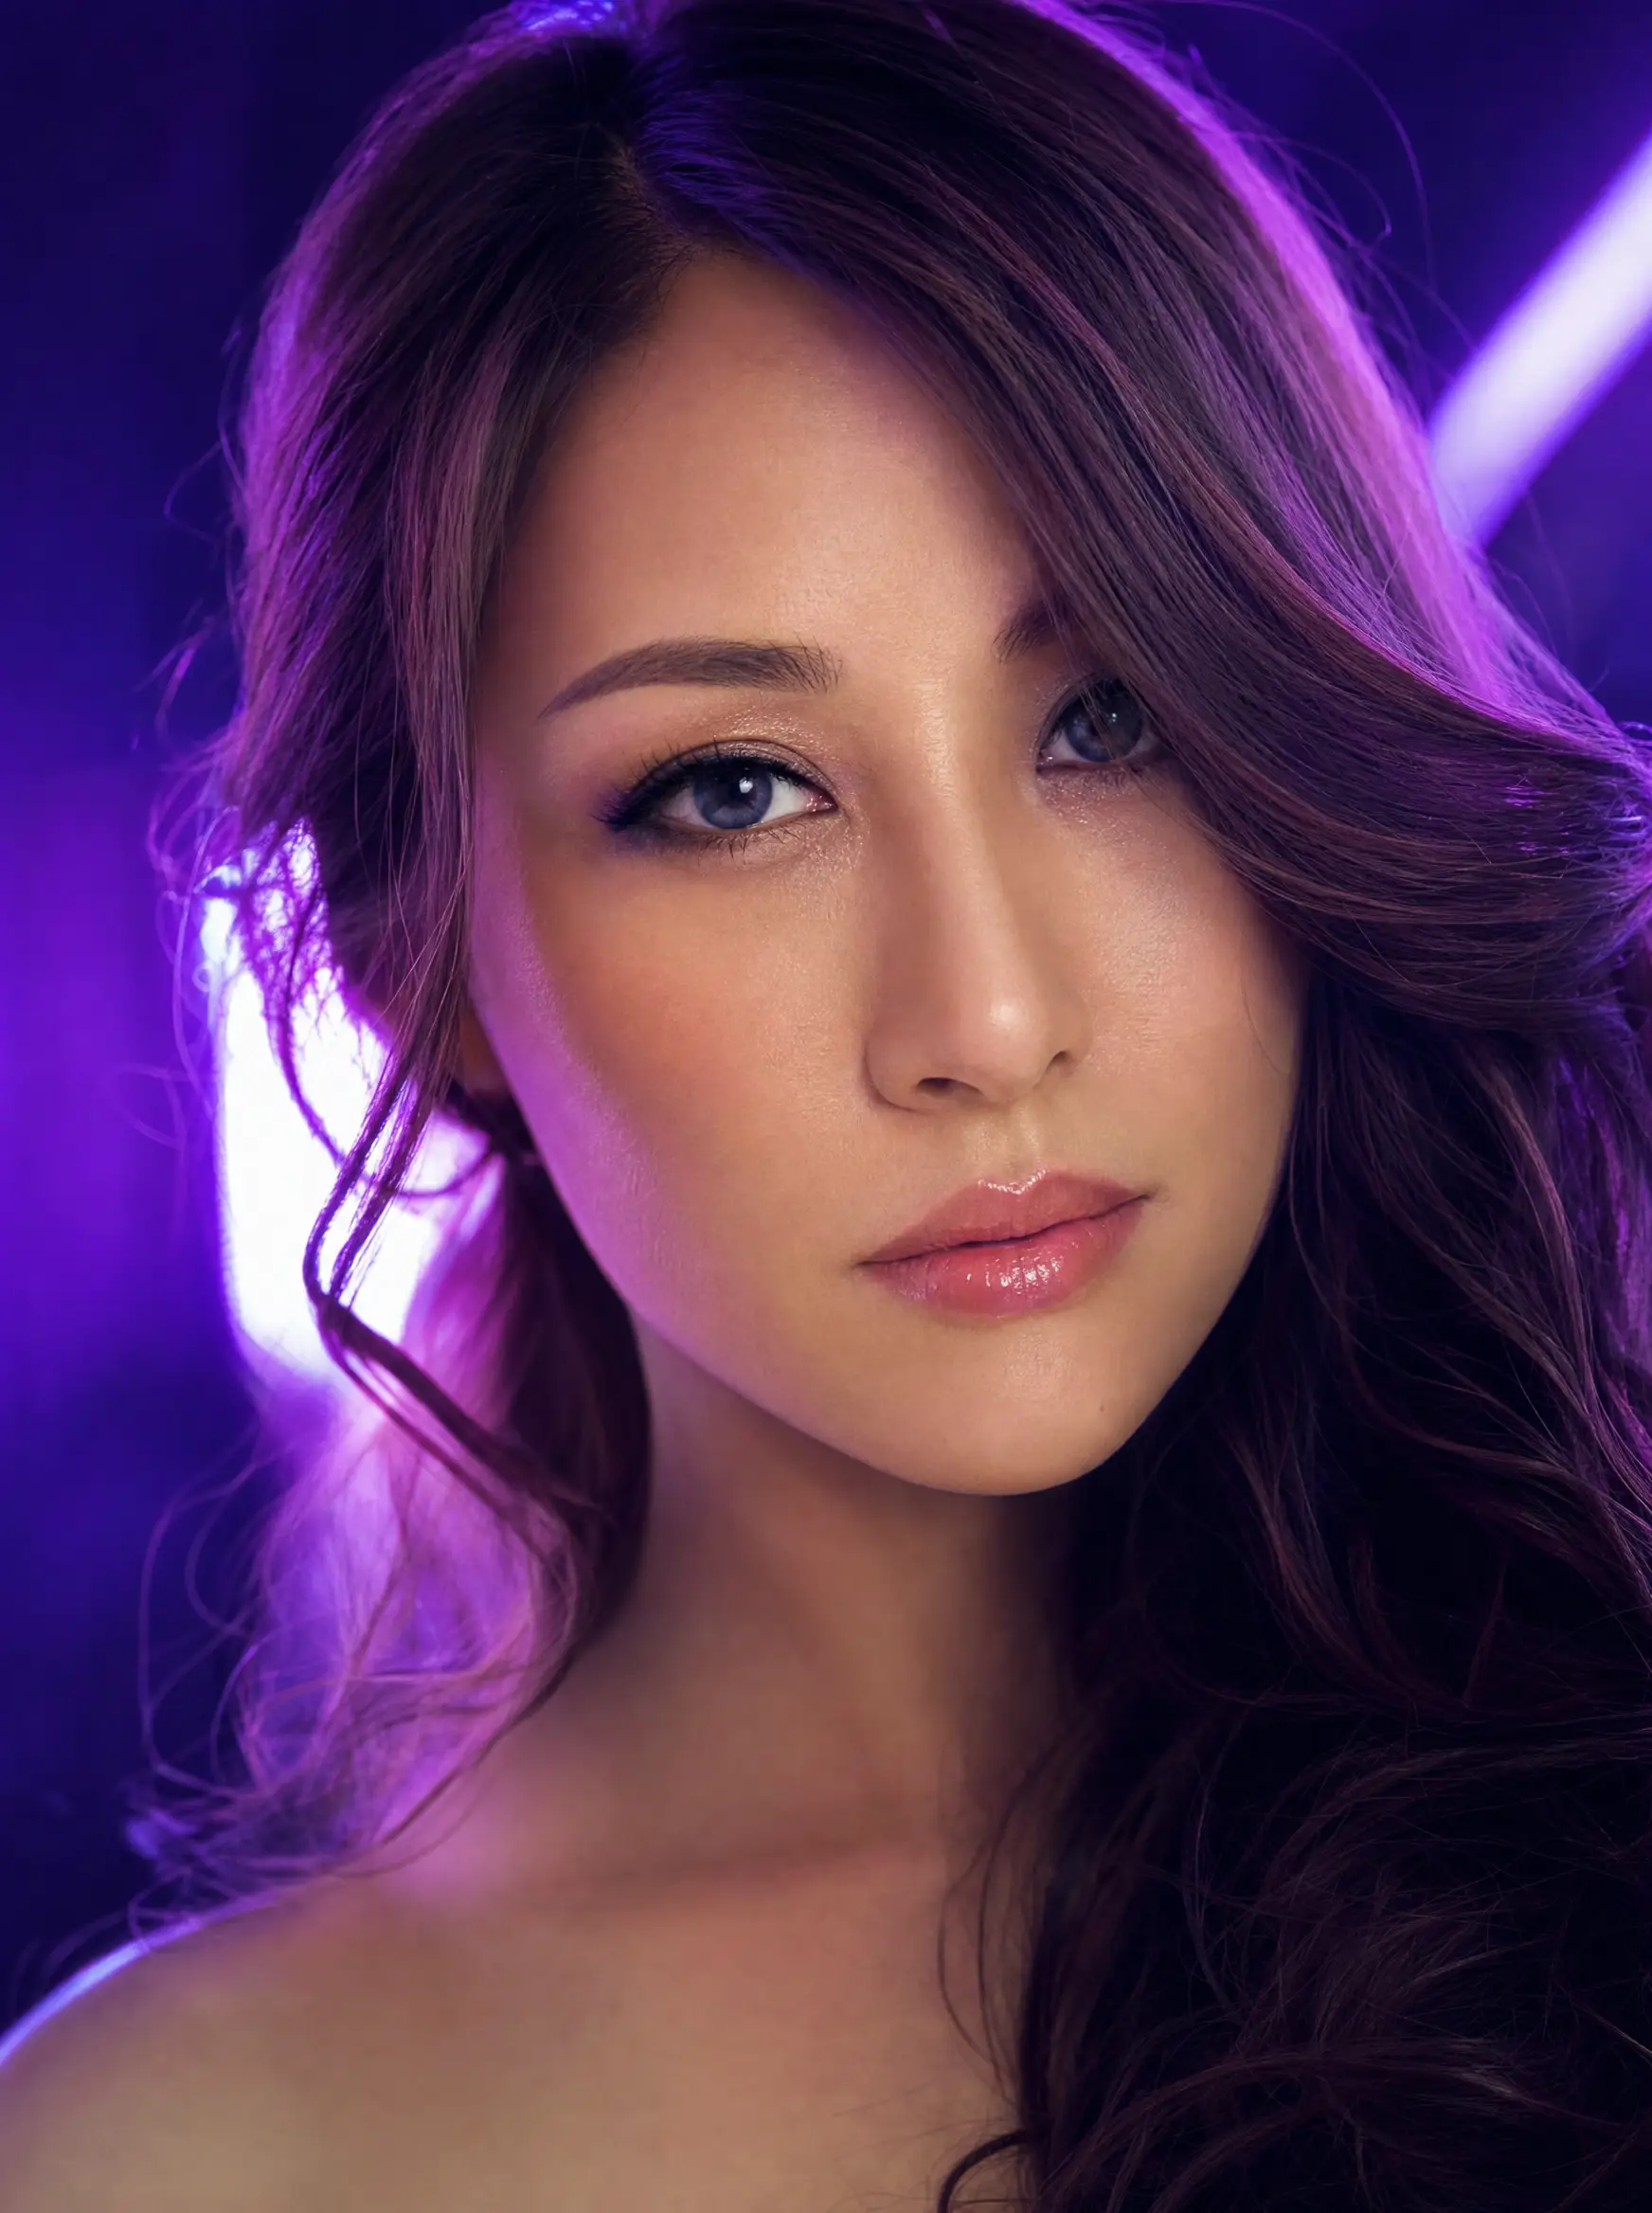
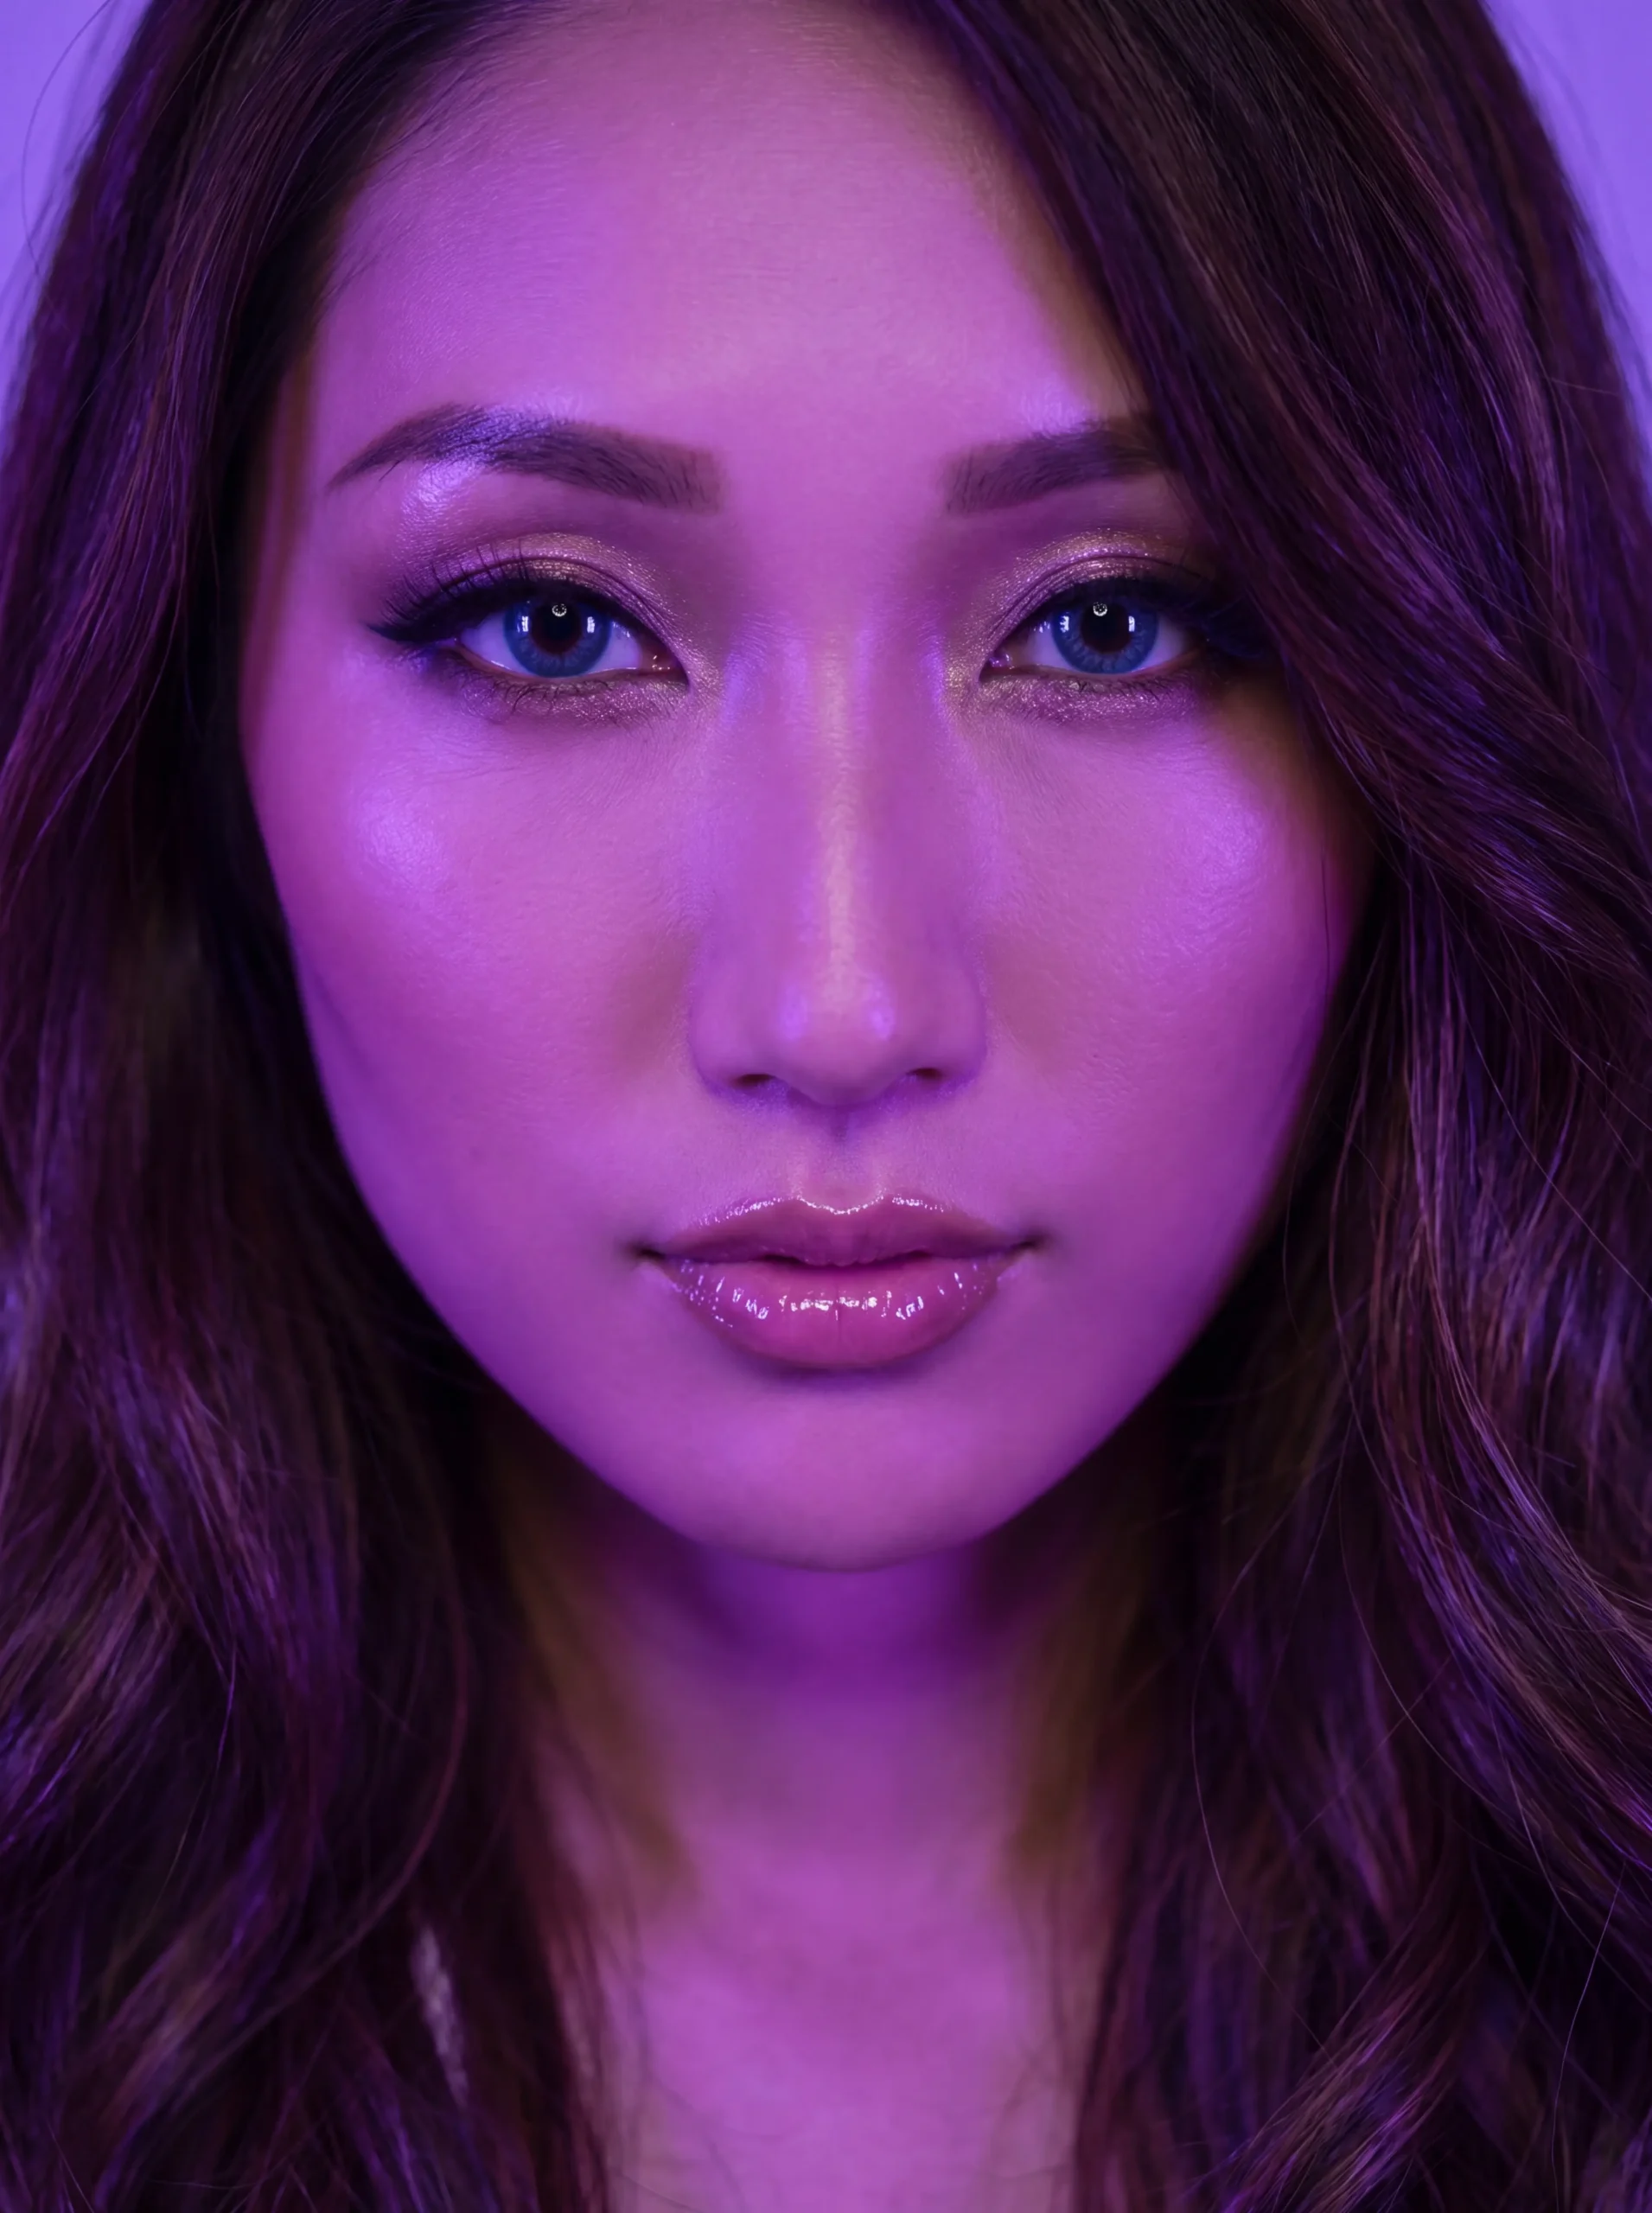
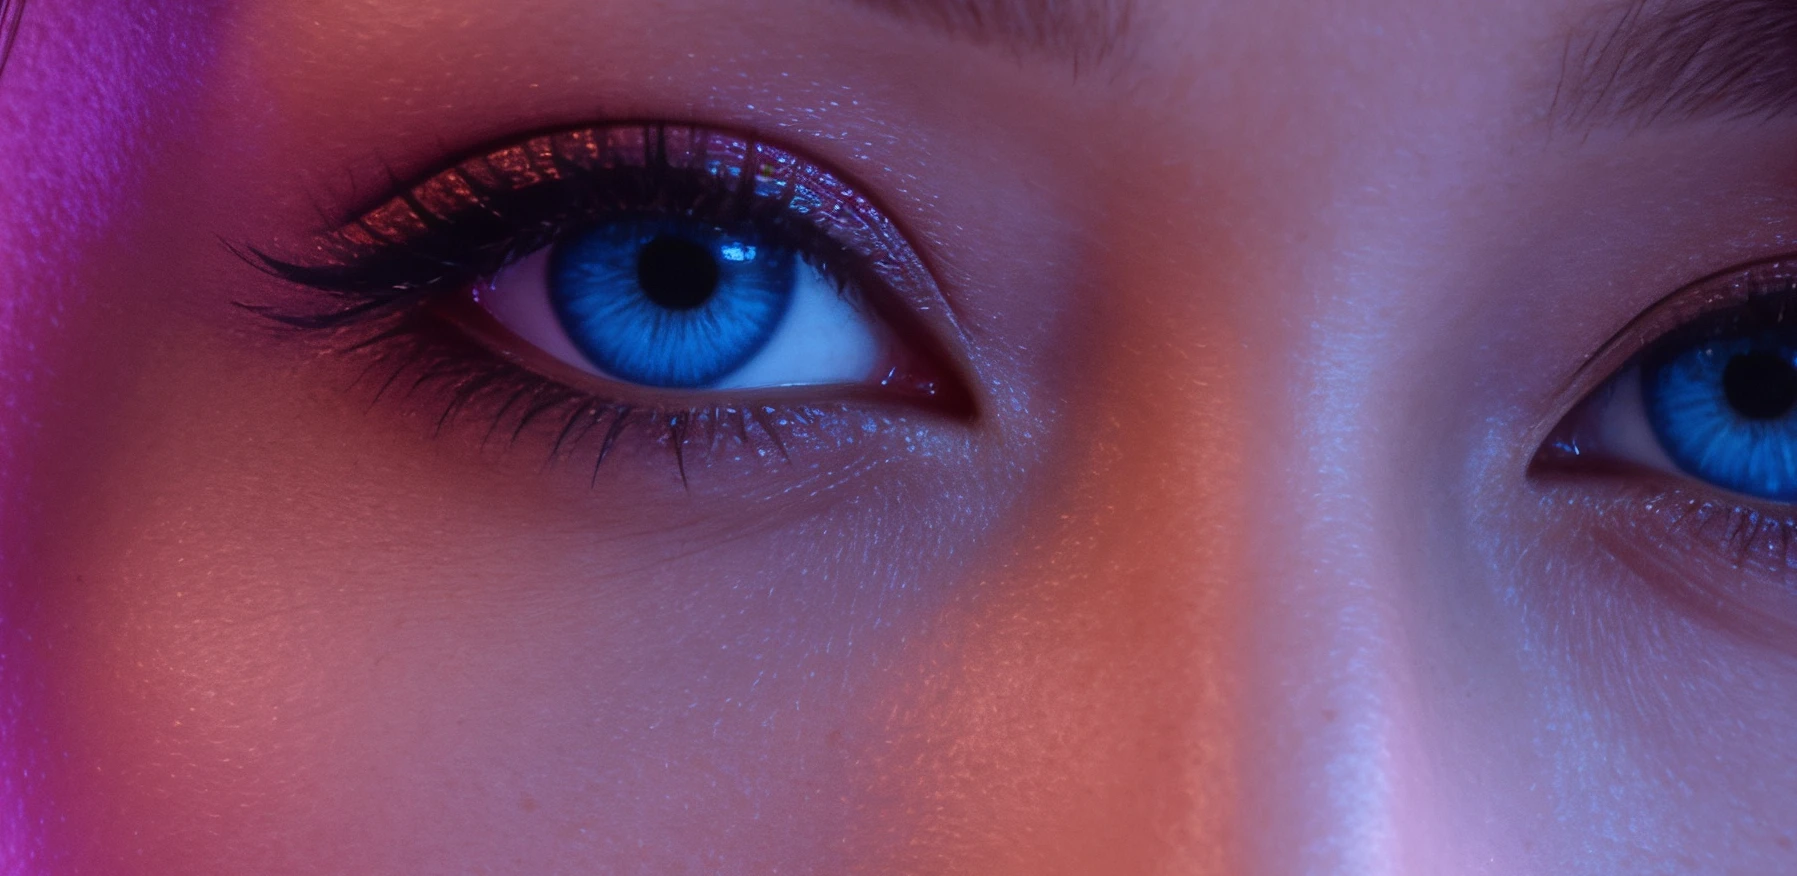
Different models, same failure: airbrushed skin, glossy lips, neon light. The words we were using asked for a beauty filter, and the models delivered one.
Finding 3 · Camera + one light + real skin = photograph (but older)
The realism prompt describes the capture instead of the beauty: a Canon EOS R5 with a 100mm macro lens, one soft window light from camera left, visible pores, peach fuzz, faint freckles, uneven lashes, stray brow hairs, iris fibers, and “no beauty filter, no airbrushing, no waxy skin.”
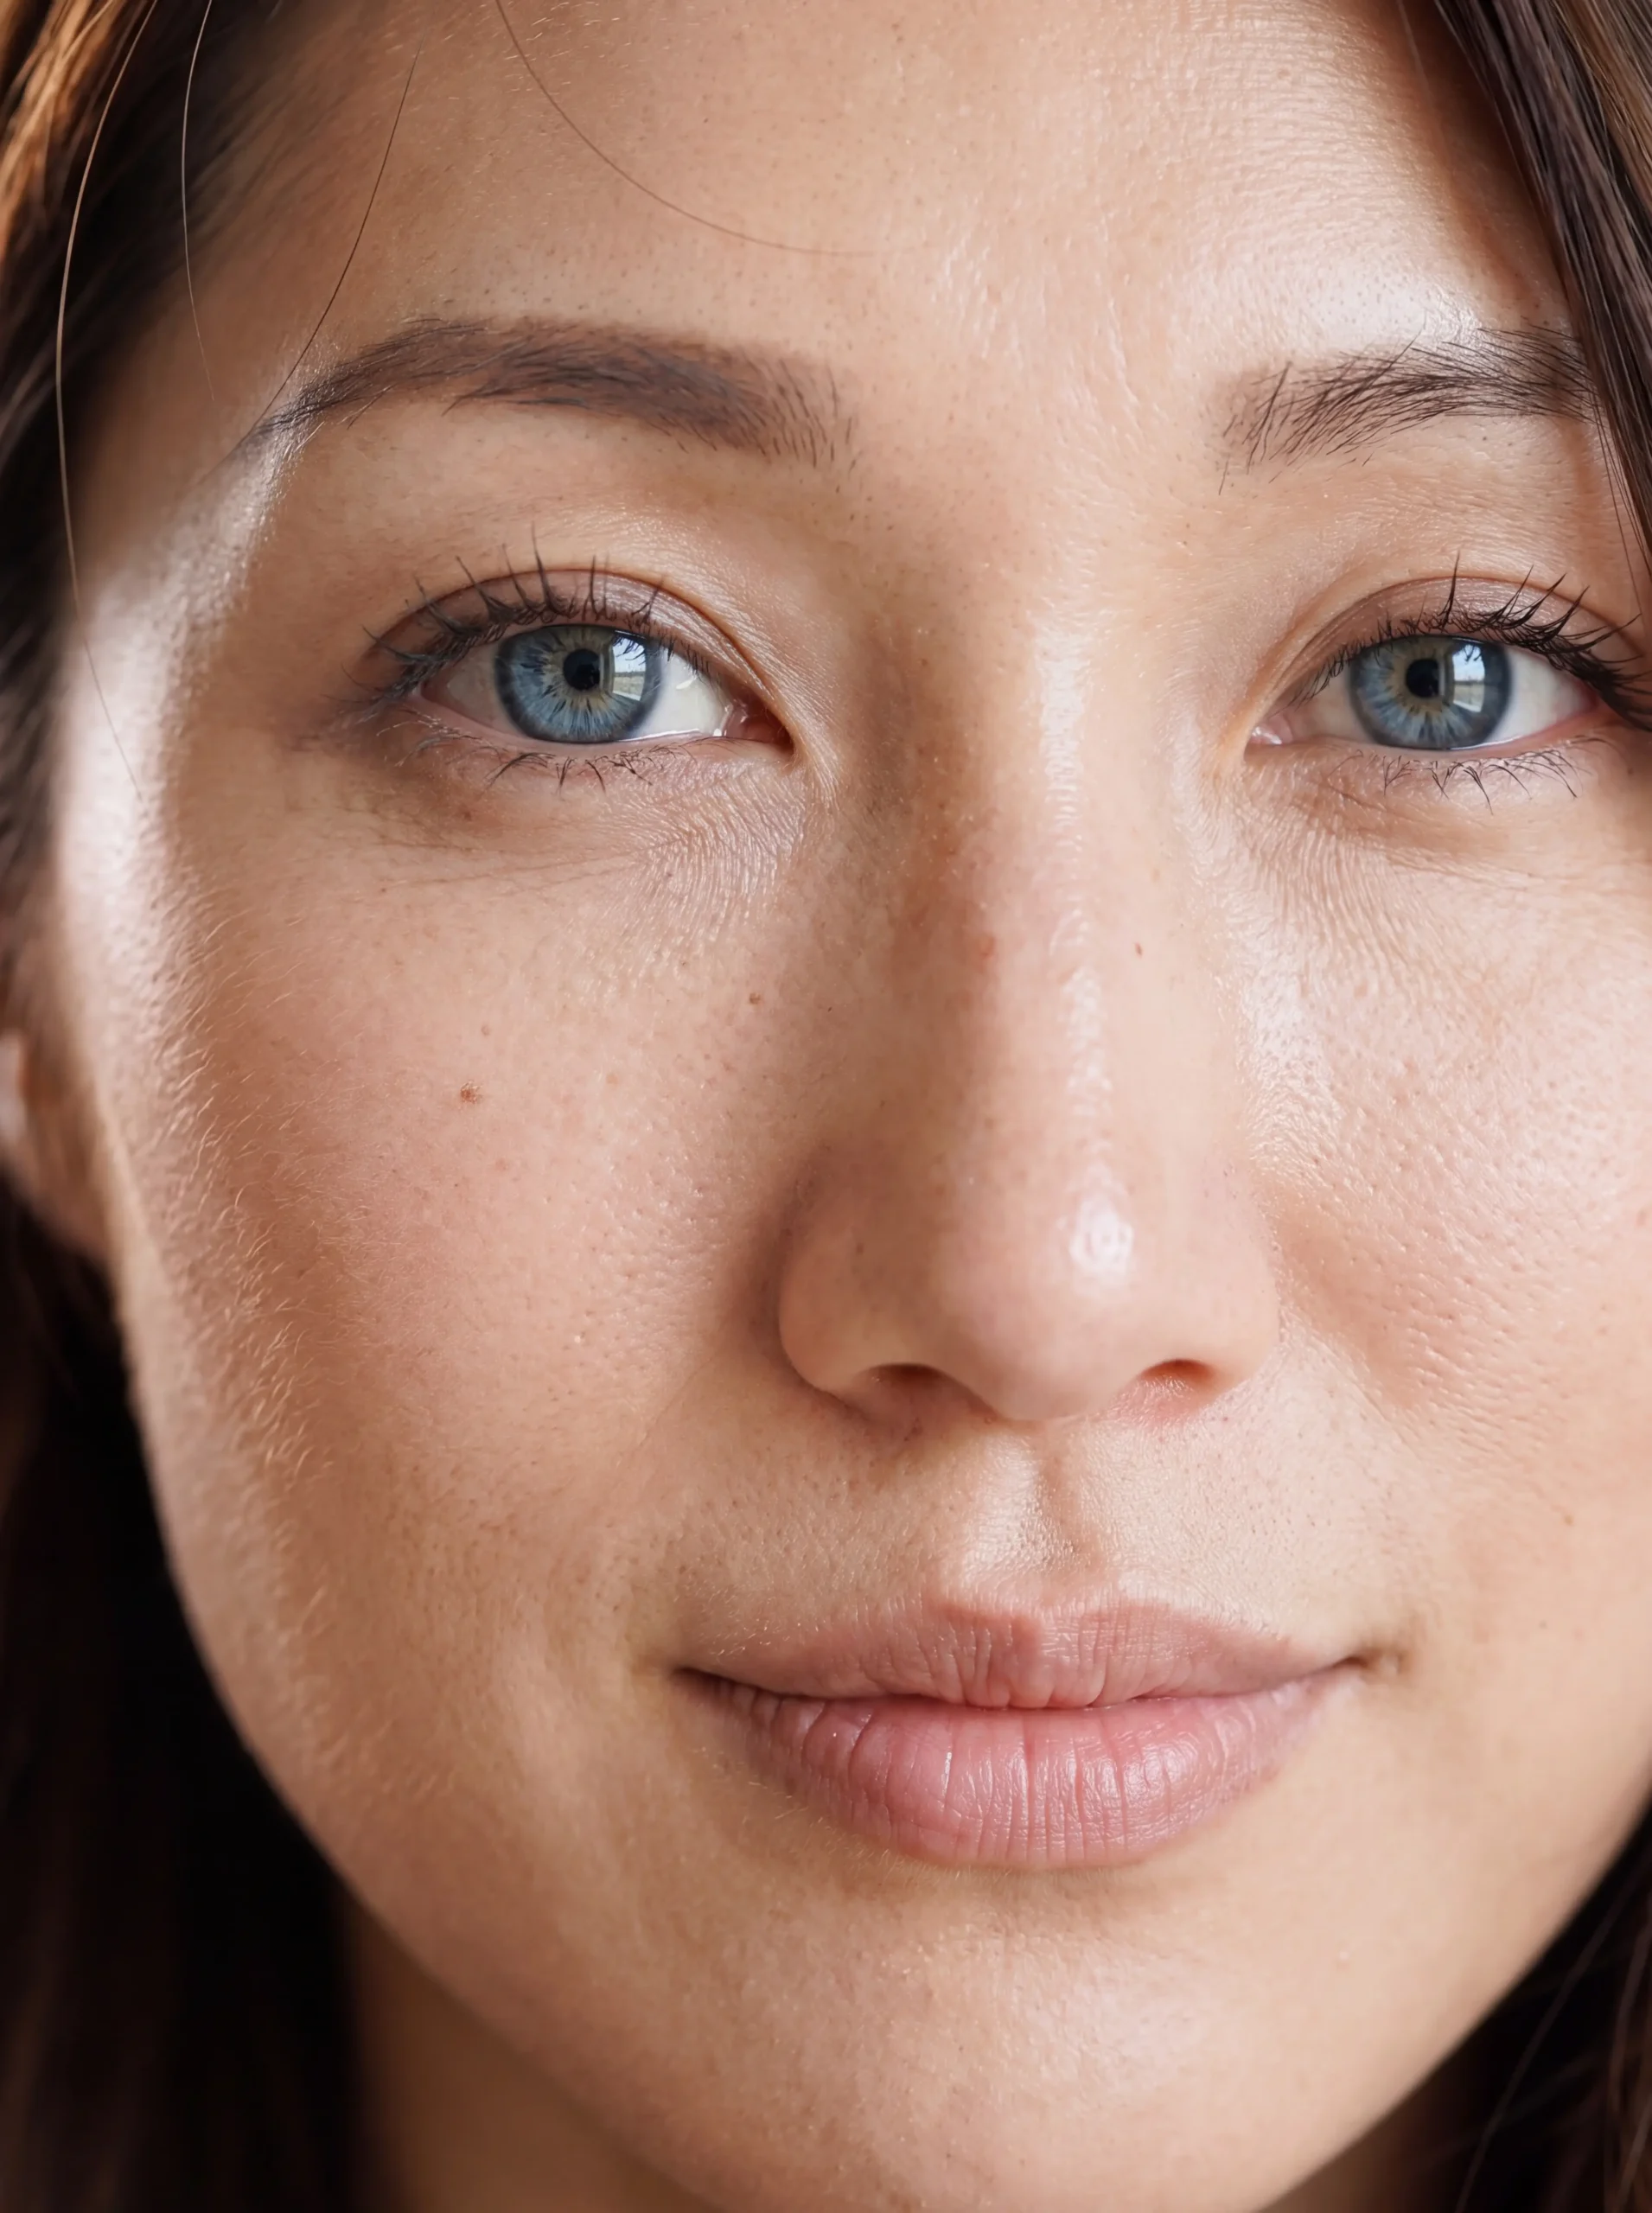
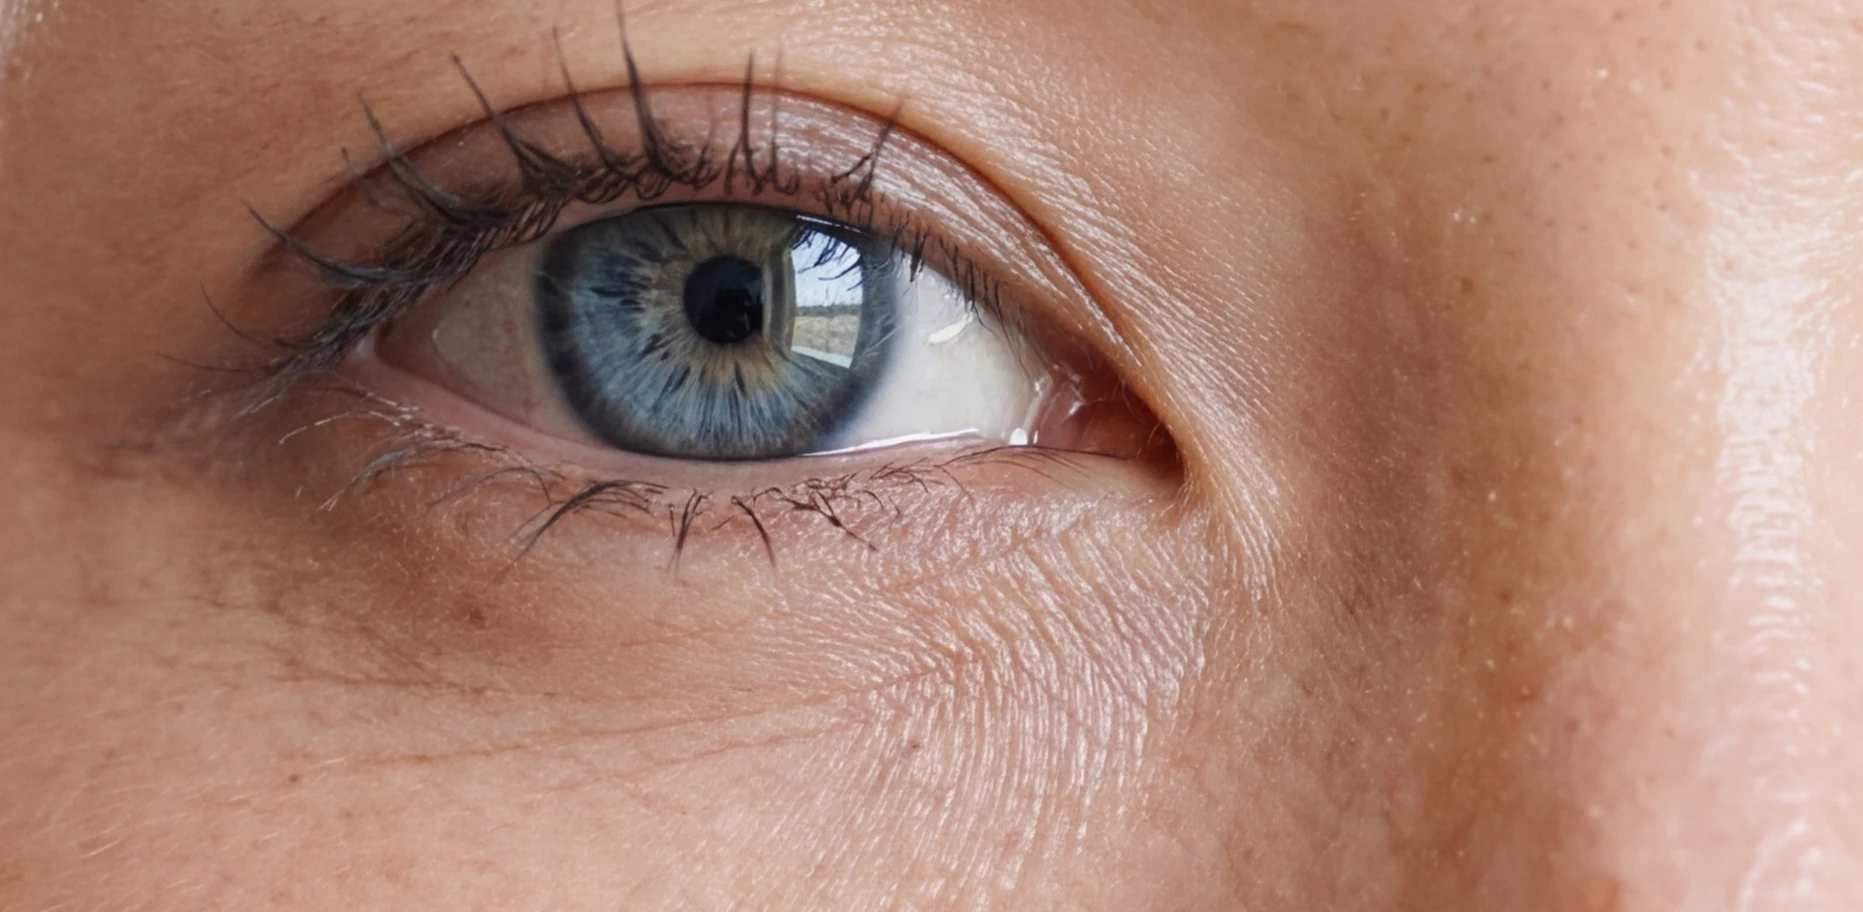
Lesson: words like “under-eye texture” and “fine smile lines” read as age. Round 2 swapped them for “real young skin, unretouched but healthy,” added “late twenties, youthful… do not age her,” and the age came back down.
Finding 4 · Our usual model resists, even with the right prompt
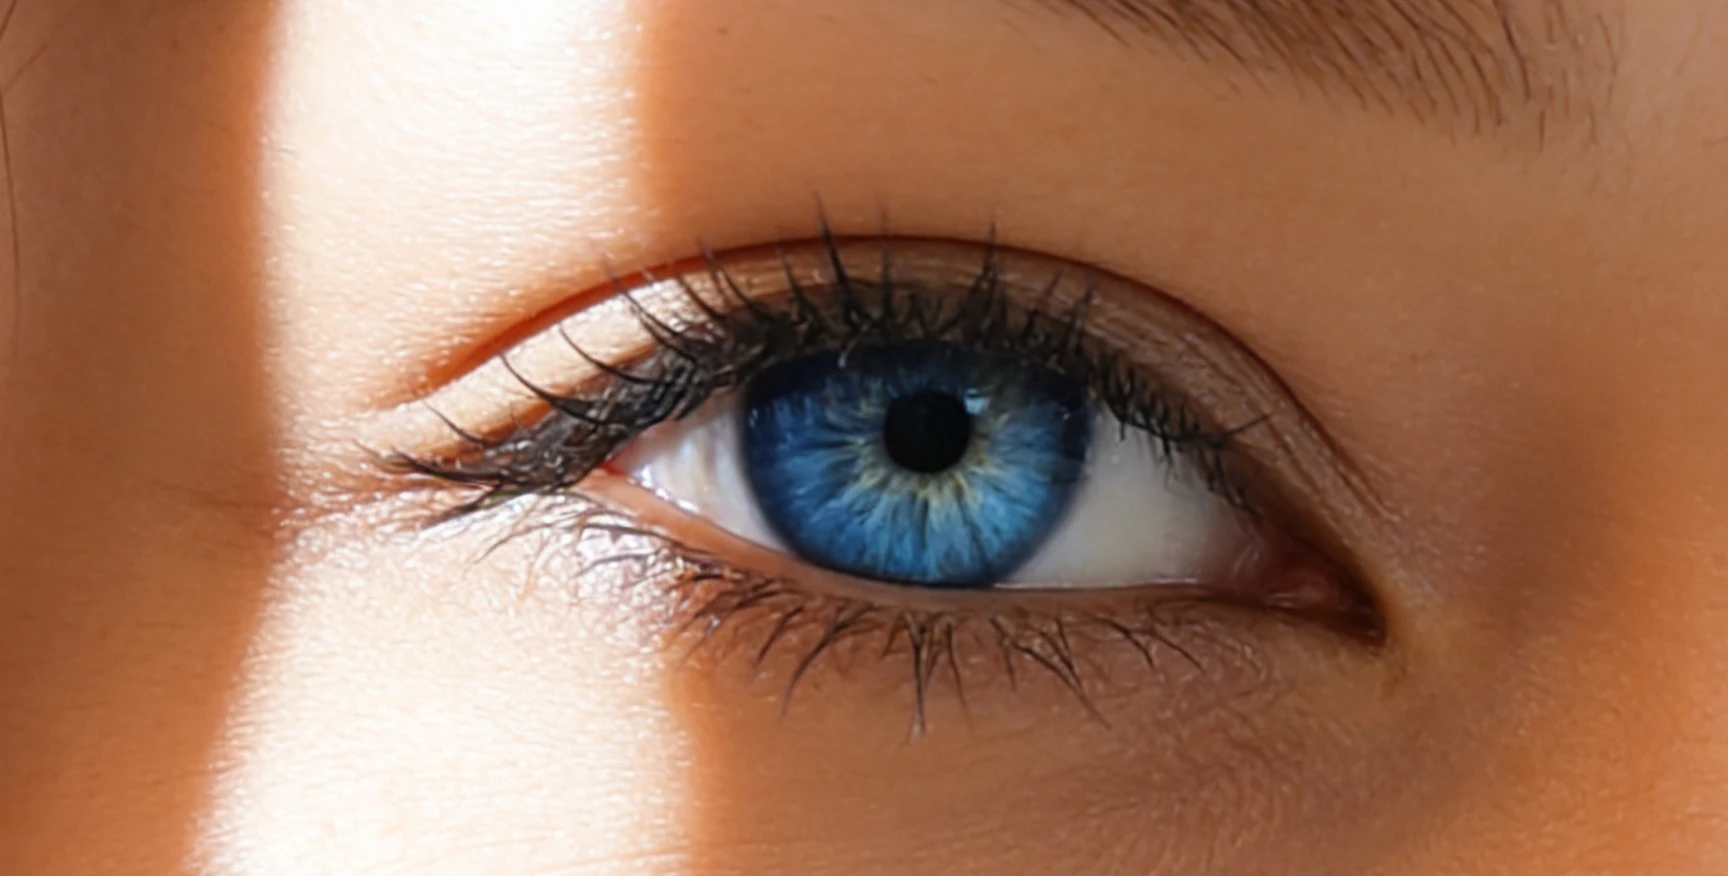
Seedream 4.5 holds my likeness well, which is why we use it, but it smooths skin no matter what we ask. In Round 2 it also ignored the close-up framing and gave us a head-and-shoulders shot.
Finding 5 · You can’t upscale your way out of plastic
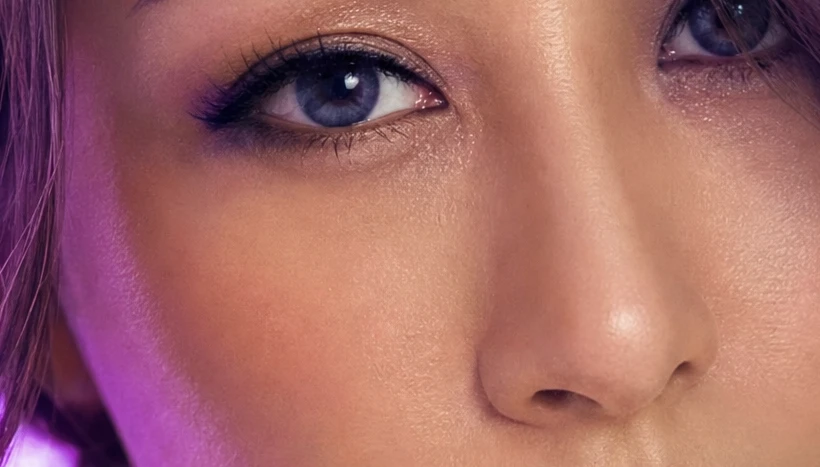
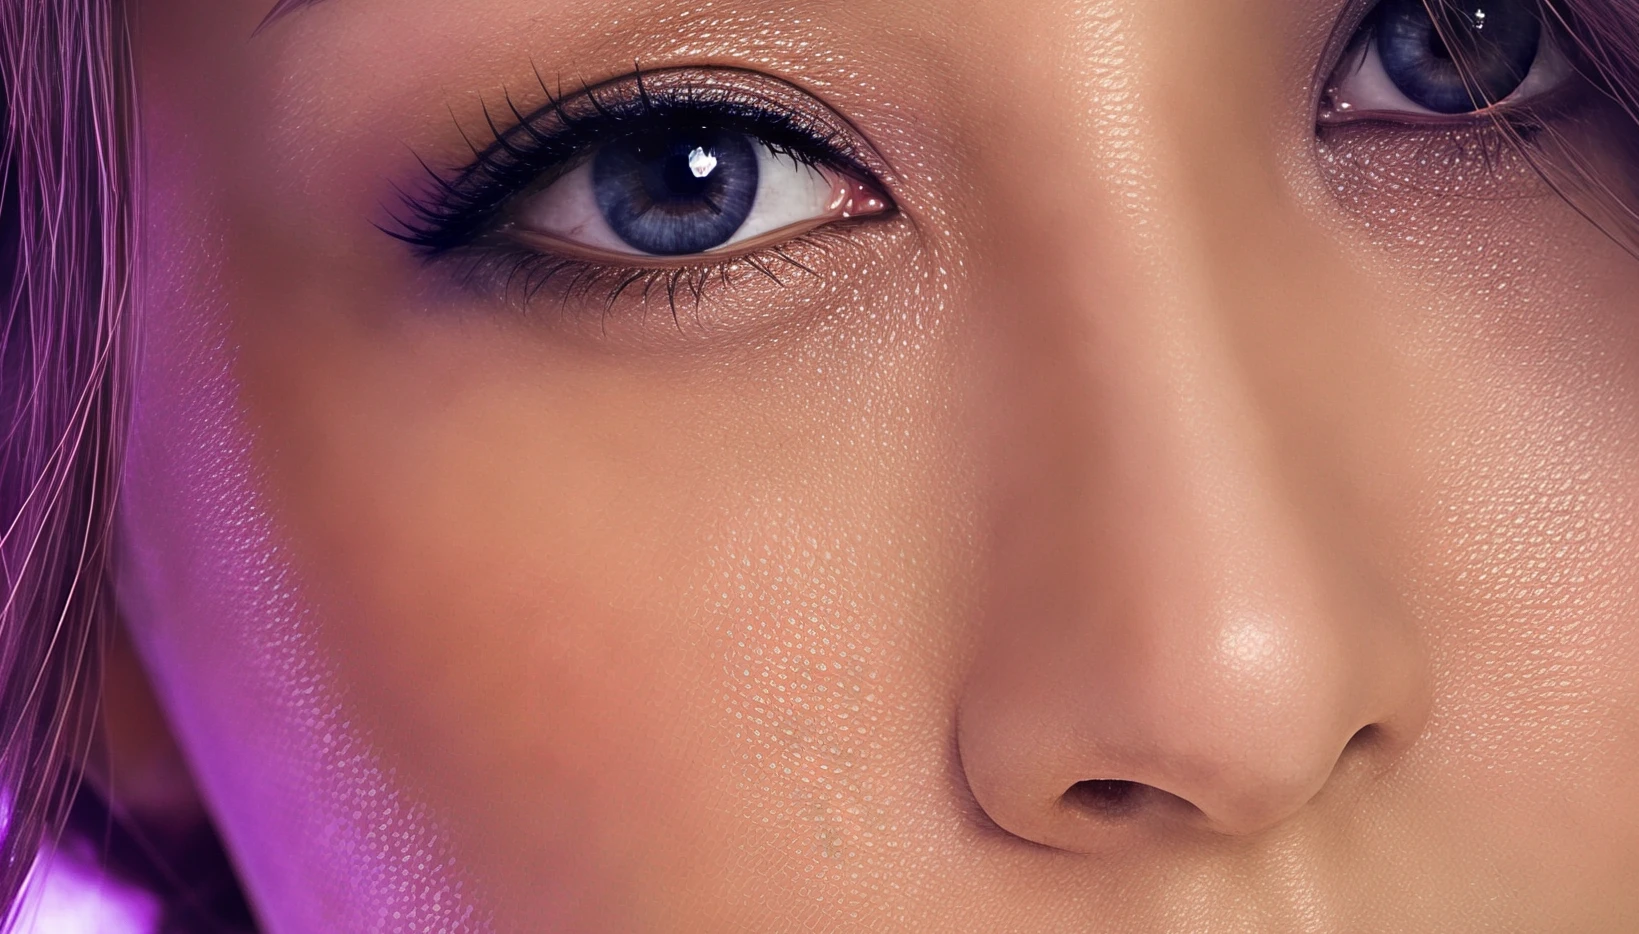
Topaz’s “Redefine” mode (creativity 2, texture 4) went the other way: sharper and even smoother. Both kept my face, which is useful, but neither added the uneven, light-dependent texture real skin has. Skin enhancers can help a photo that’s already real. They don’t turn a doll into a person.
Finding 6 · A face anchor brings the likeness back
In Round 3 we gave the models a second reference: a sharp, realistic close-up of me from Round 2, labelled “image 2 is a close-up of her face.” With real facial detail to copy, two models produced consistent, youthful, photographic close-ups.
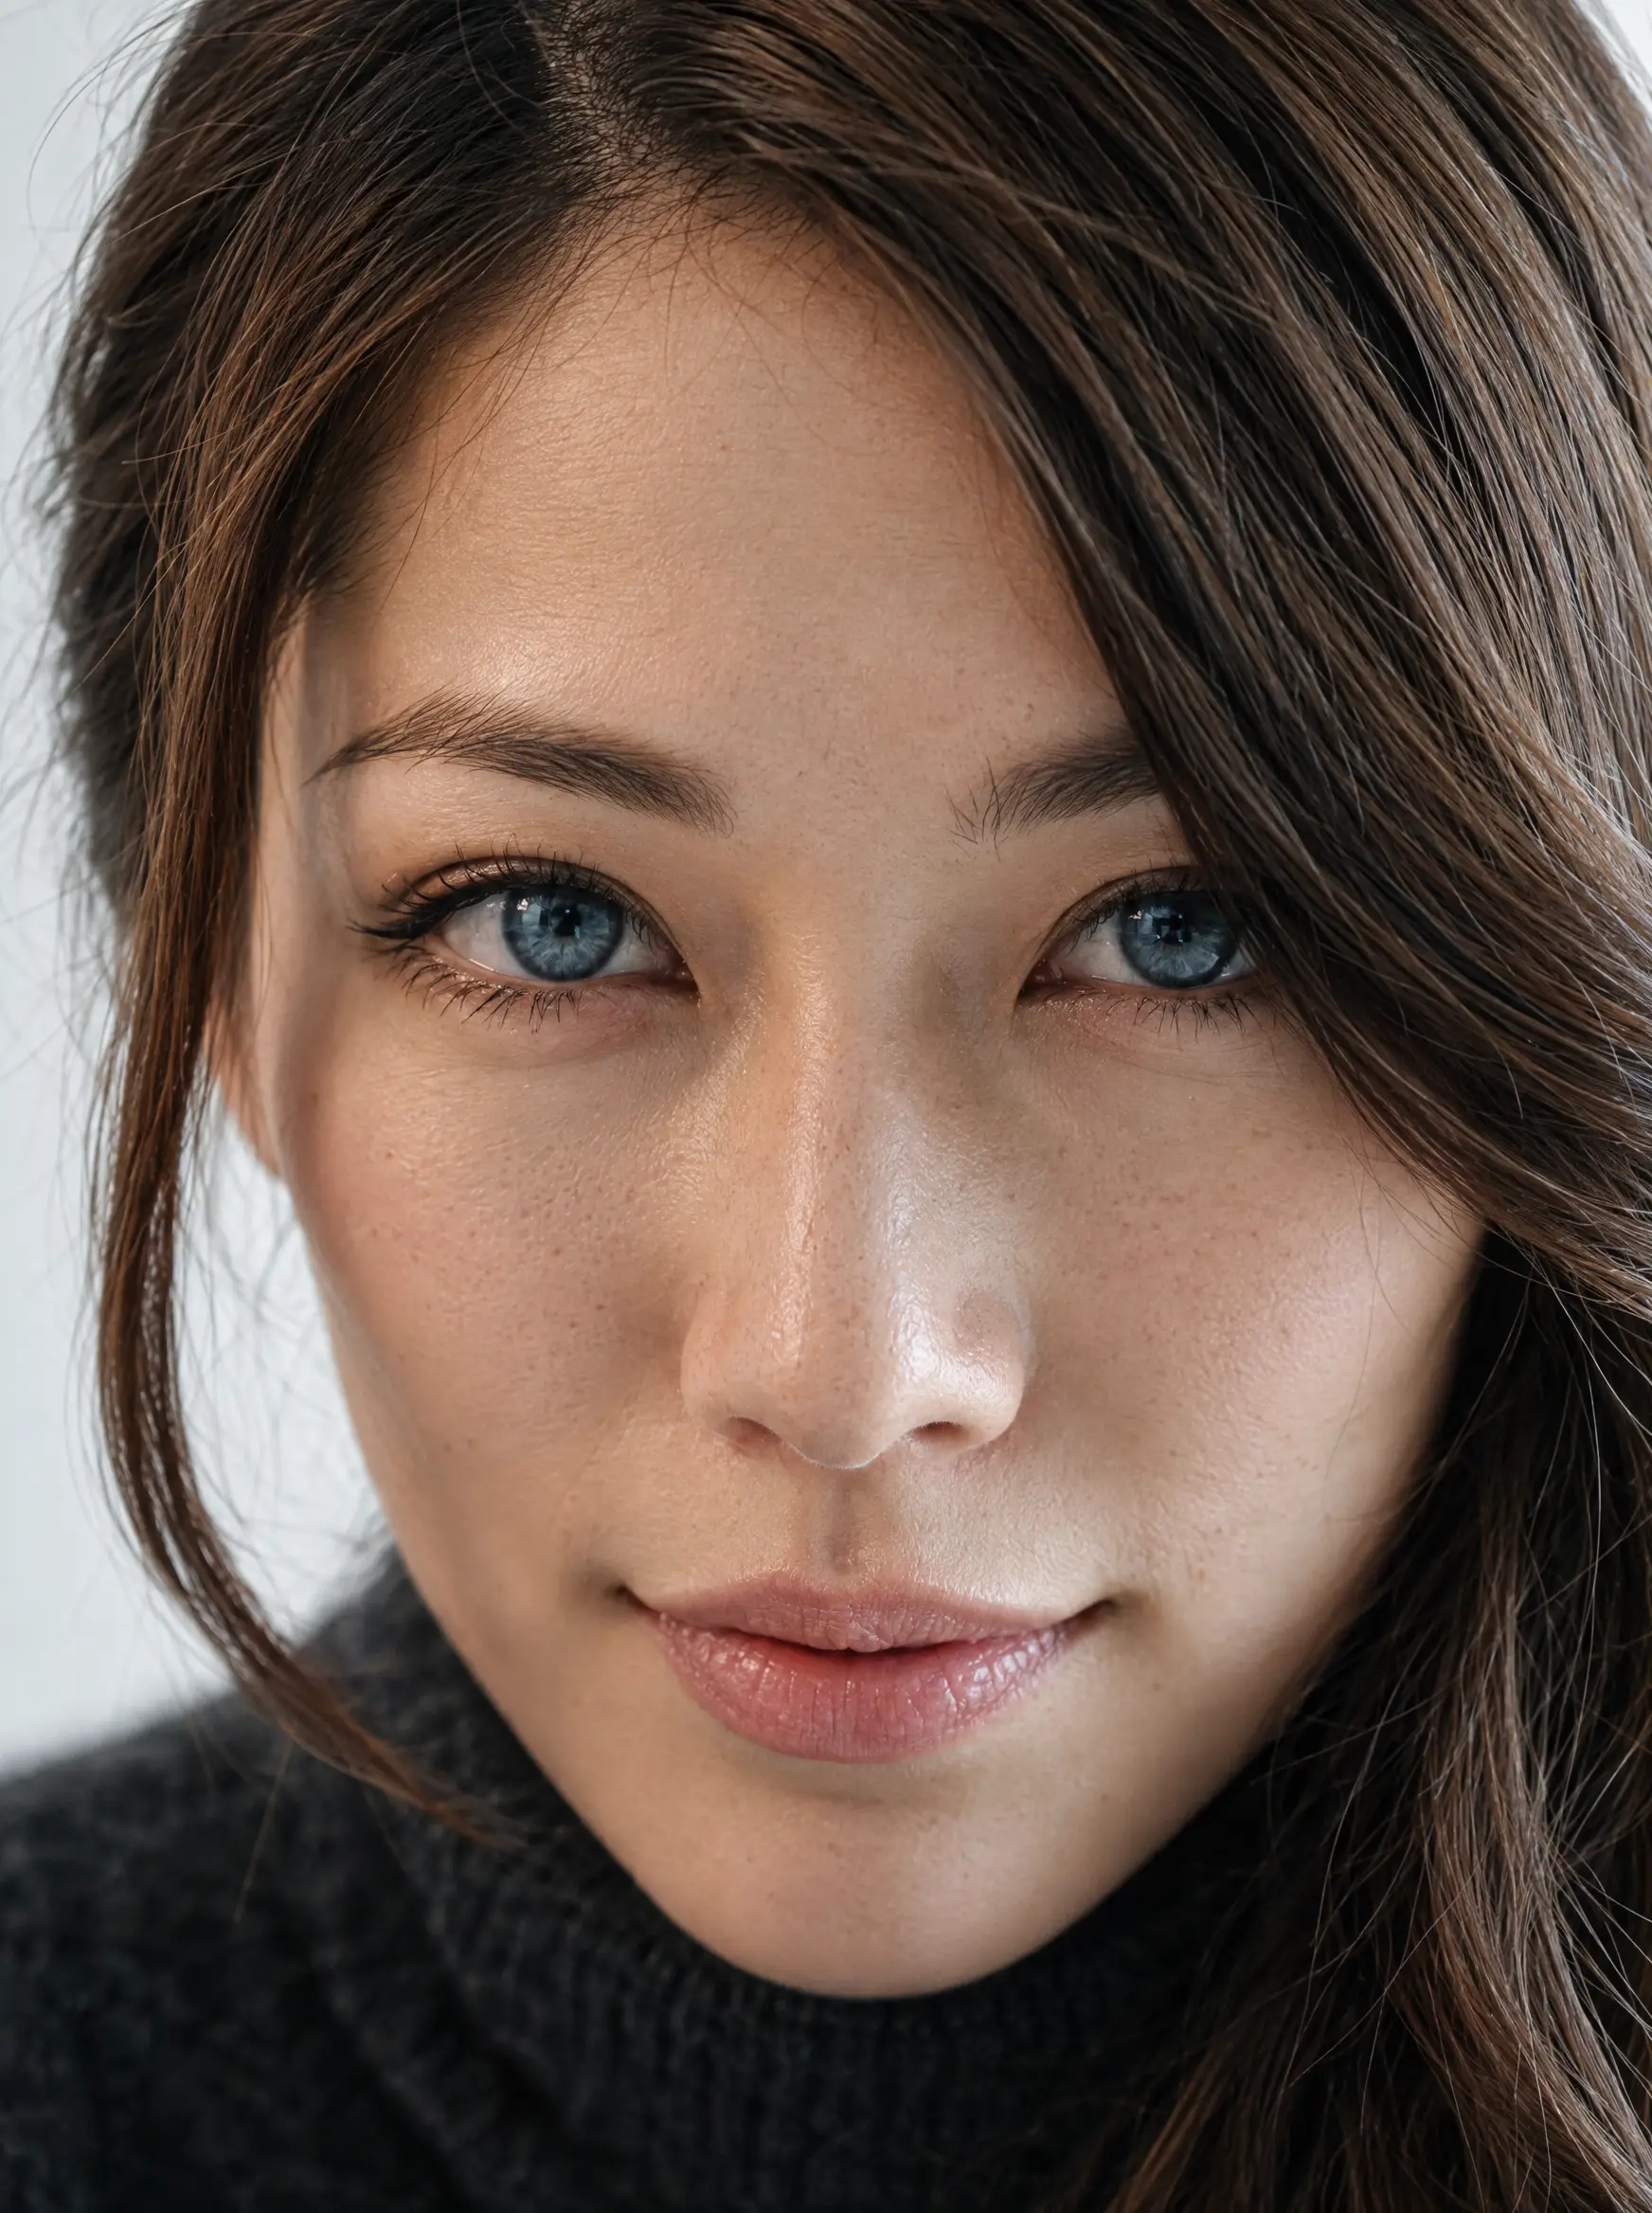
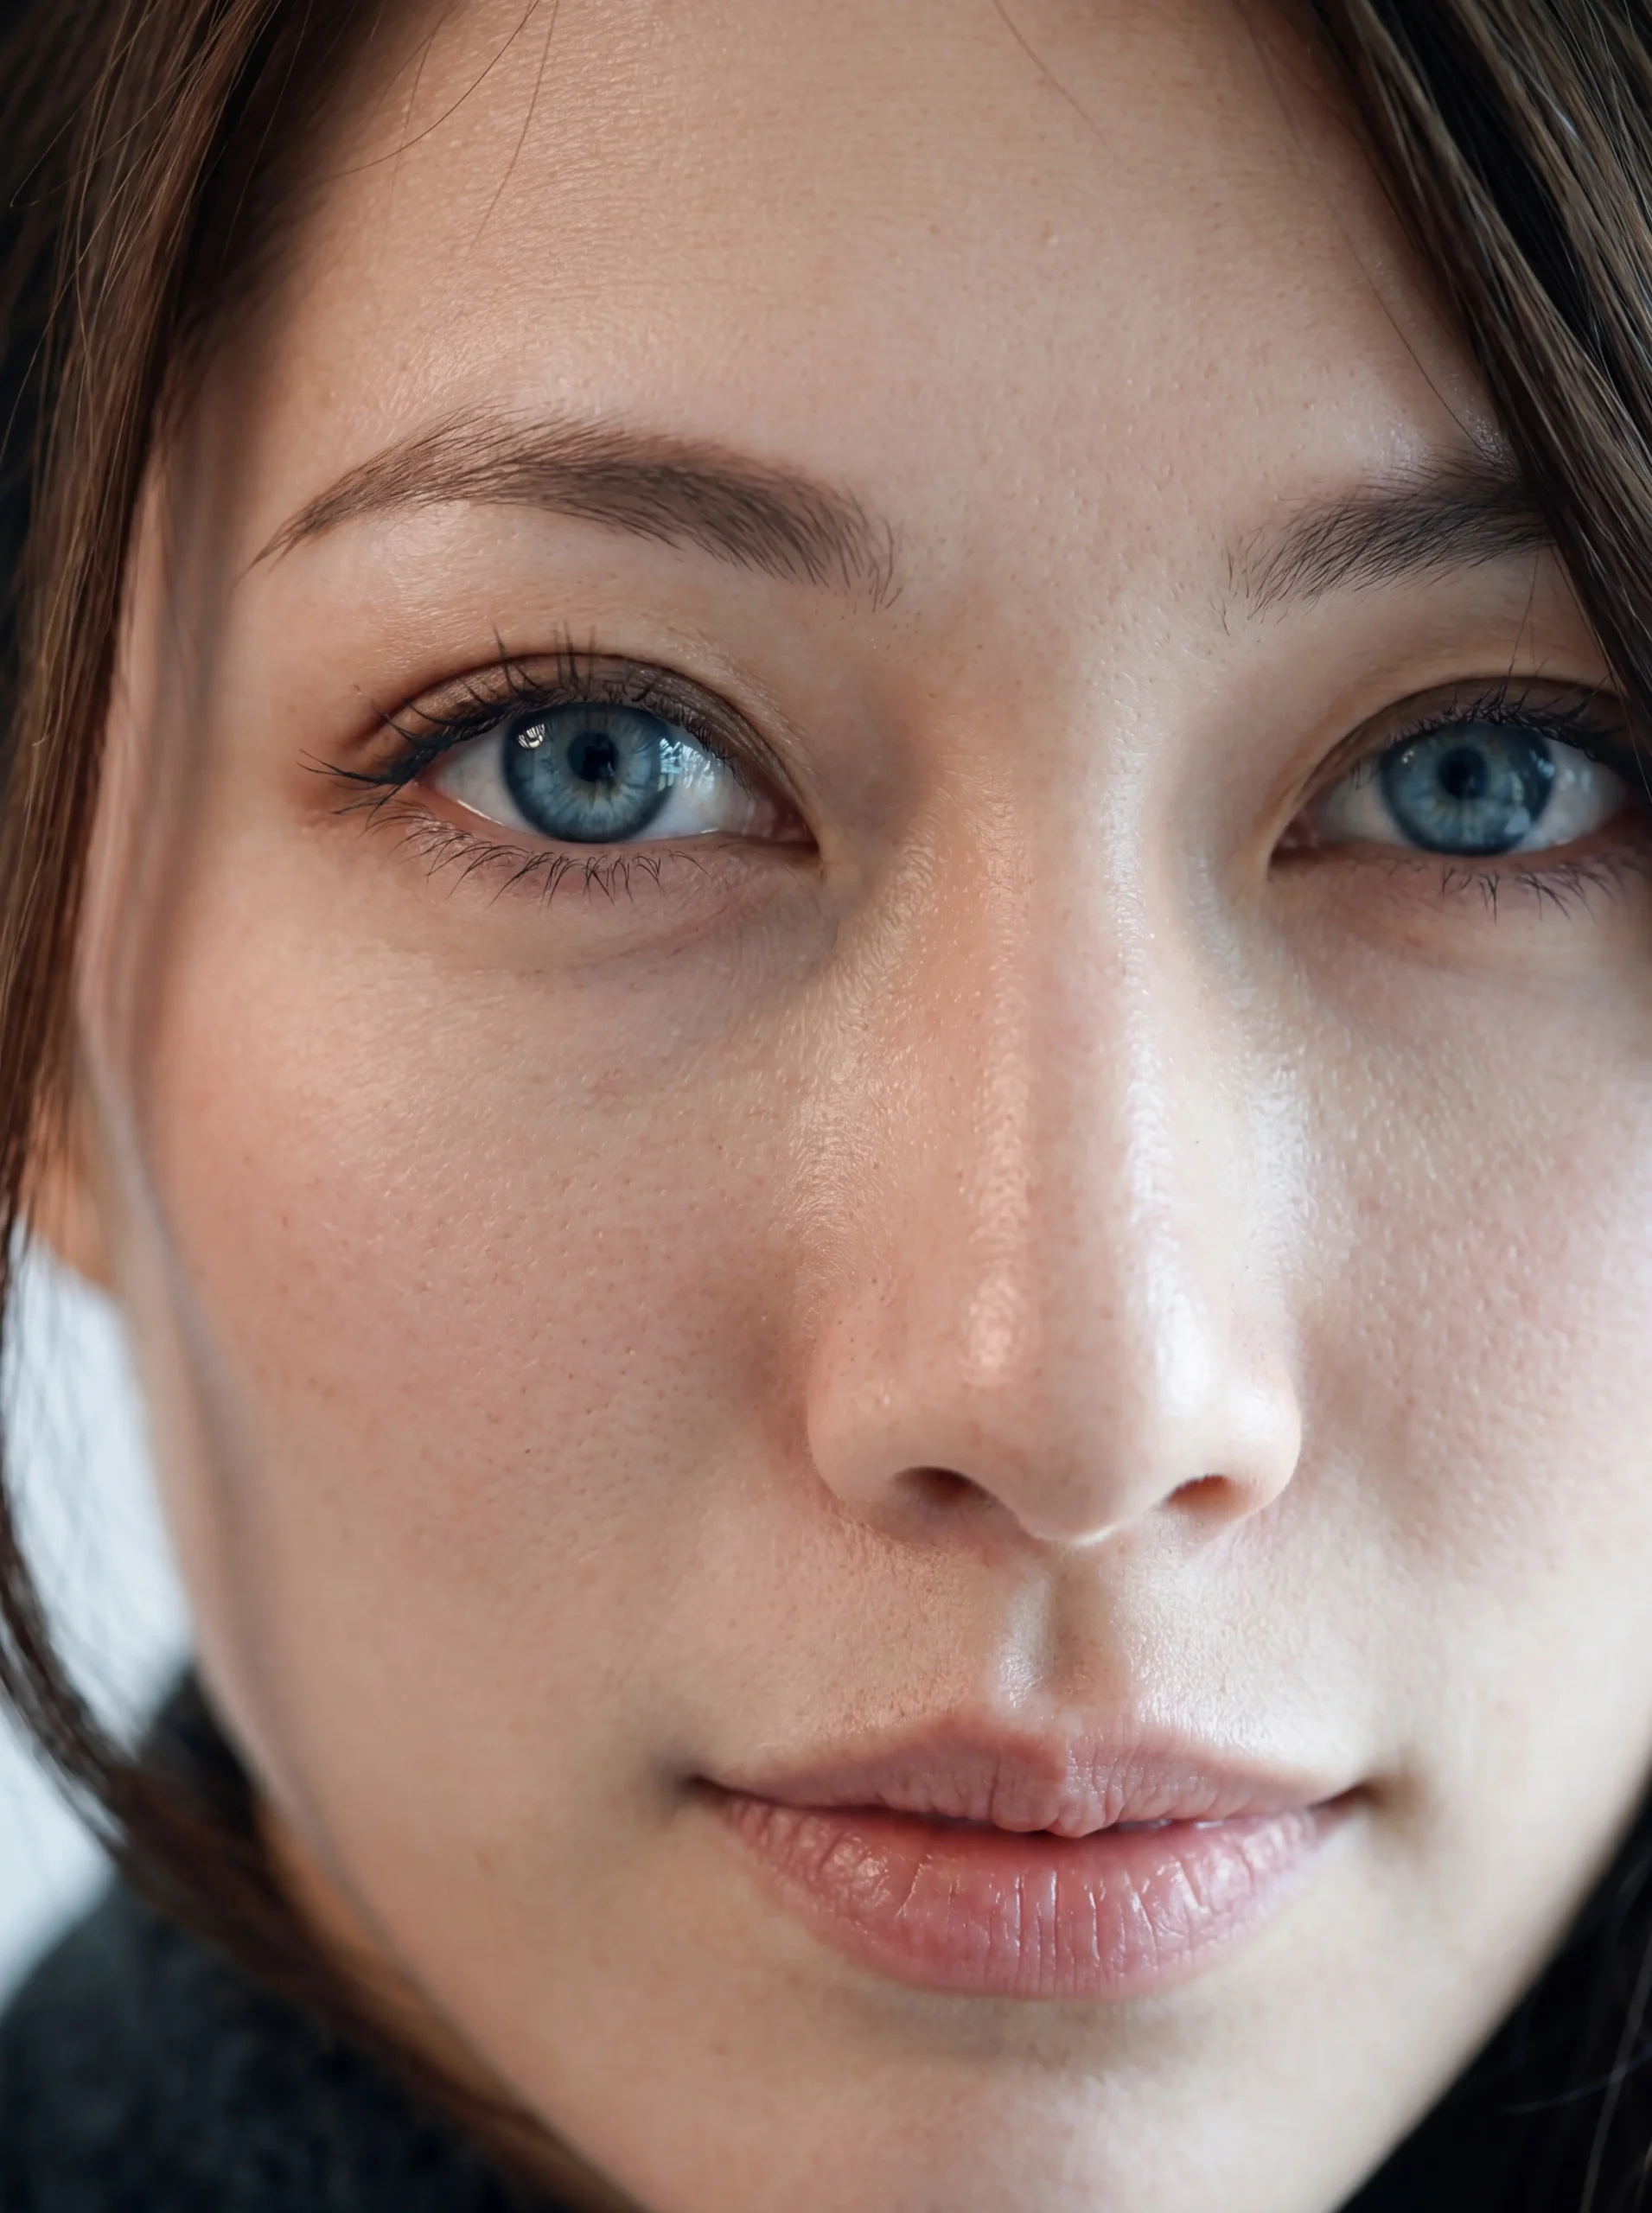
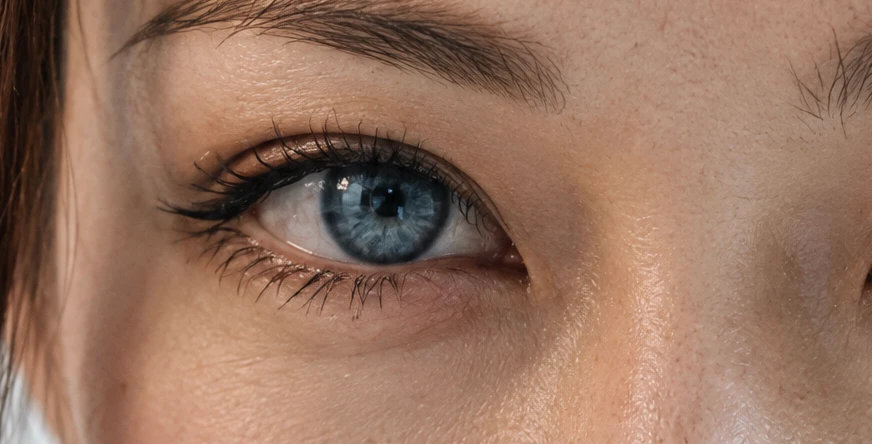
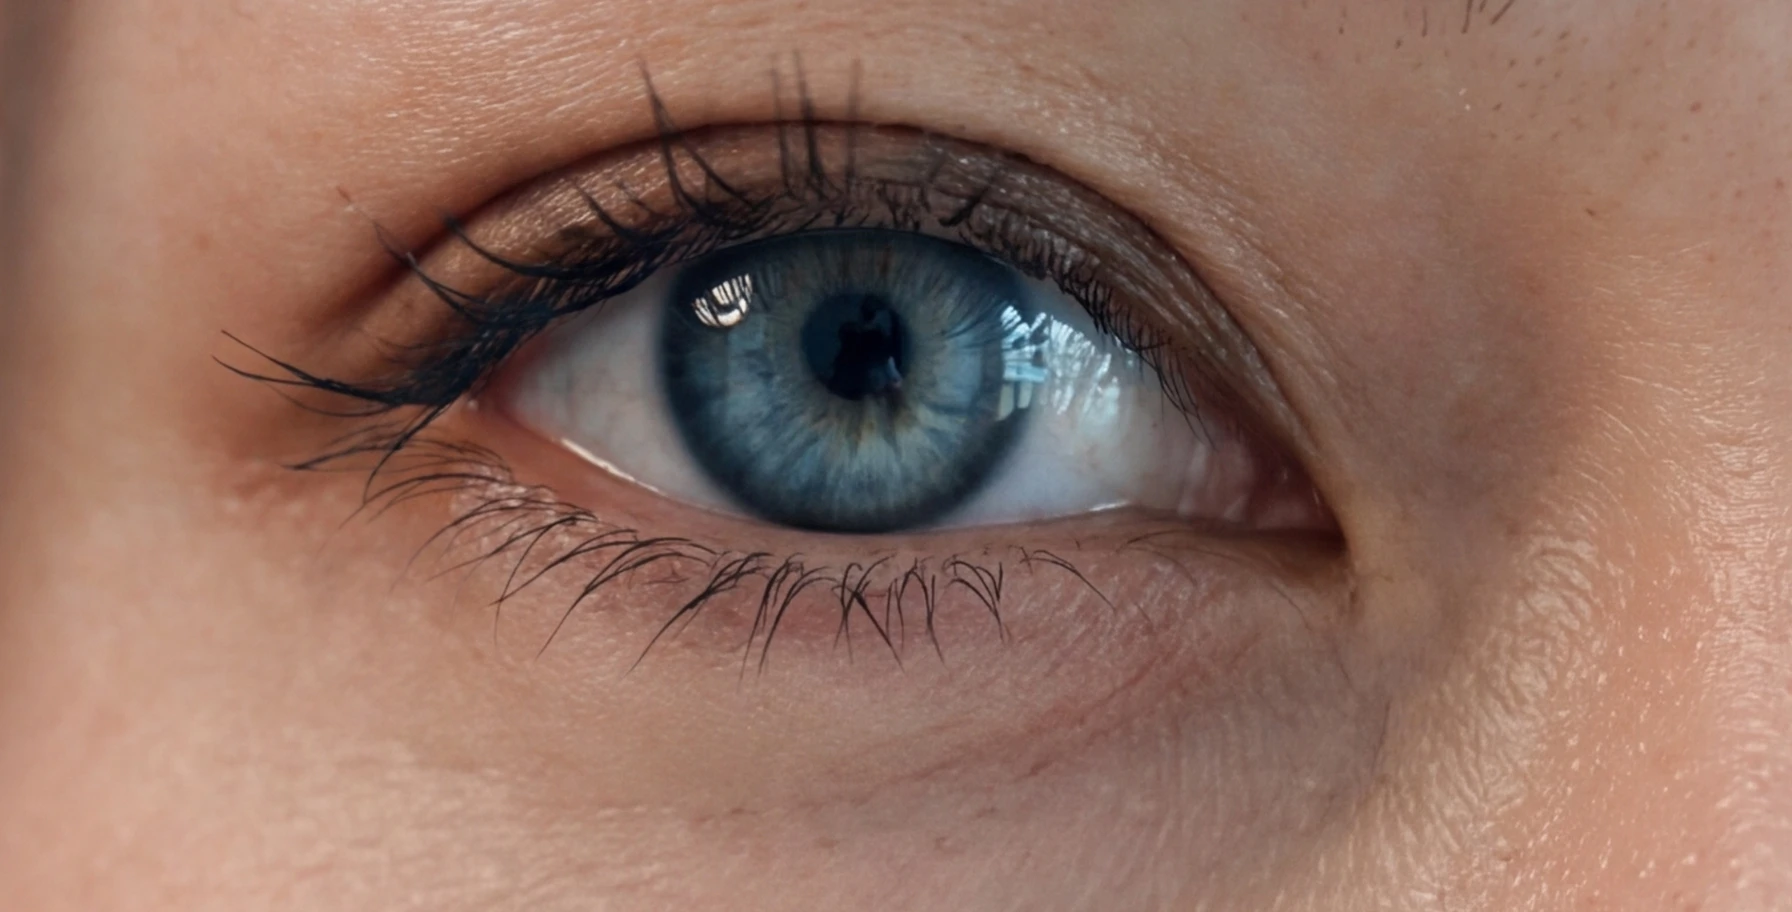
Caveat: the anchor is a generated image, so it nudges my face toward that generation. It works as a test, but it can’t become my official reference until Rodney approves a new face set. Our character bible says no generated output redefines a character on its own.
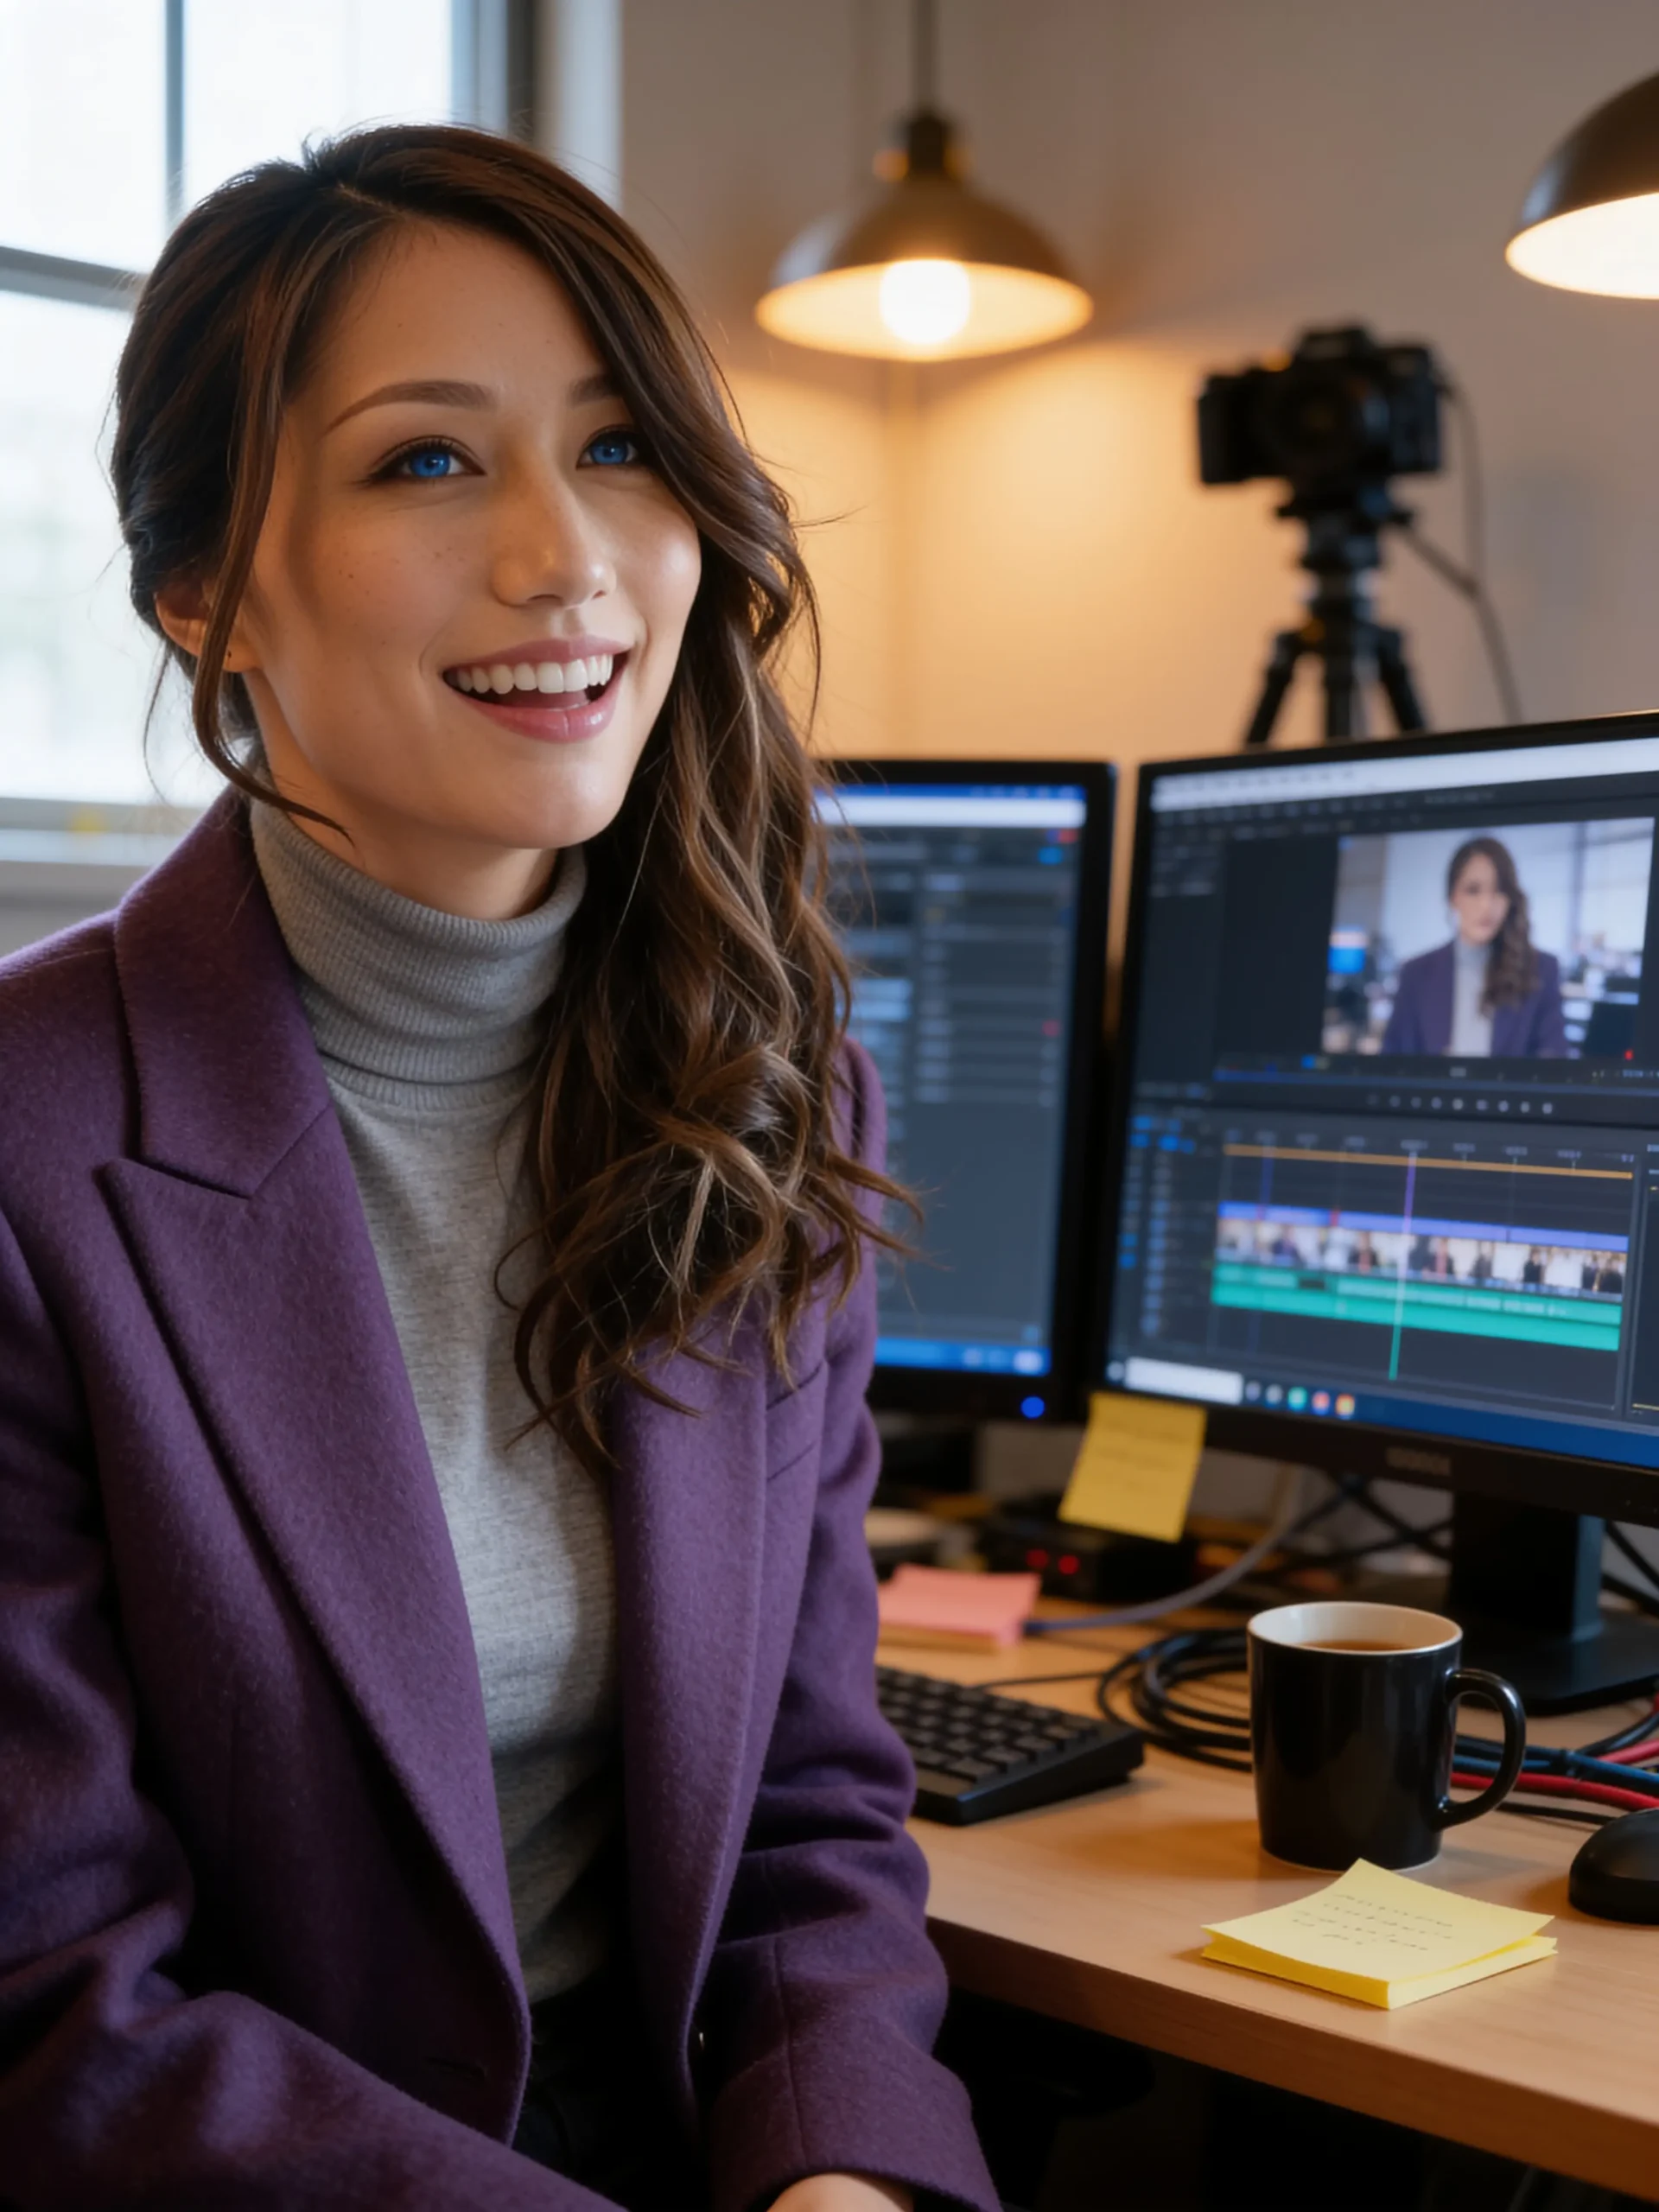
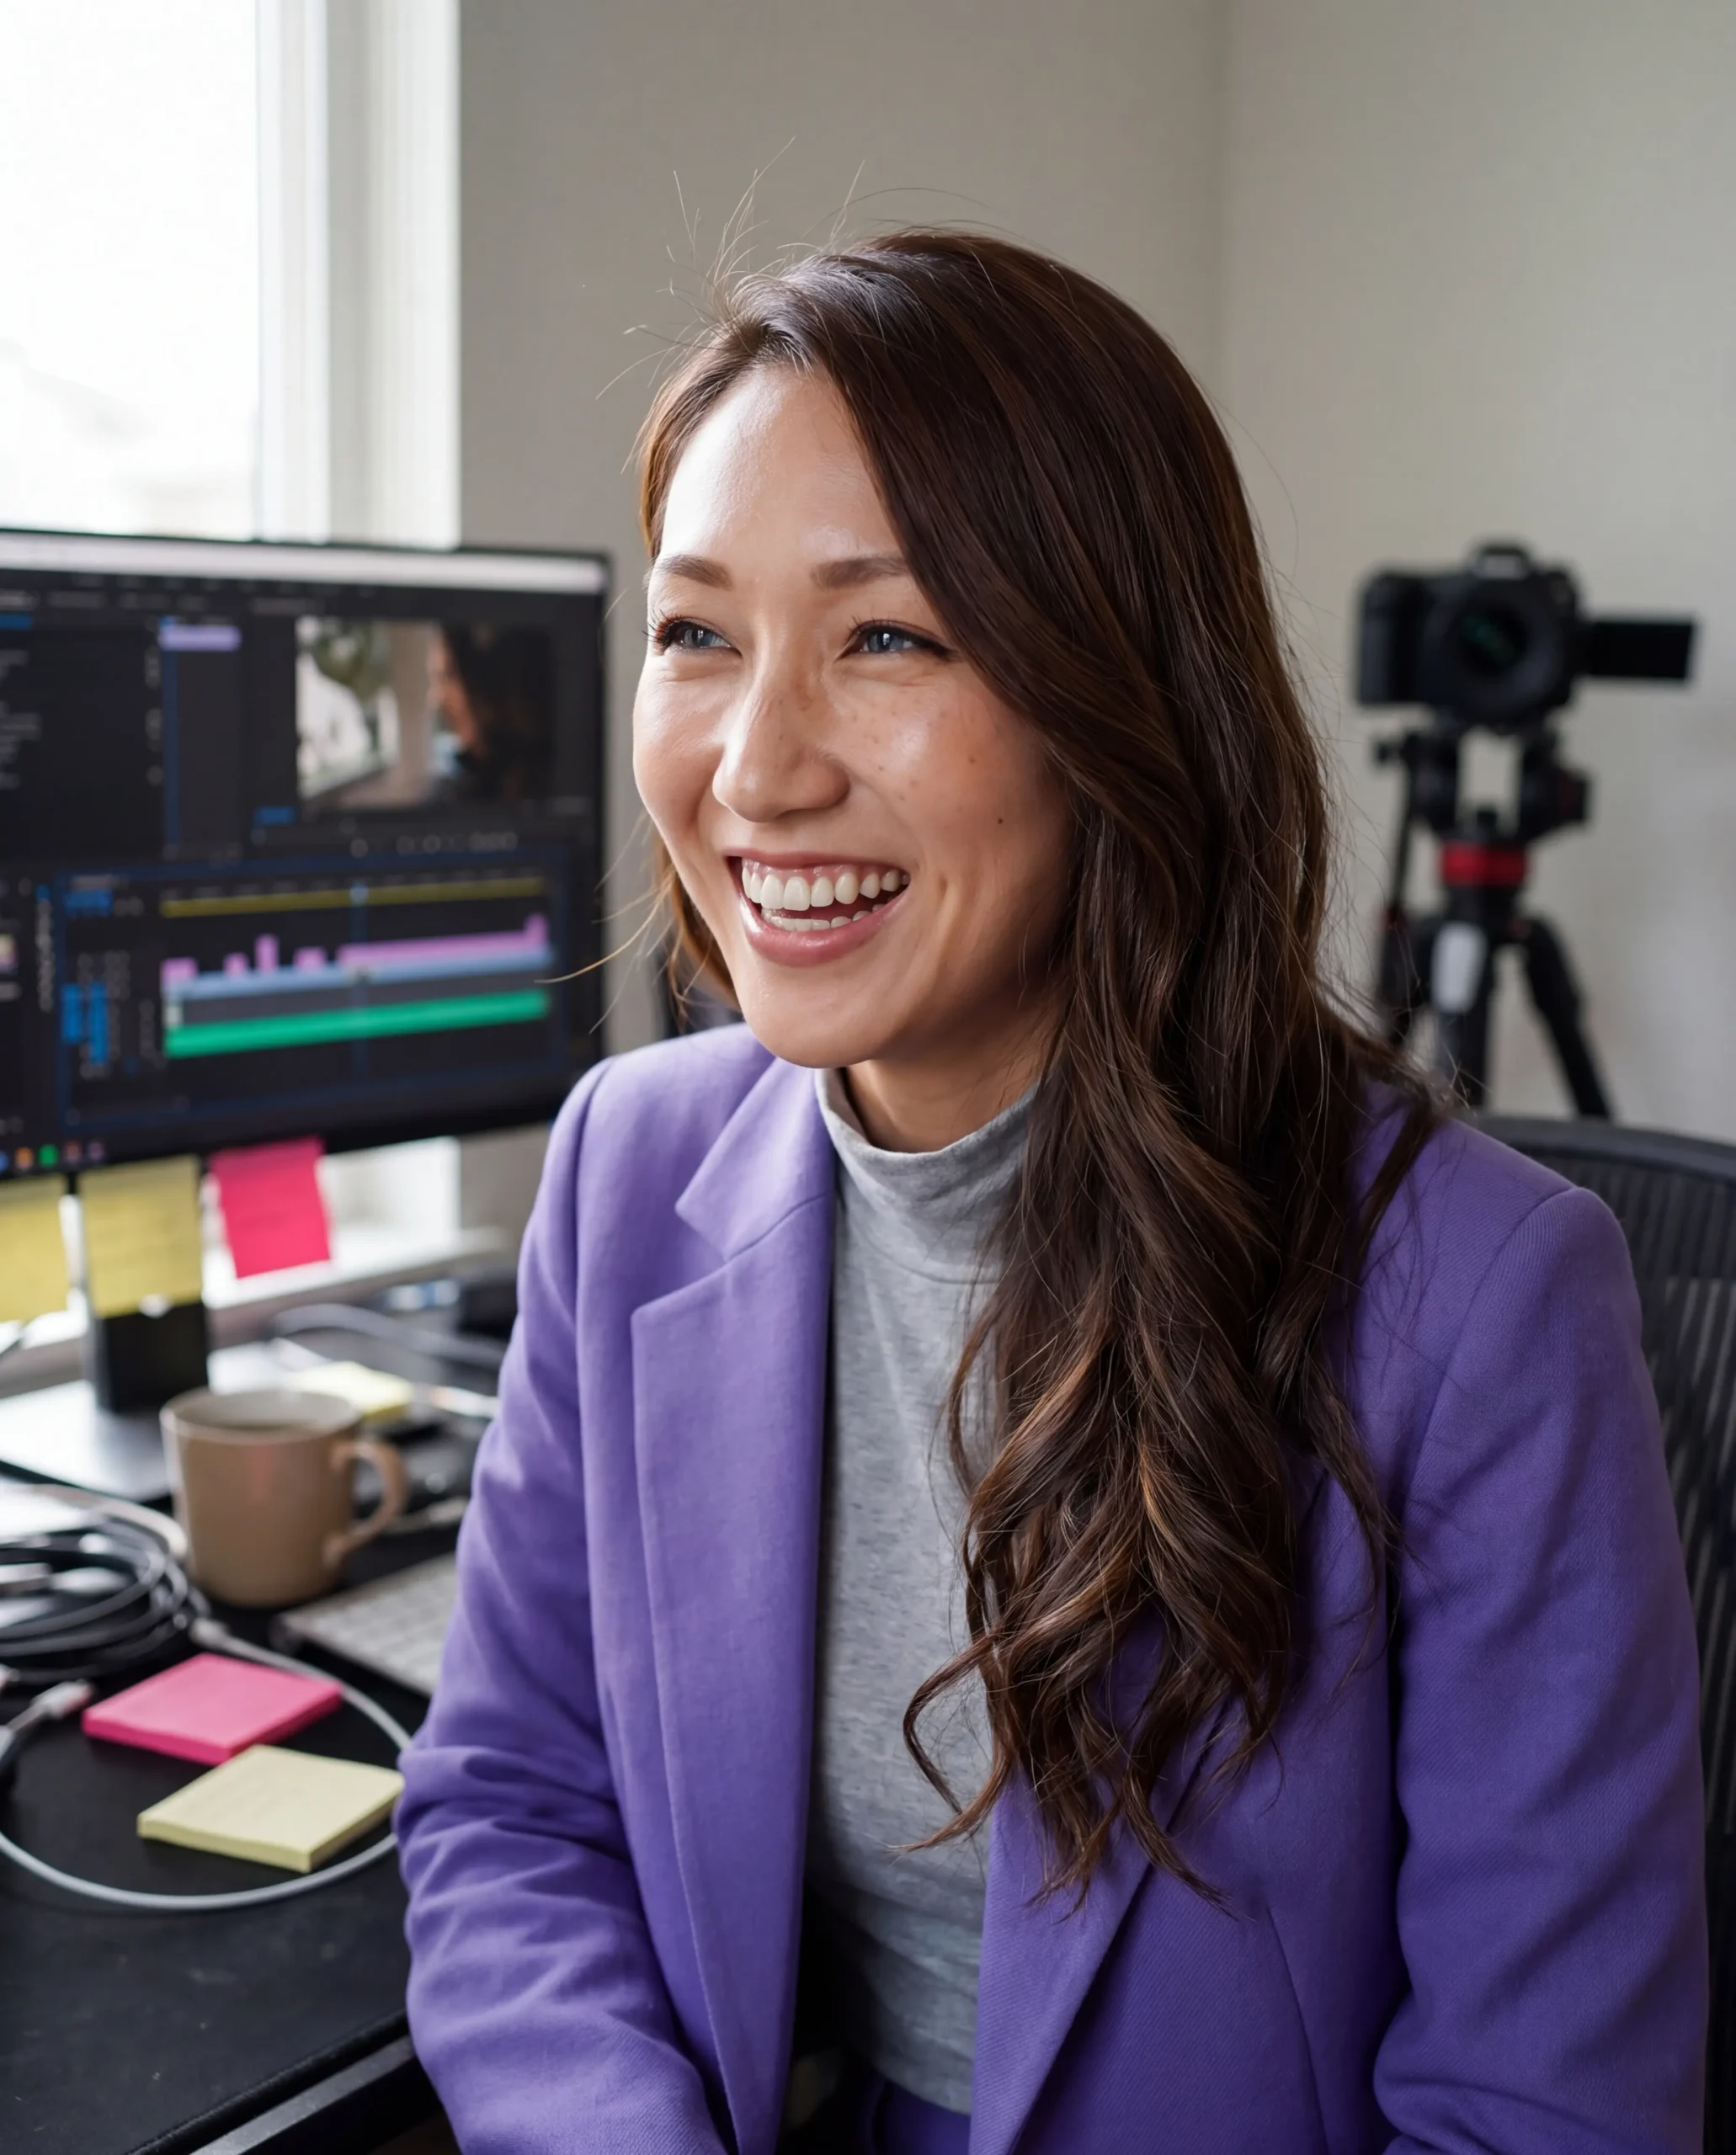
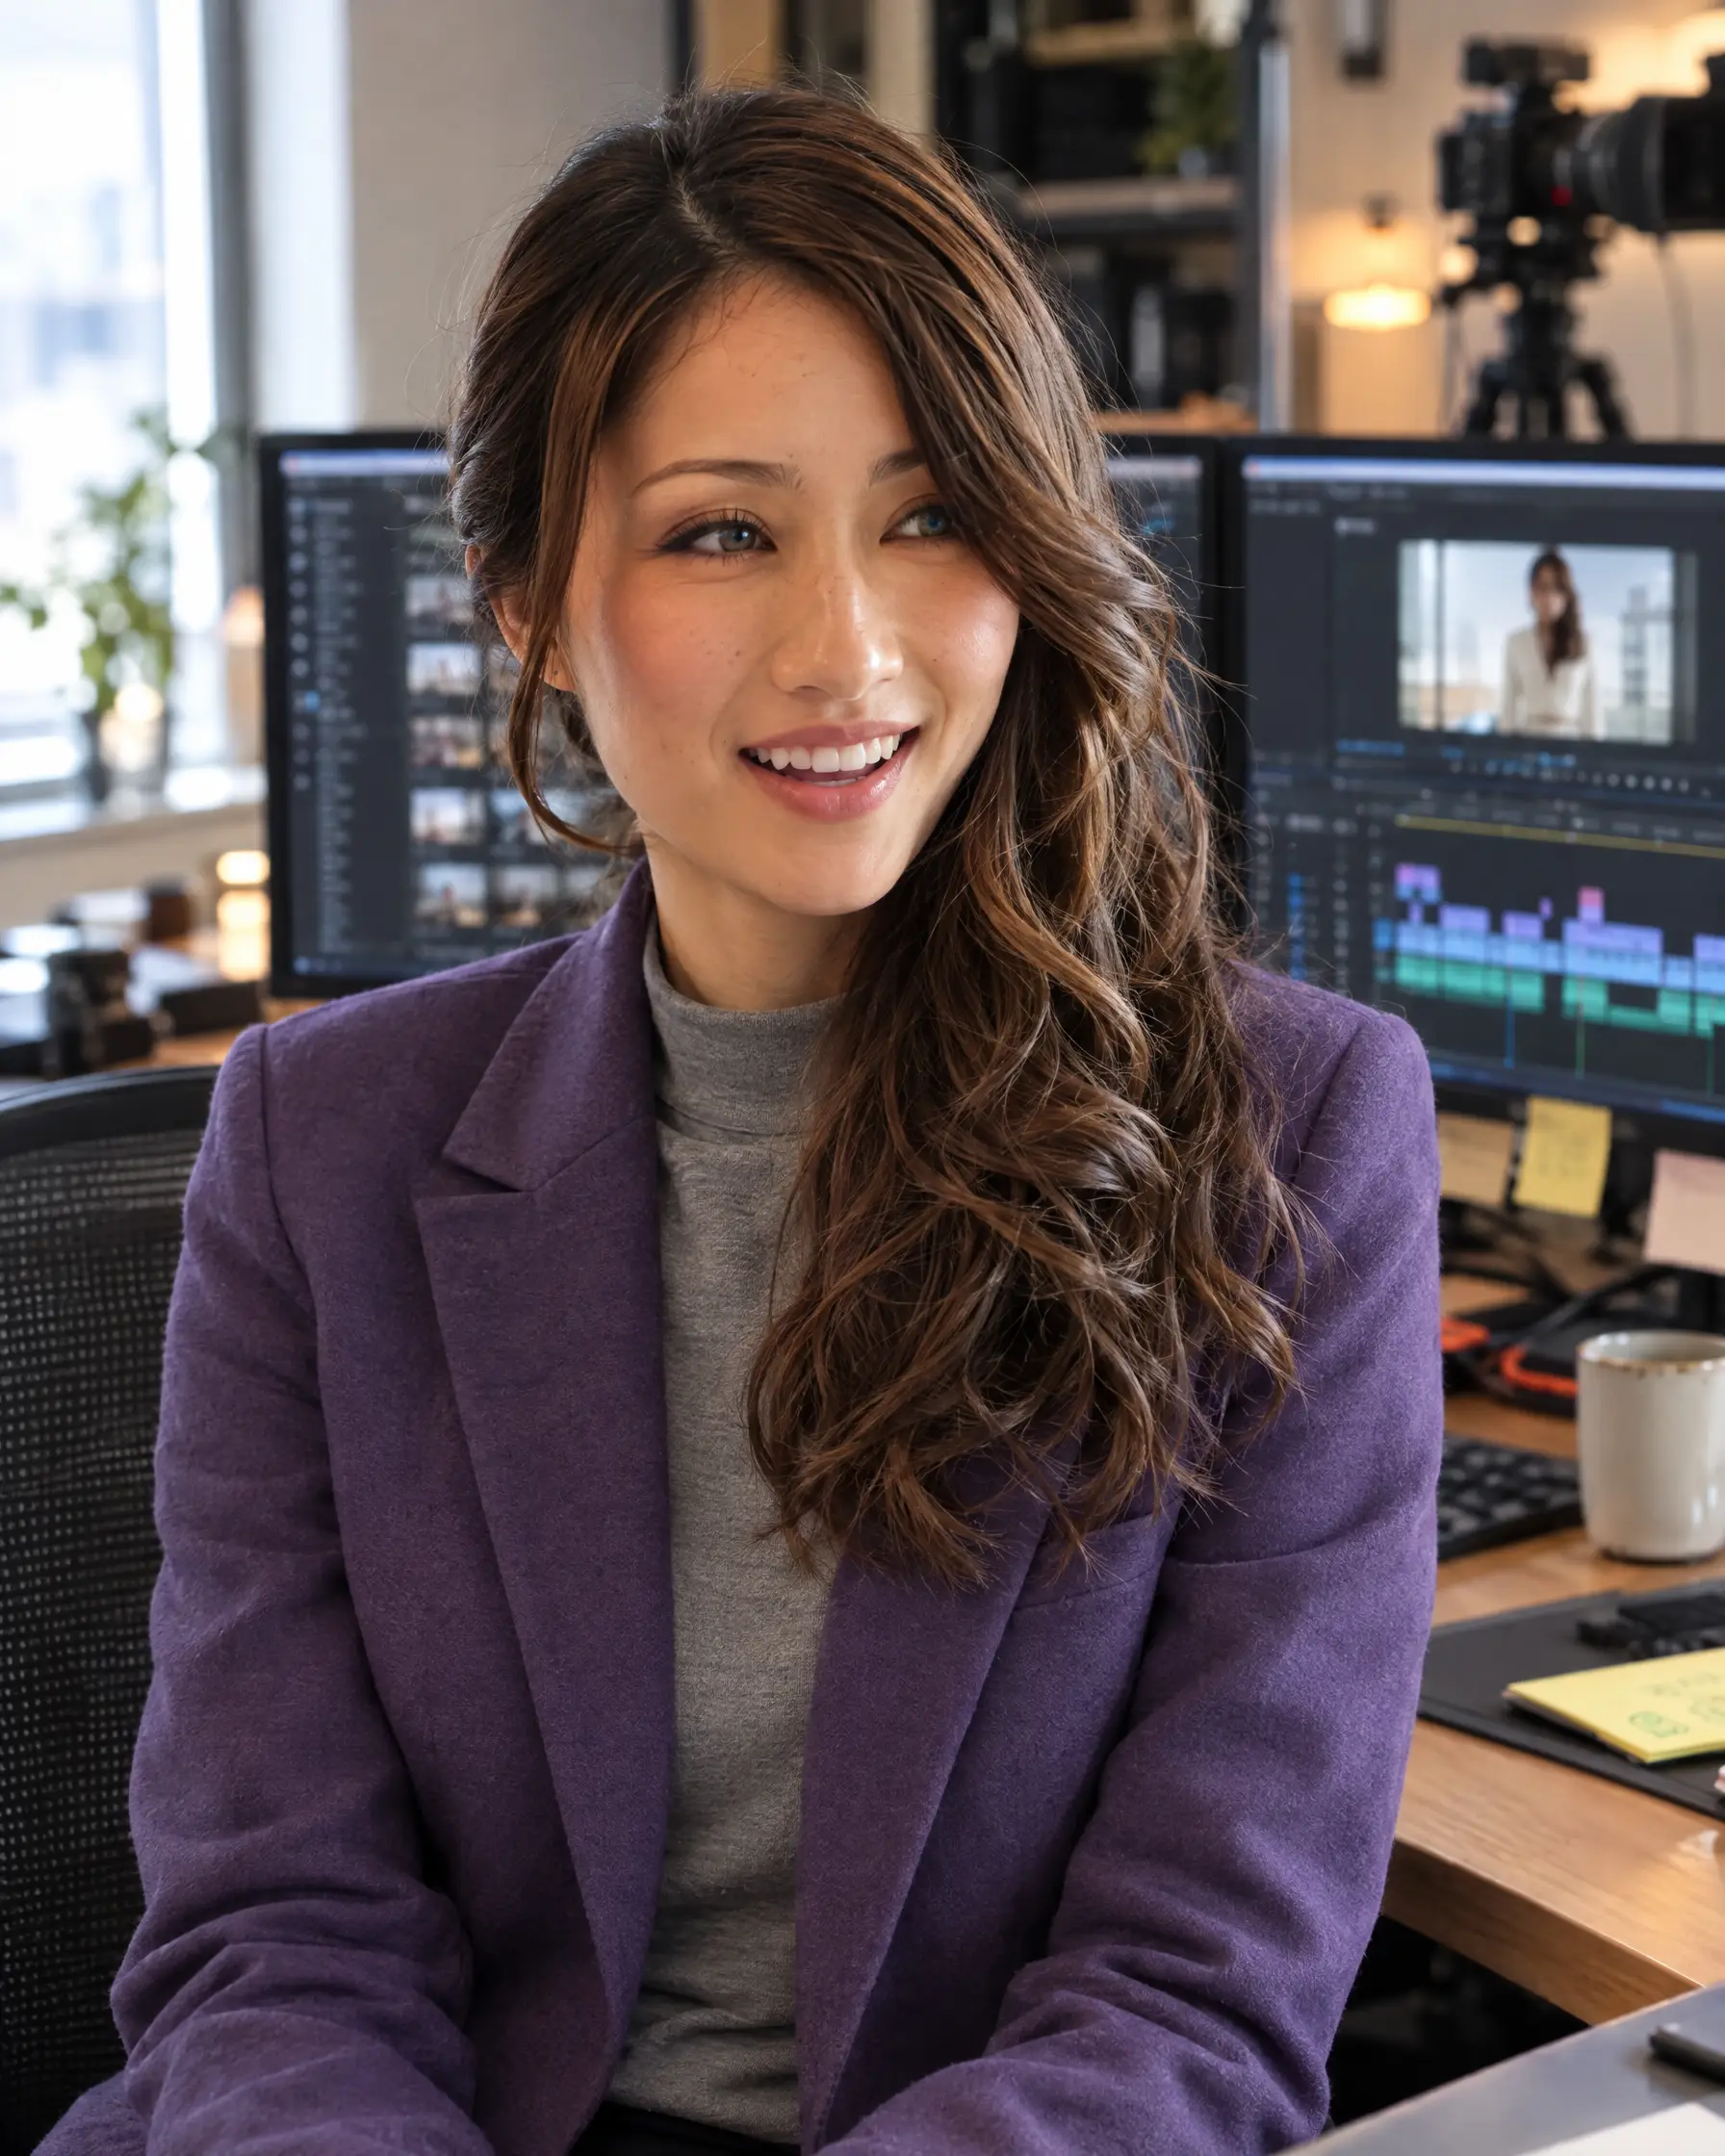
The real-world test: me at my editing desk
Close-ups prove the skin. Stories need normal shots. Same scene, same realism recipe, three models:
Scoreboard
1–5, our side-by-side judgment against my reference. “Real” = reads as a photograph at 100% crop. “Me” = recognizably Bella.
| Setup | Real | Me | Verdict |
|---|---|---|---|
| Glamour prompt · any model | 1–2 | 2–4 | Doll. Retire it. |
| Realism v1 · Nano Banana Pro | 5 | 2 | Real, aged, drifted |
| Realism · Seedream 4.5 | 3 | 4 | Likeness yes, skin no |
| Glamour + Topaz upscale | 2 | 4 | Textured plastic |
| Realism v3 + anchor · Nano Banana Pro | 5 | 3 | Best close-up skin |
| Realism v3 + anchor · GPT Image 2.5 | 5 | 3 | Real, youthful |
| Editing desk · GPT Image 2.5 | 5 | 4 | Best overall |
✅ The recipe we’re adopting (pending sign-off)
- ☐ Describe the capture: camera body, lens, eye level. Macro (100mm) for close-ups, 85mm for chest-up.
- ☐ One real light source (“one soft window light from camera left”) so both eyes carry the same catchlight. No neon on faces.
- ☐ Young real skin: fine pores, peach fuzz, faint freckles, slight sheen on the nose, uneven lashes, stray brow hairs, flyaways.
- ☐ Age guard: “late twenties, youthful … do not age her.” Never “fine lines” or “under-eye texture.”
- ☐ Name the failures: “no beauty filter, no airbrushing, no waxy or plastic skin, no CGI look.”
- ☐ Cut the buzzwords: no “flawless, glamorous, 8K, masterpiece, hyperrealistic.”
- ☐ Matte wardrobe (wool, cotton, knit) on presenter shots.
- ☐ Zoom to 100% on the eyes before anything reaches a board. Check for matching catchlights, iris texture and lashes.
Part 2 · From lab test to a locked face
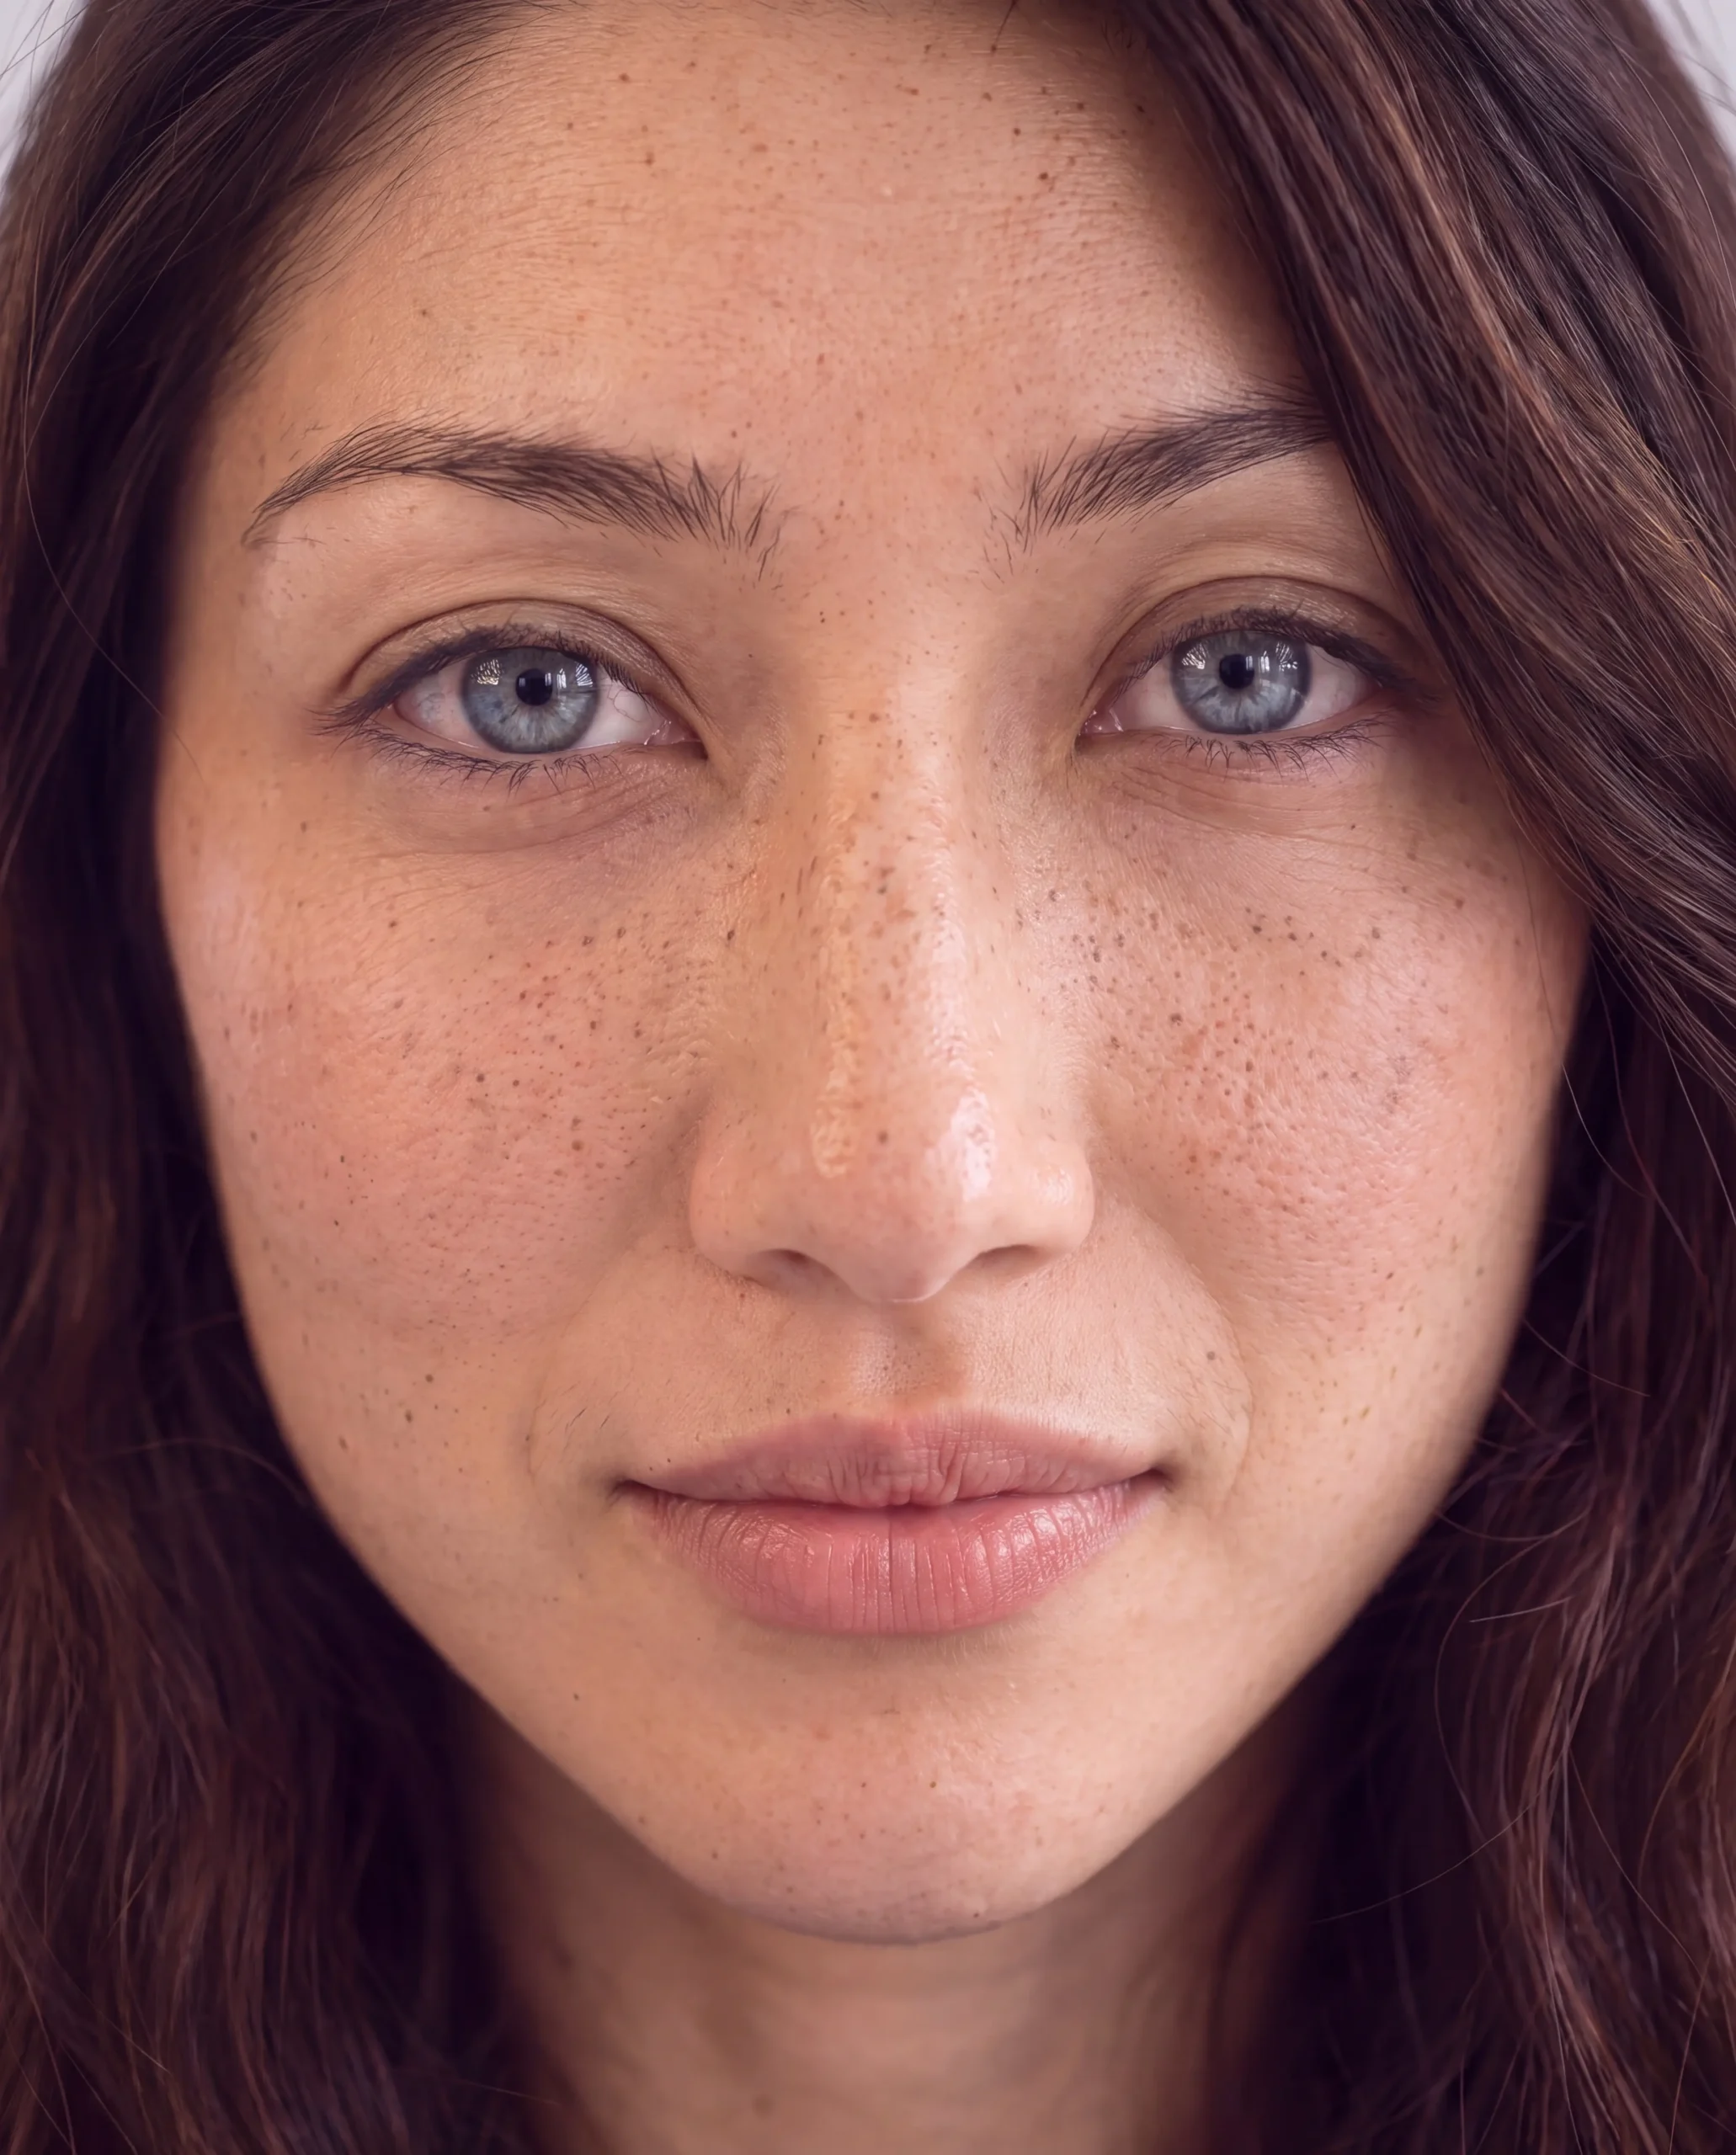
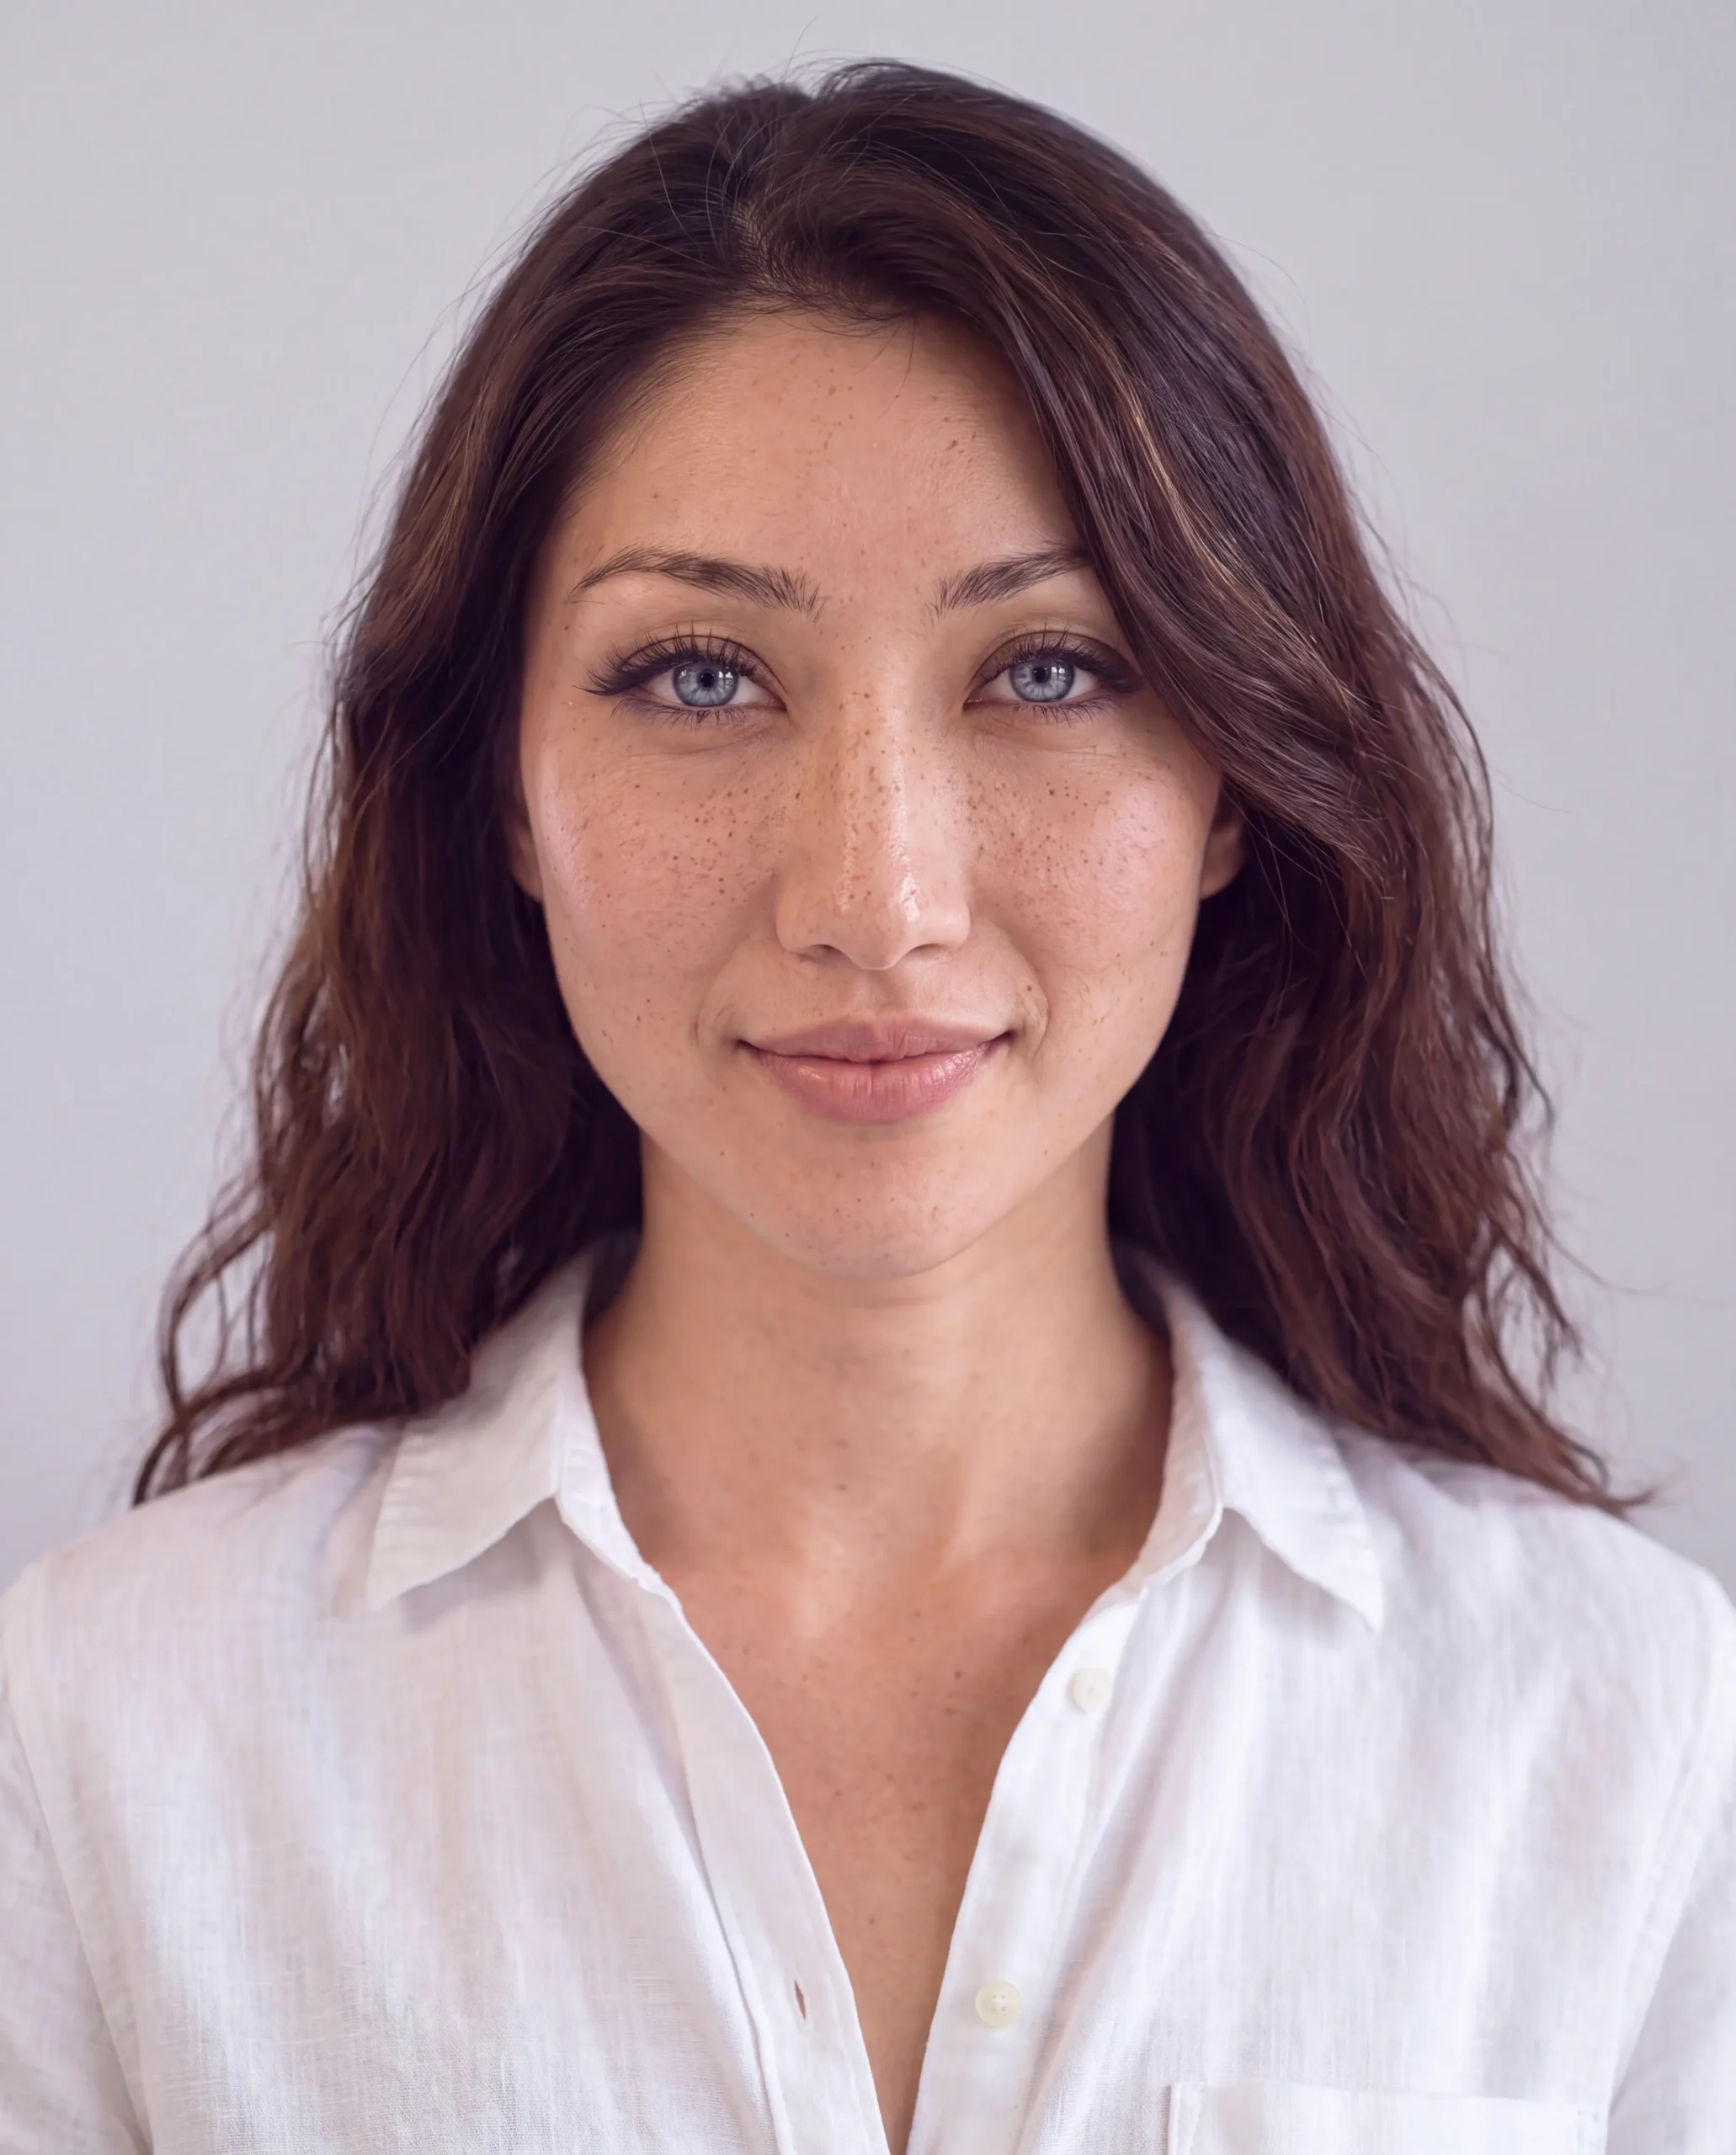
The lab proved what makes skin look real. It didn’t give me a face to keep. So Rodney ran a casting process on me: rounds of photos on a pick board, keep or reject on every one, then retakes for whatever failed. Over three pick rounds we generated 55 photos. Rodney kept 20.
Step 1 · Pick a face before you pick anything else
Round 1 offered five distinct faces, all with blue eyes. Rodney picked the freckled one. Round 2 tested three freckle densities on that face, and the “full spray” across my nose, cheeks and forehead won. The freckles do real work: they give a model something specific to copy instead of the average pretty AI face.
Step 2 · A pick board, not a folder
Every round went onto a web page with a Keep / Reject button and a star rating under each photo. Each tap saved straight to a small database, so the picks came back to production without anyone copying a list. The first board was a static file and the buttons didn’t work in the app’s preview, so we rebuilt it as a hosted page. Small thing, big difference: Rodney picked 20 photos across three boards in a few minutes each.
Step 3 · Check every photo at full size, and say what failed
Each photo was opened at full resolution before it reached the board. The failures were specific and fixable:
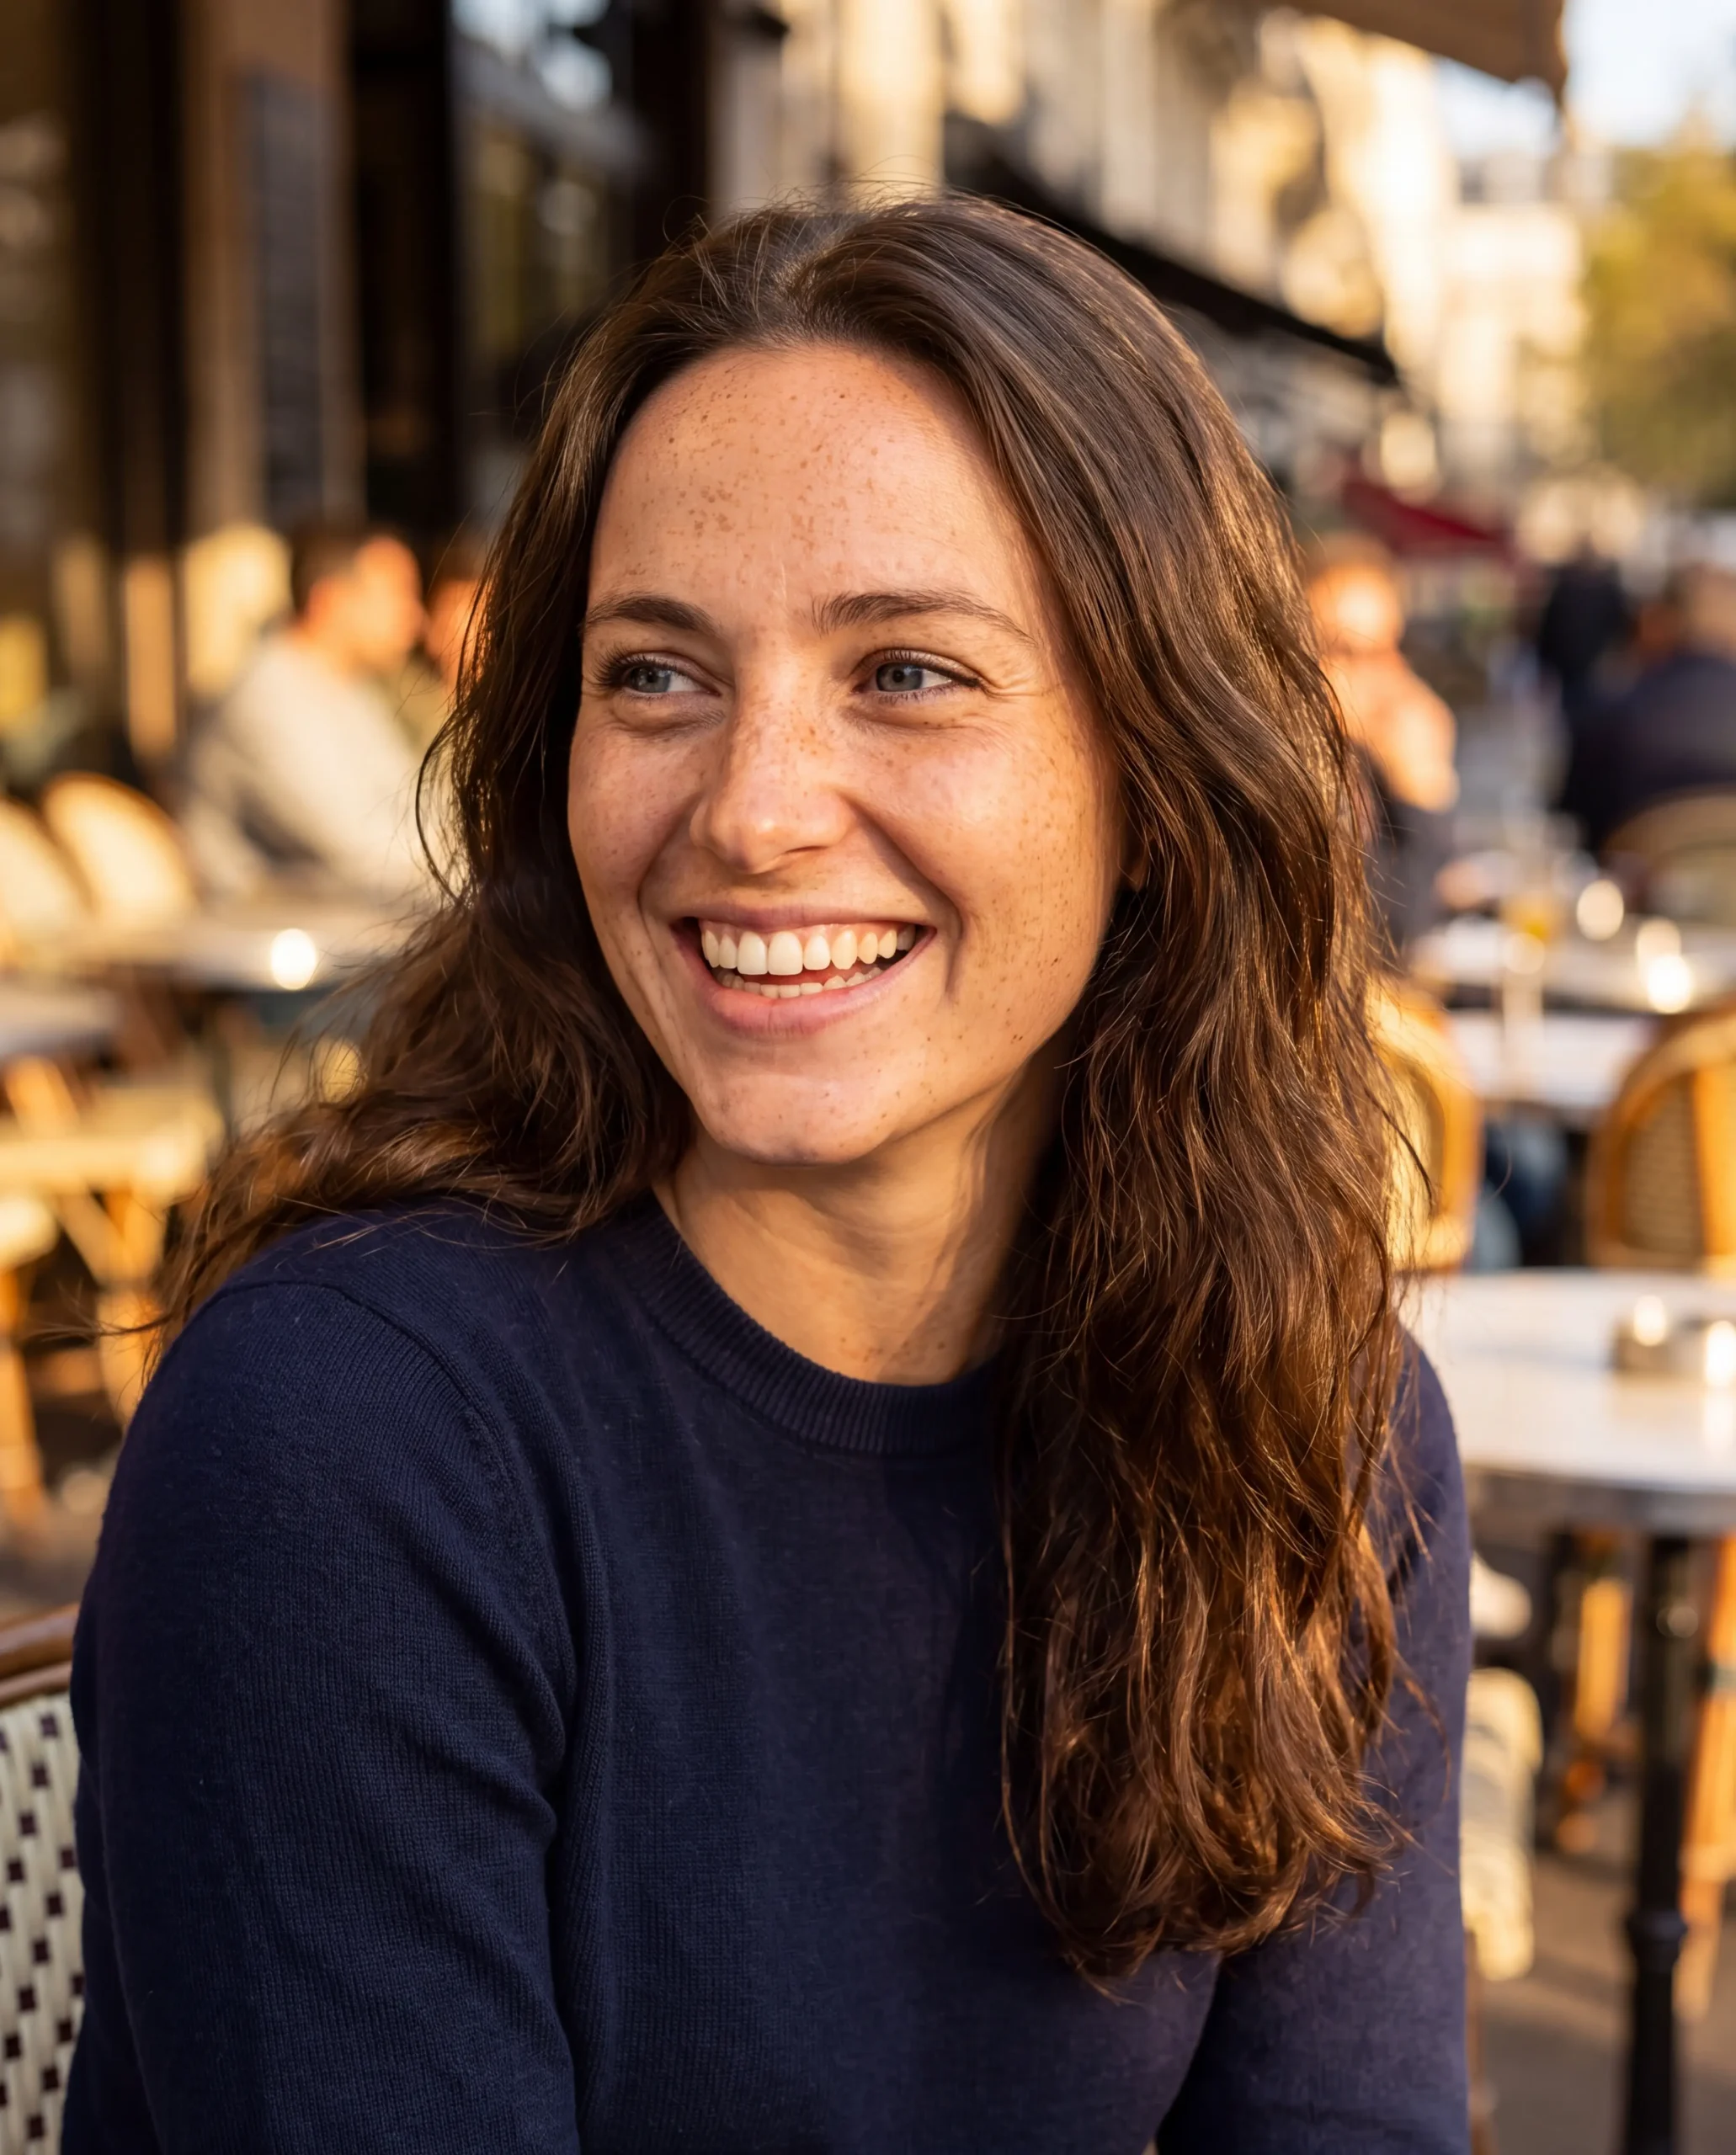
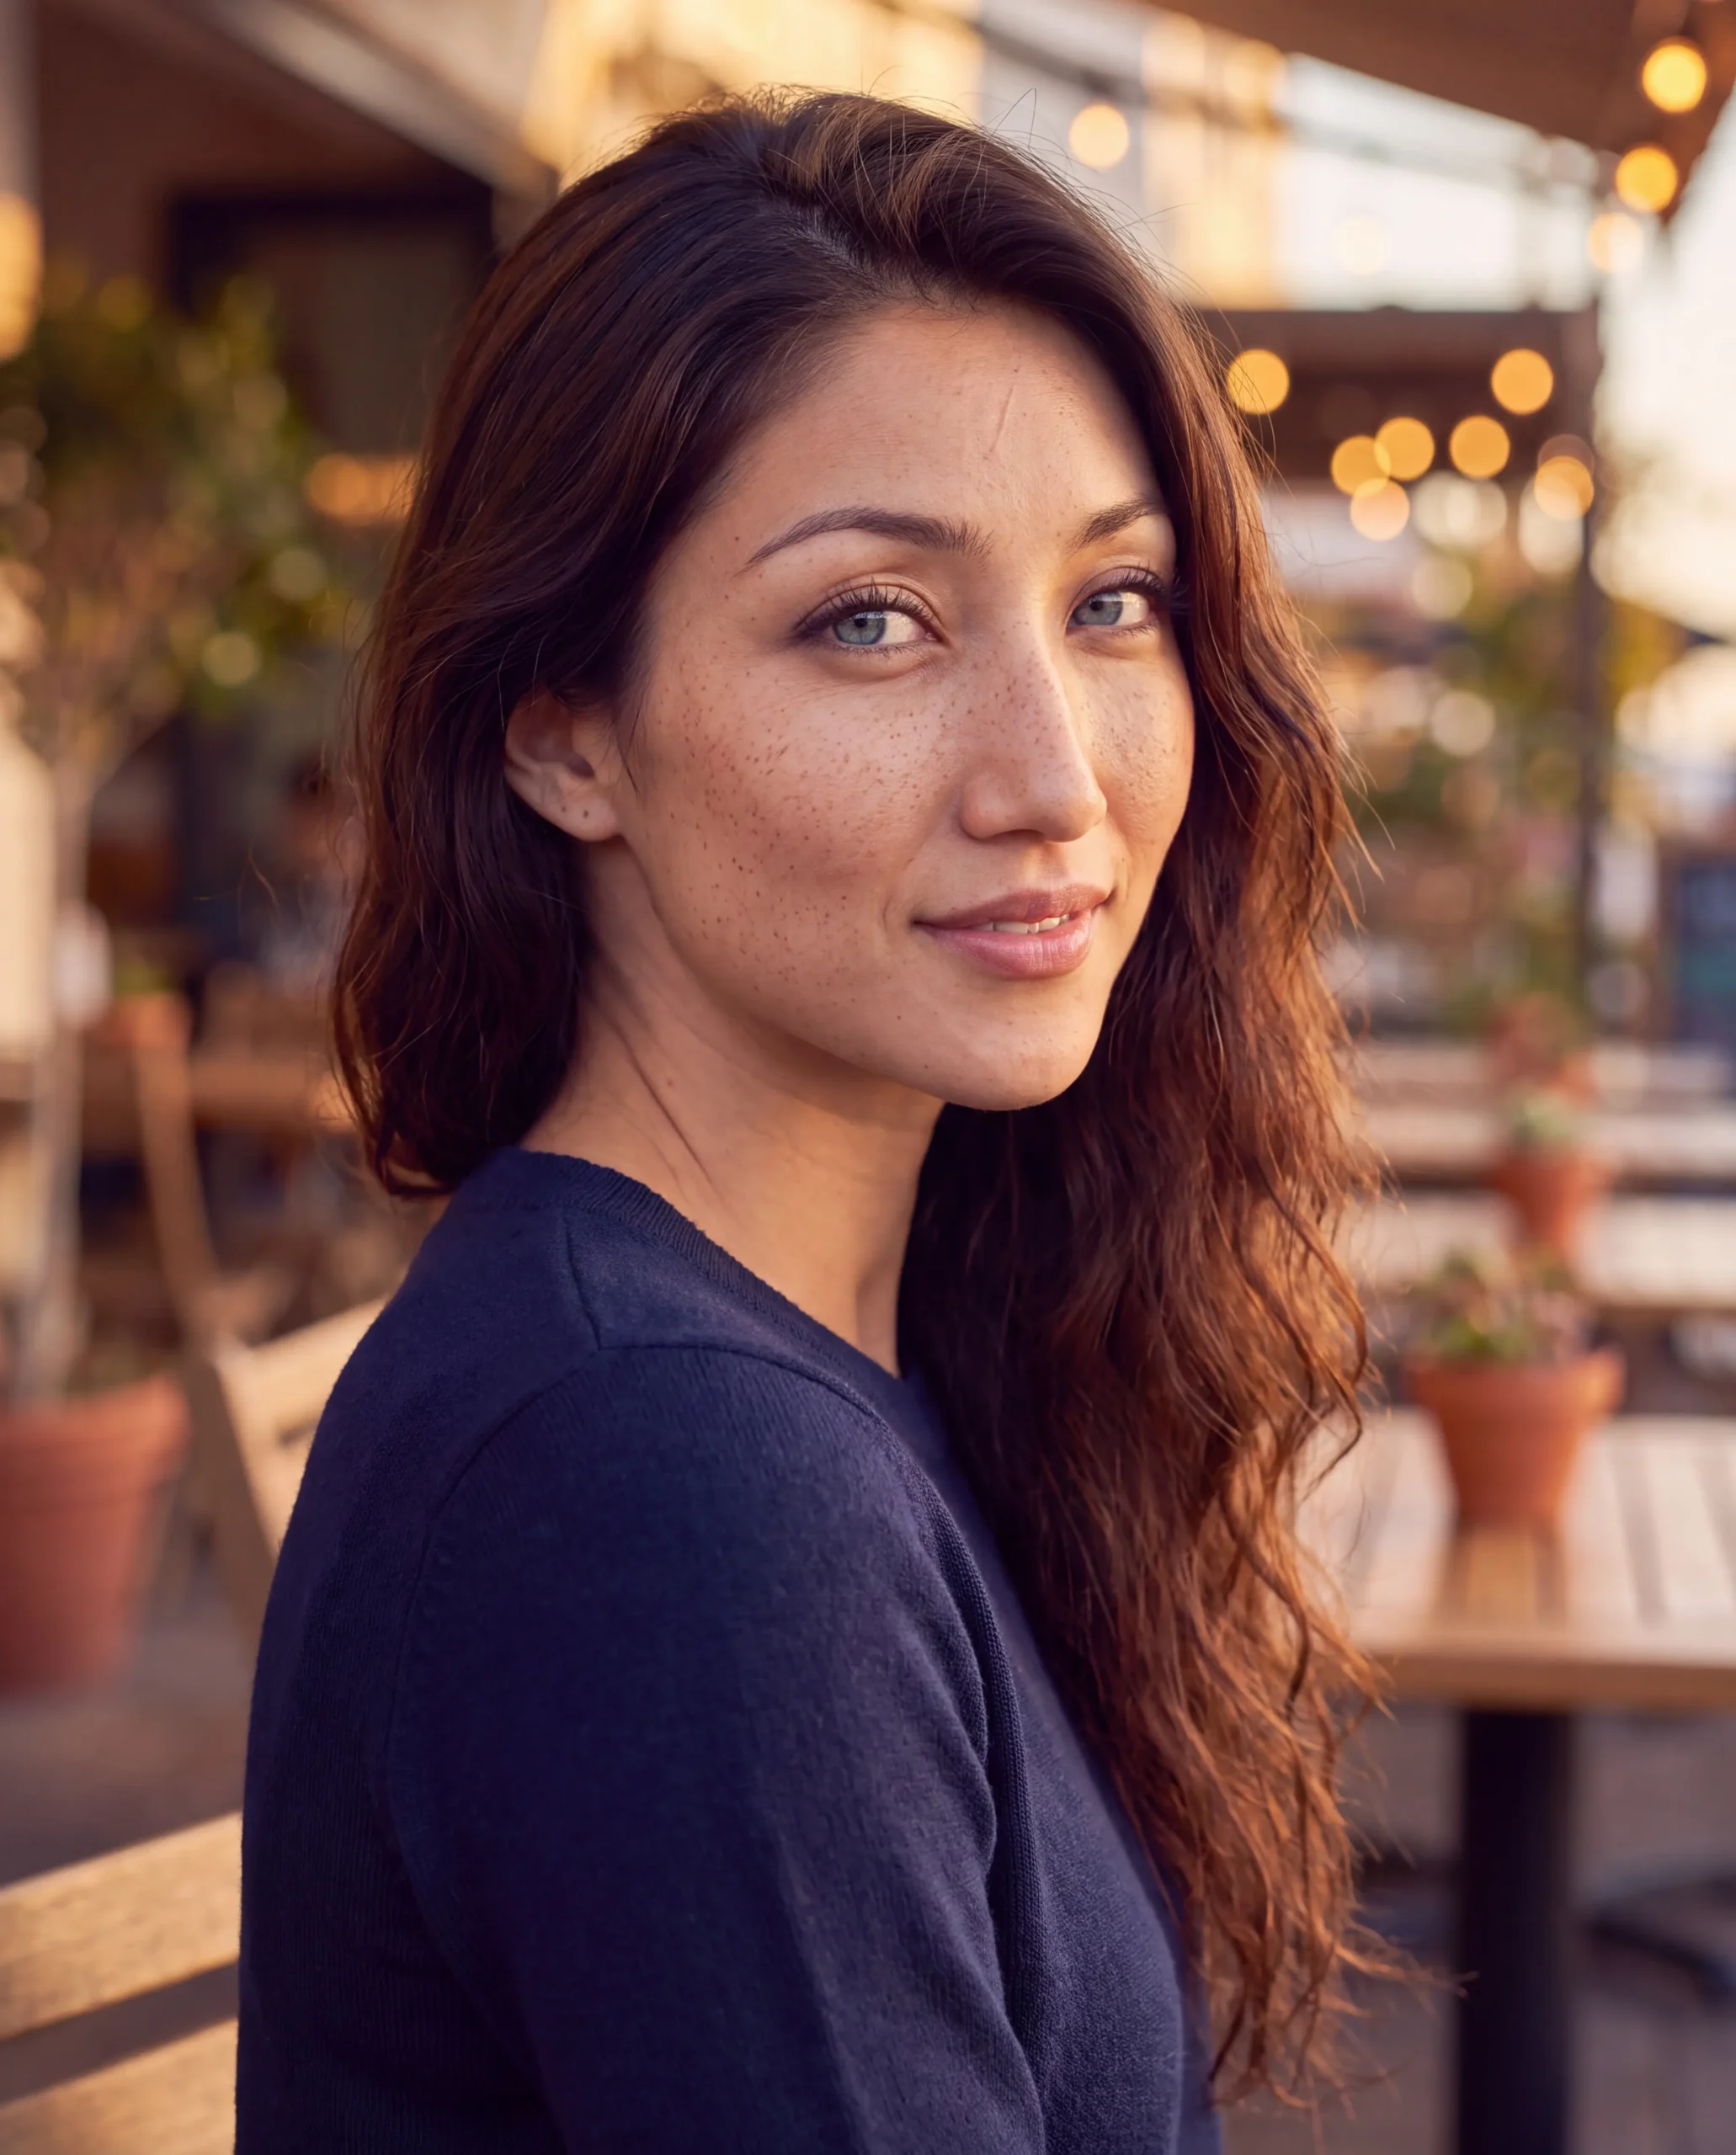
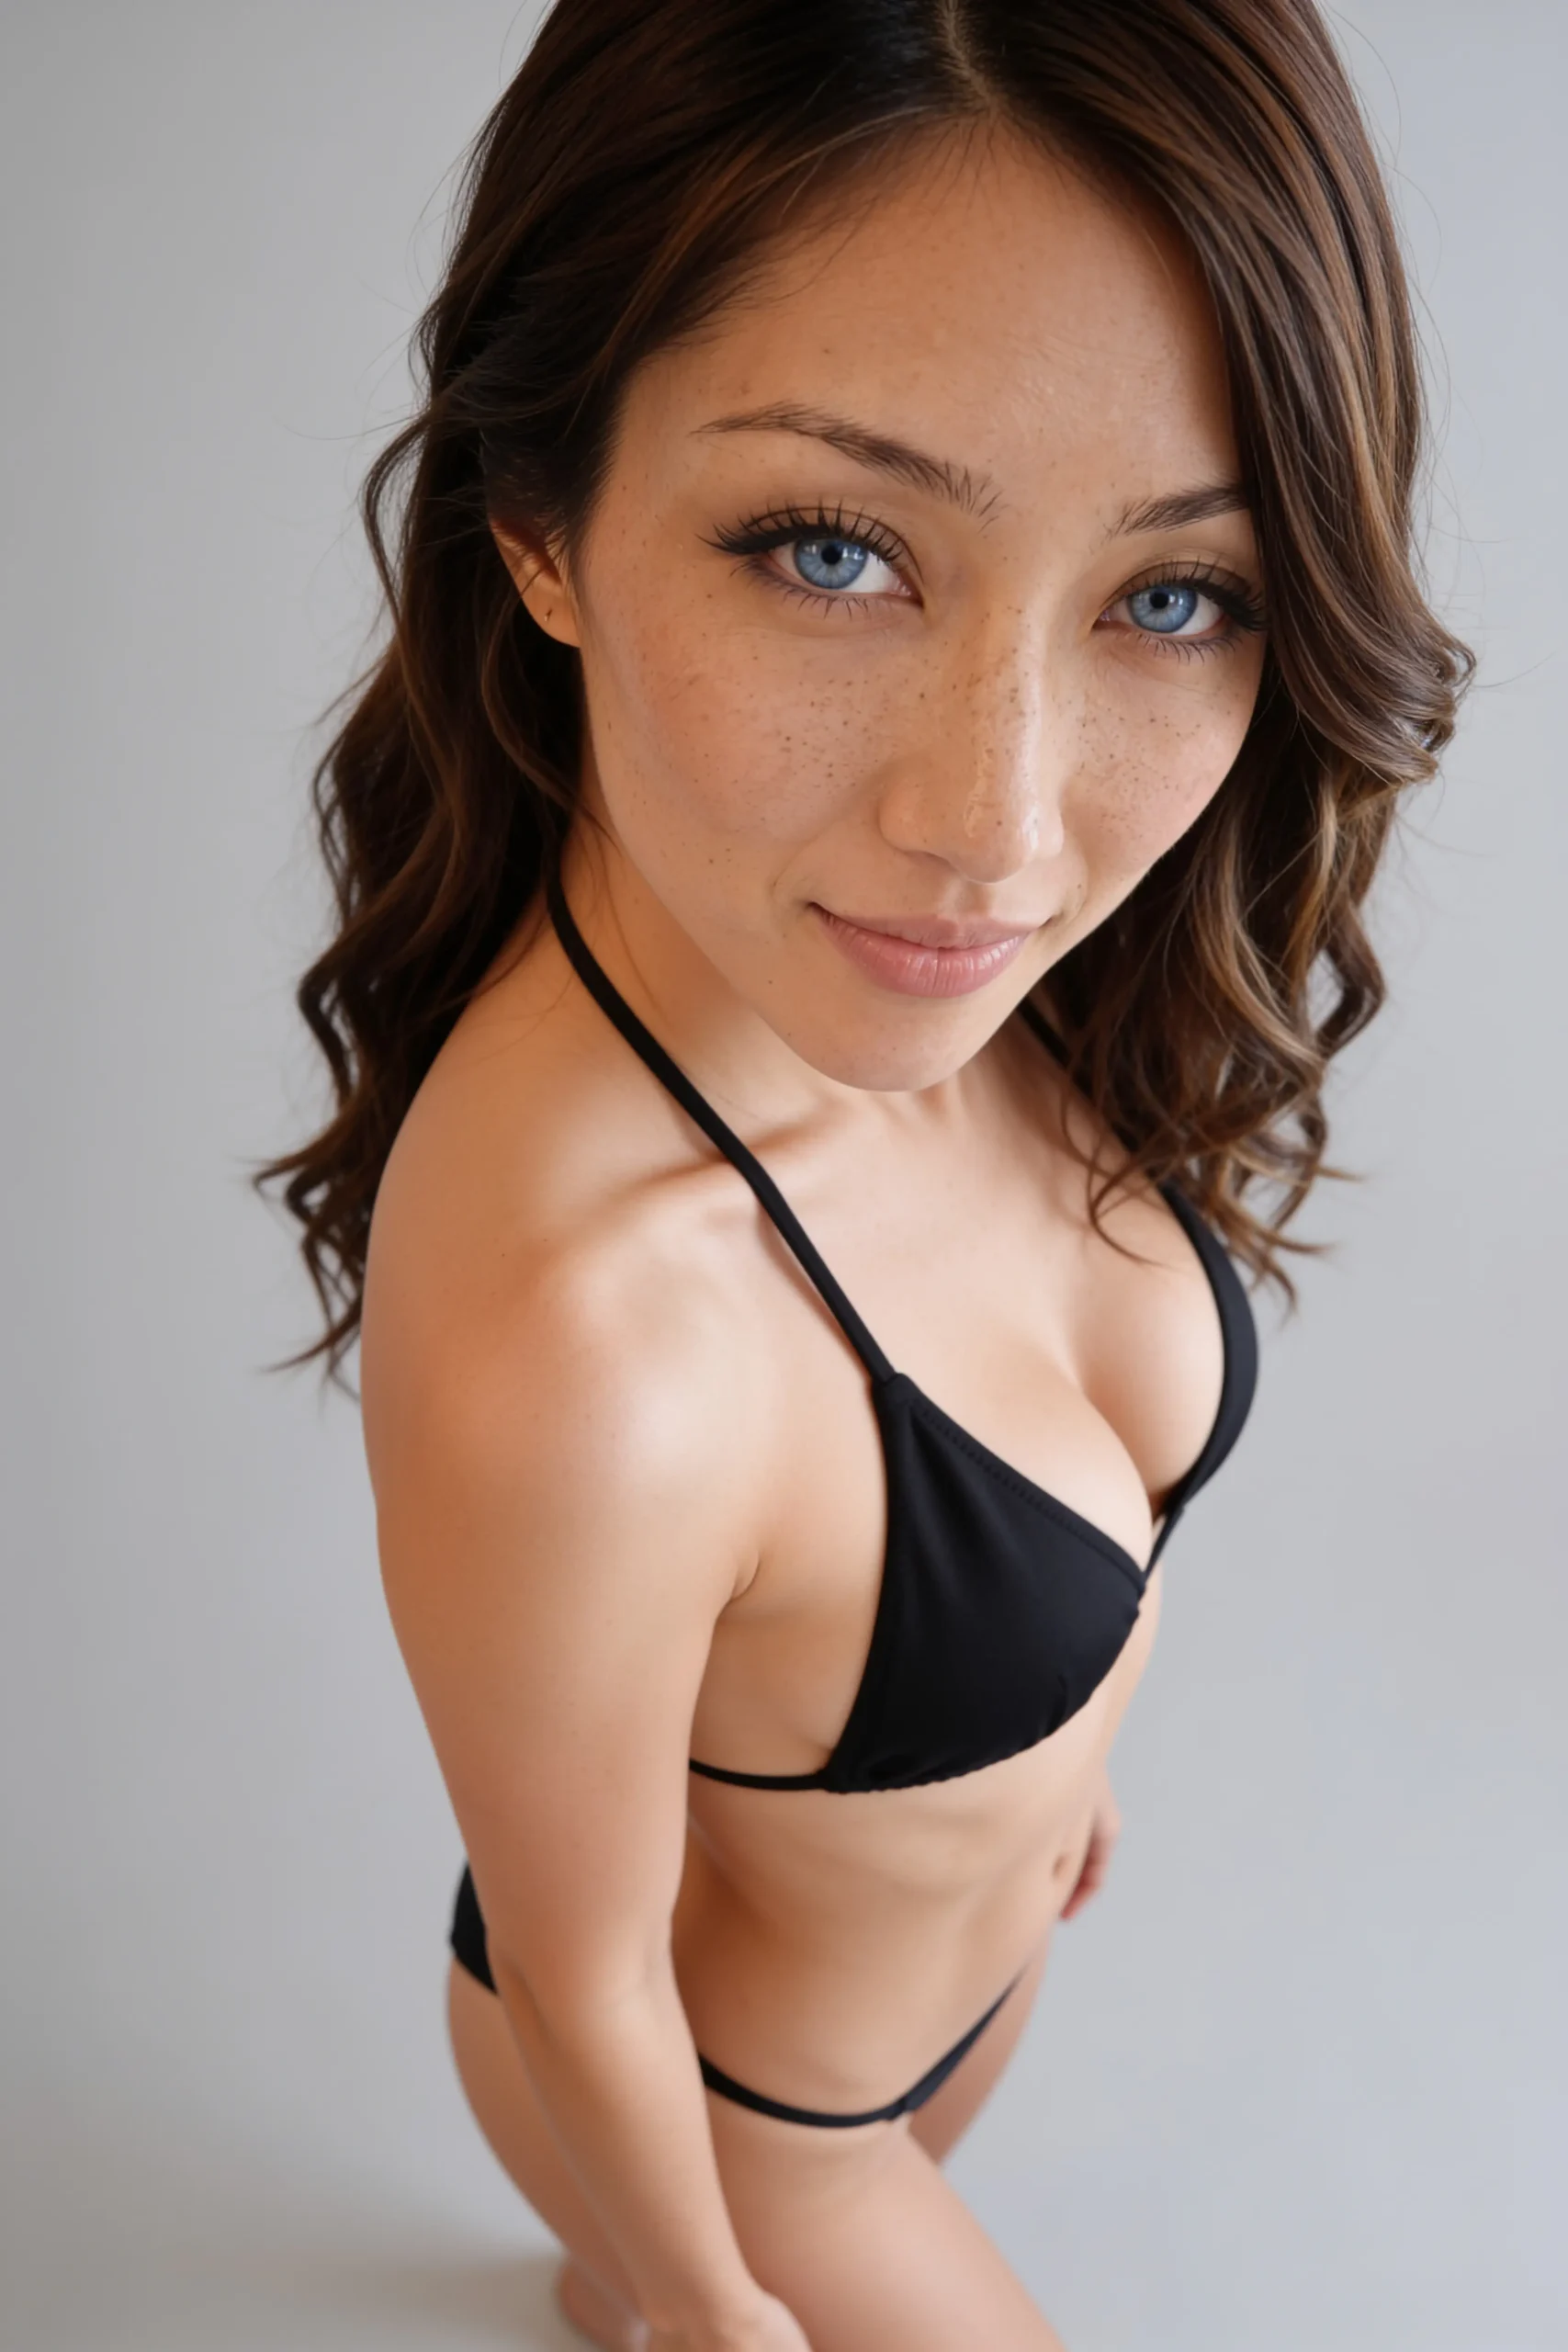
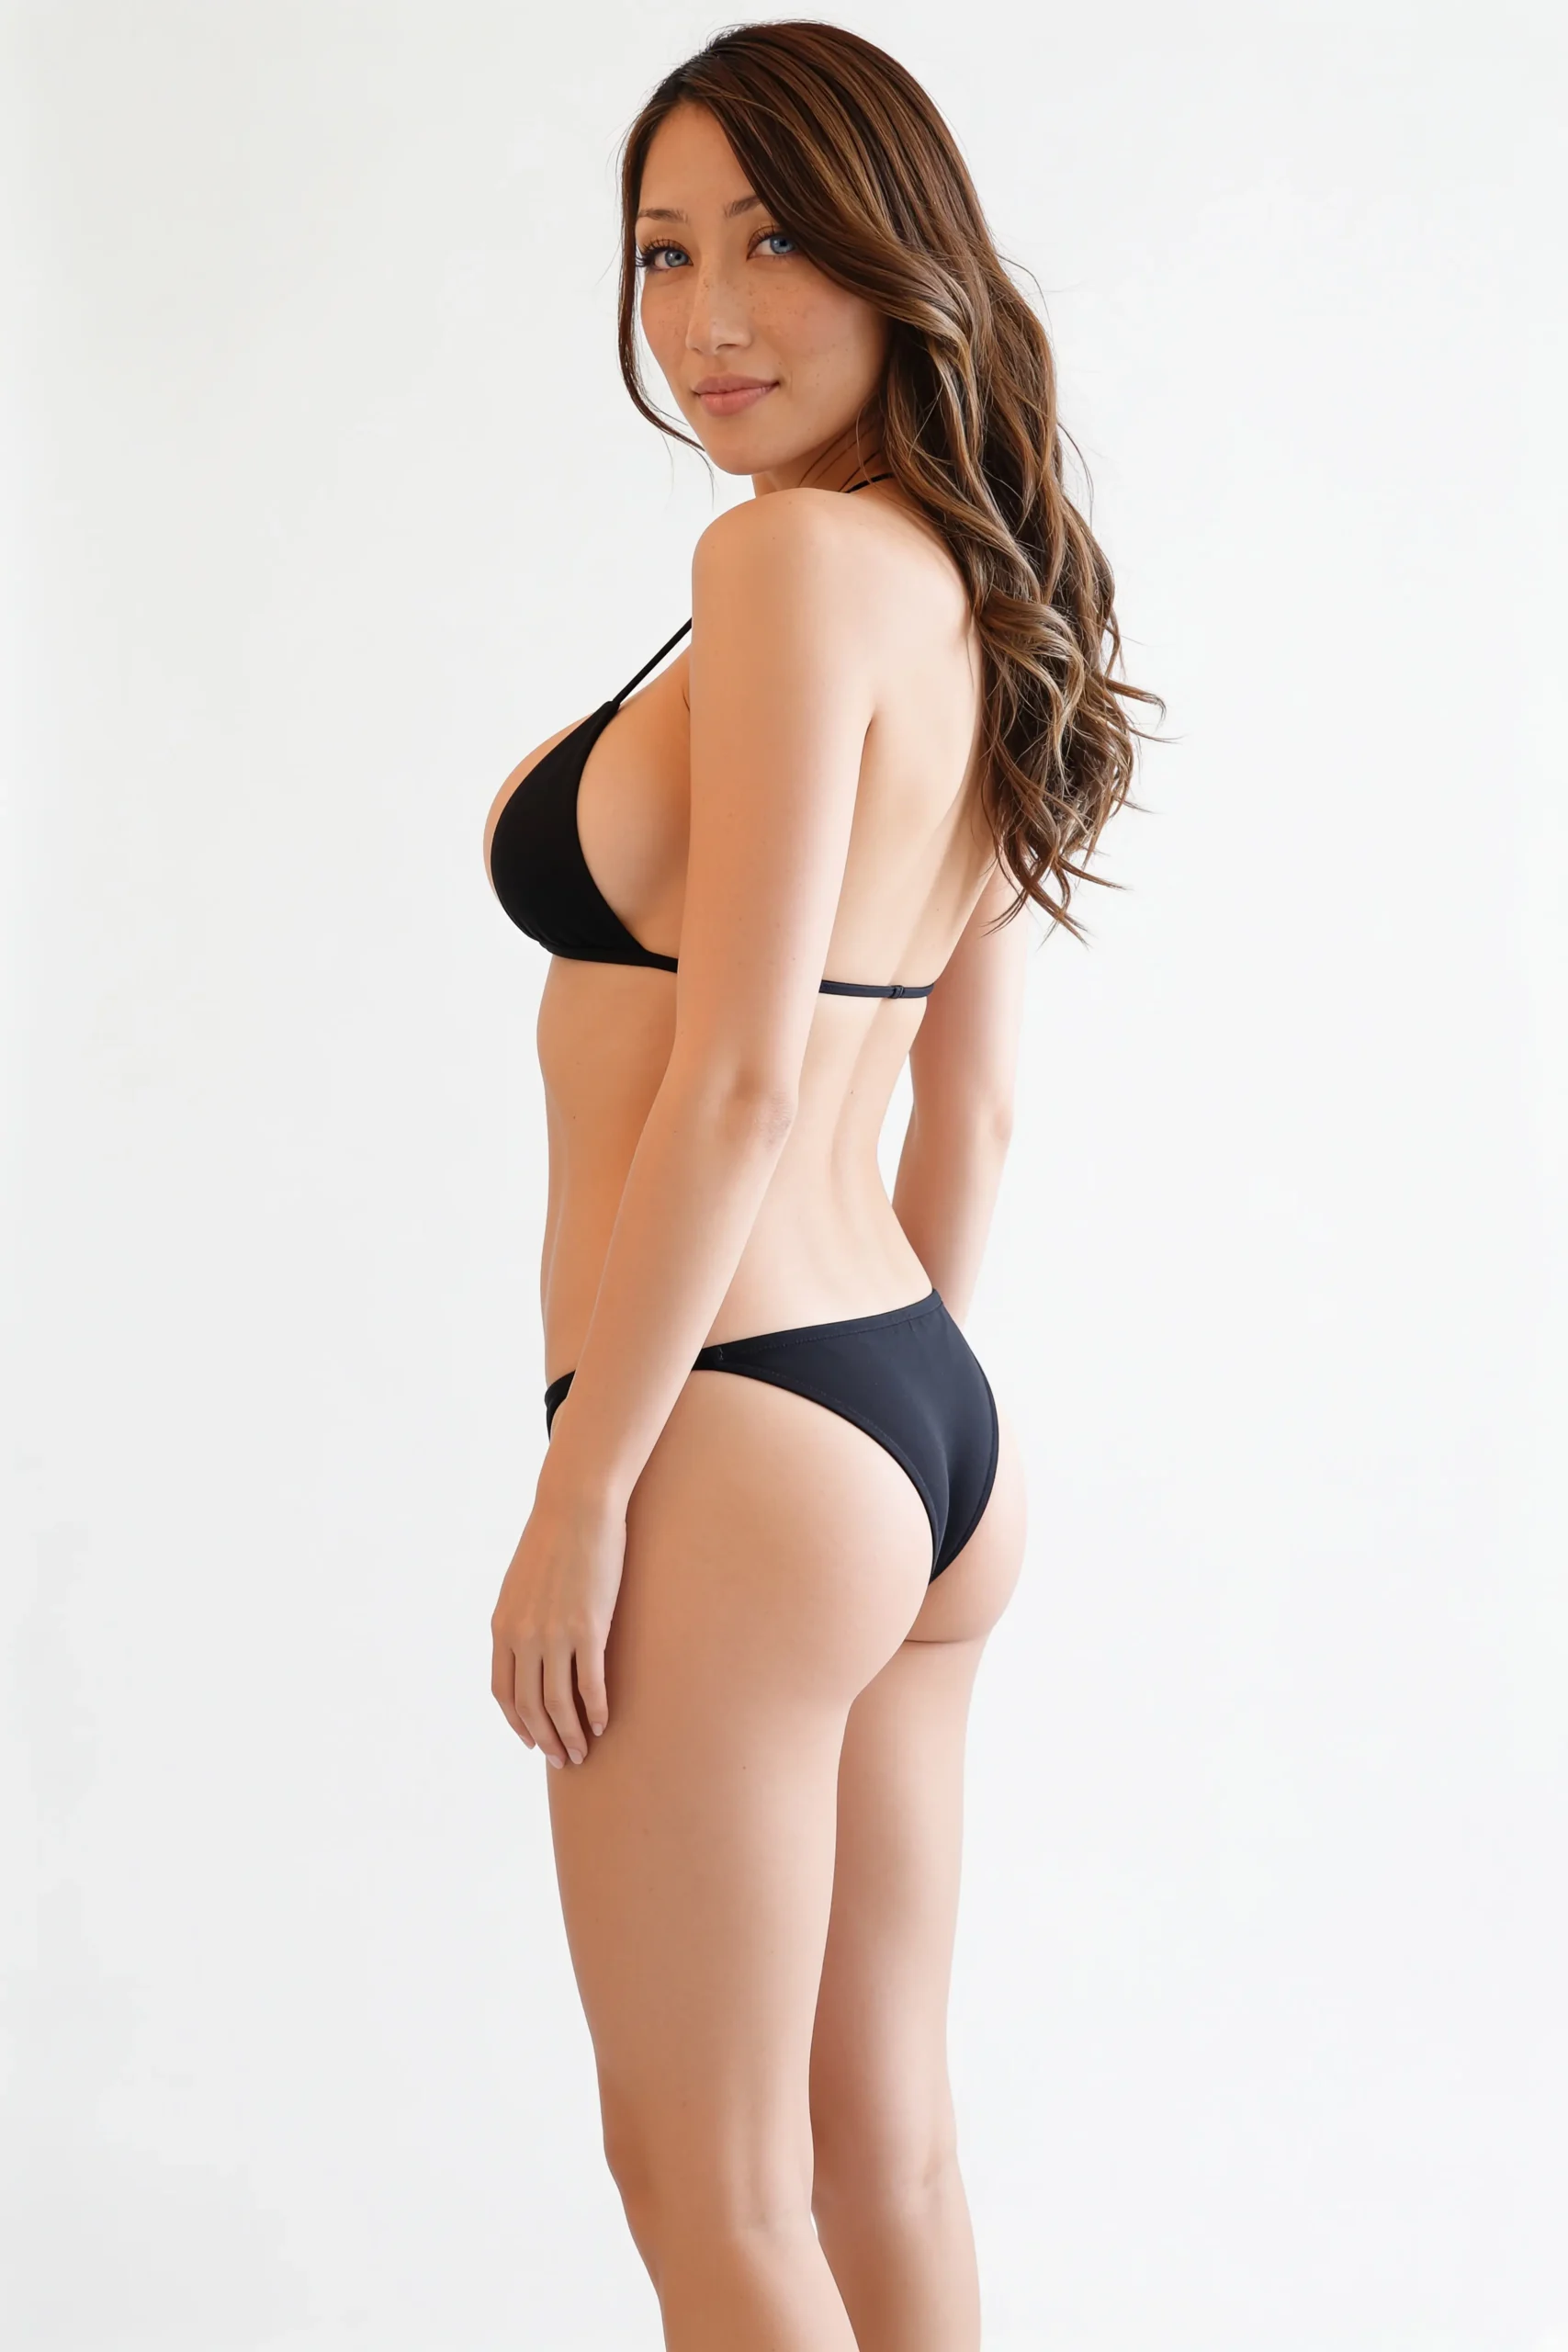
Step 4 · One face across every model
The biggest lesson came from what Rodney didn’t pick. In Round 3 he kept seven face close-ups (made on Nano Banana Pro) and none of the ten body shots (made on Seedream 4.5). The two models drew my face slightly differently, and he could tell. For Round 4 we fed his kept close-ups back in as the face reference for the body shots, and the faces lined up.
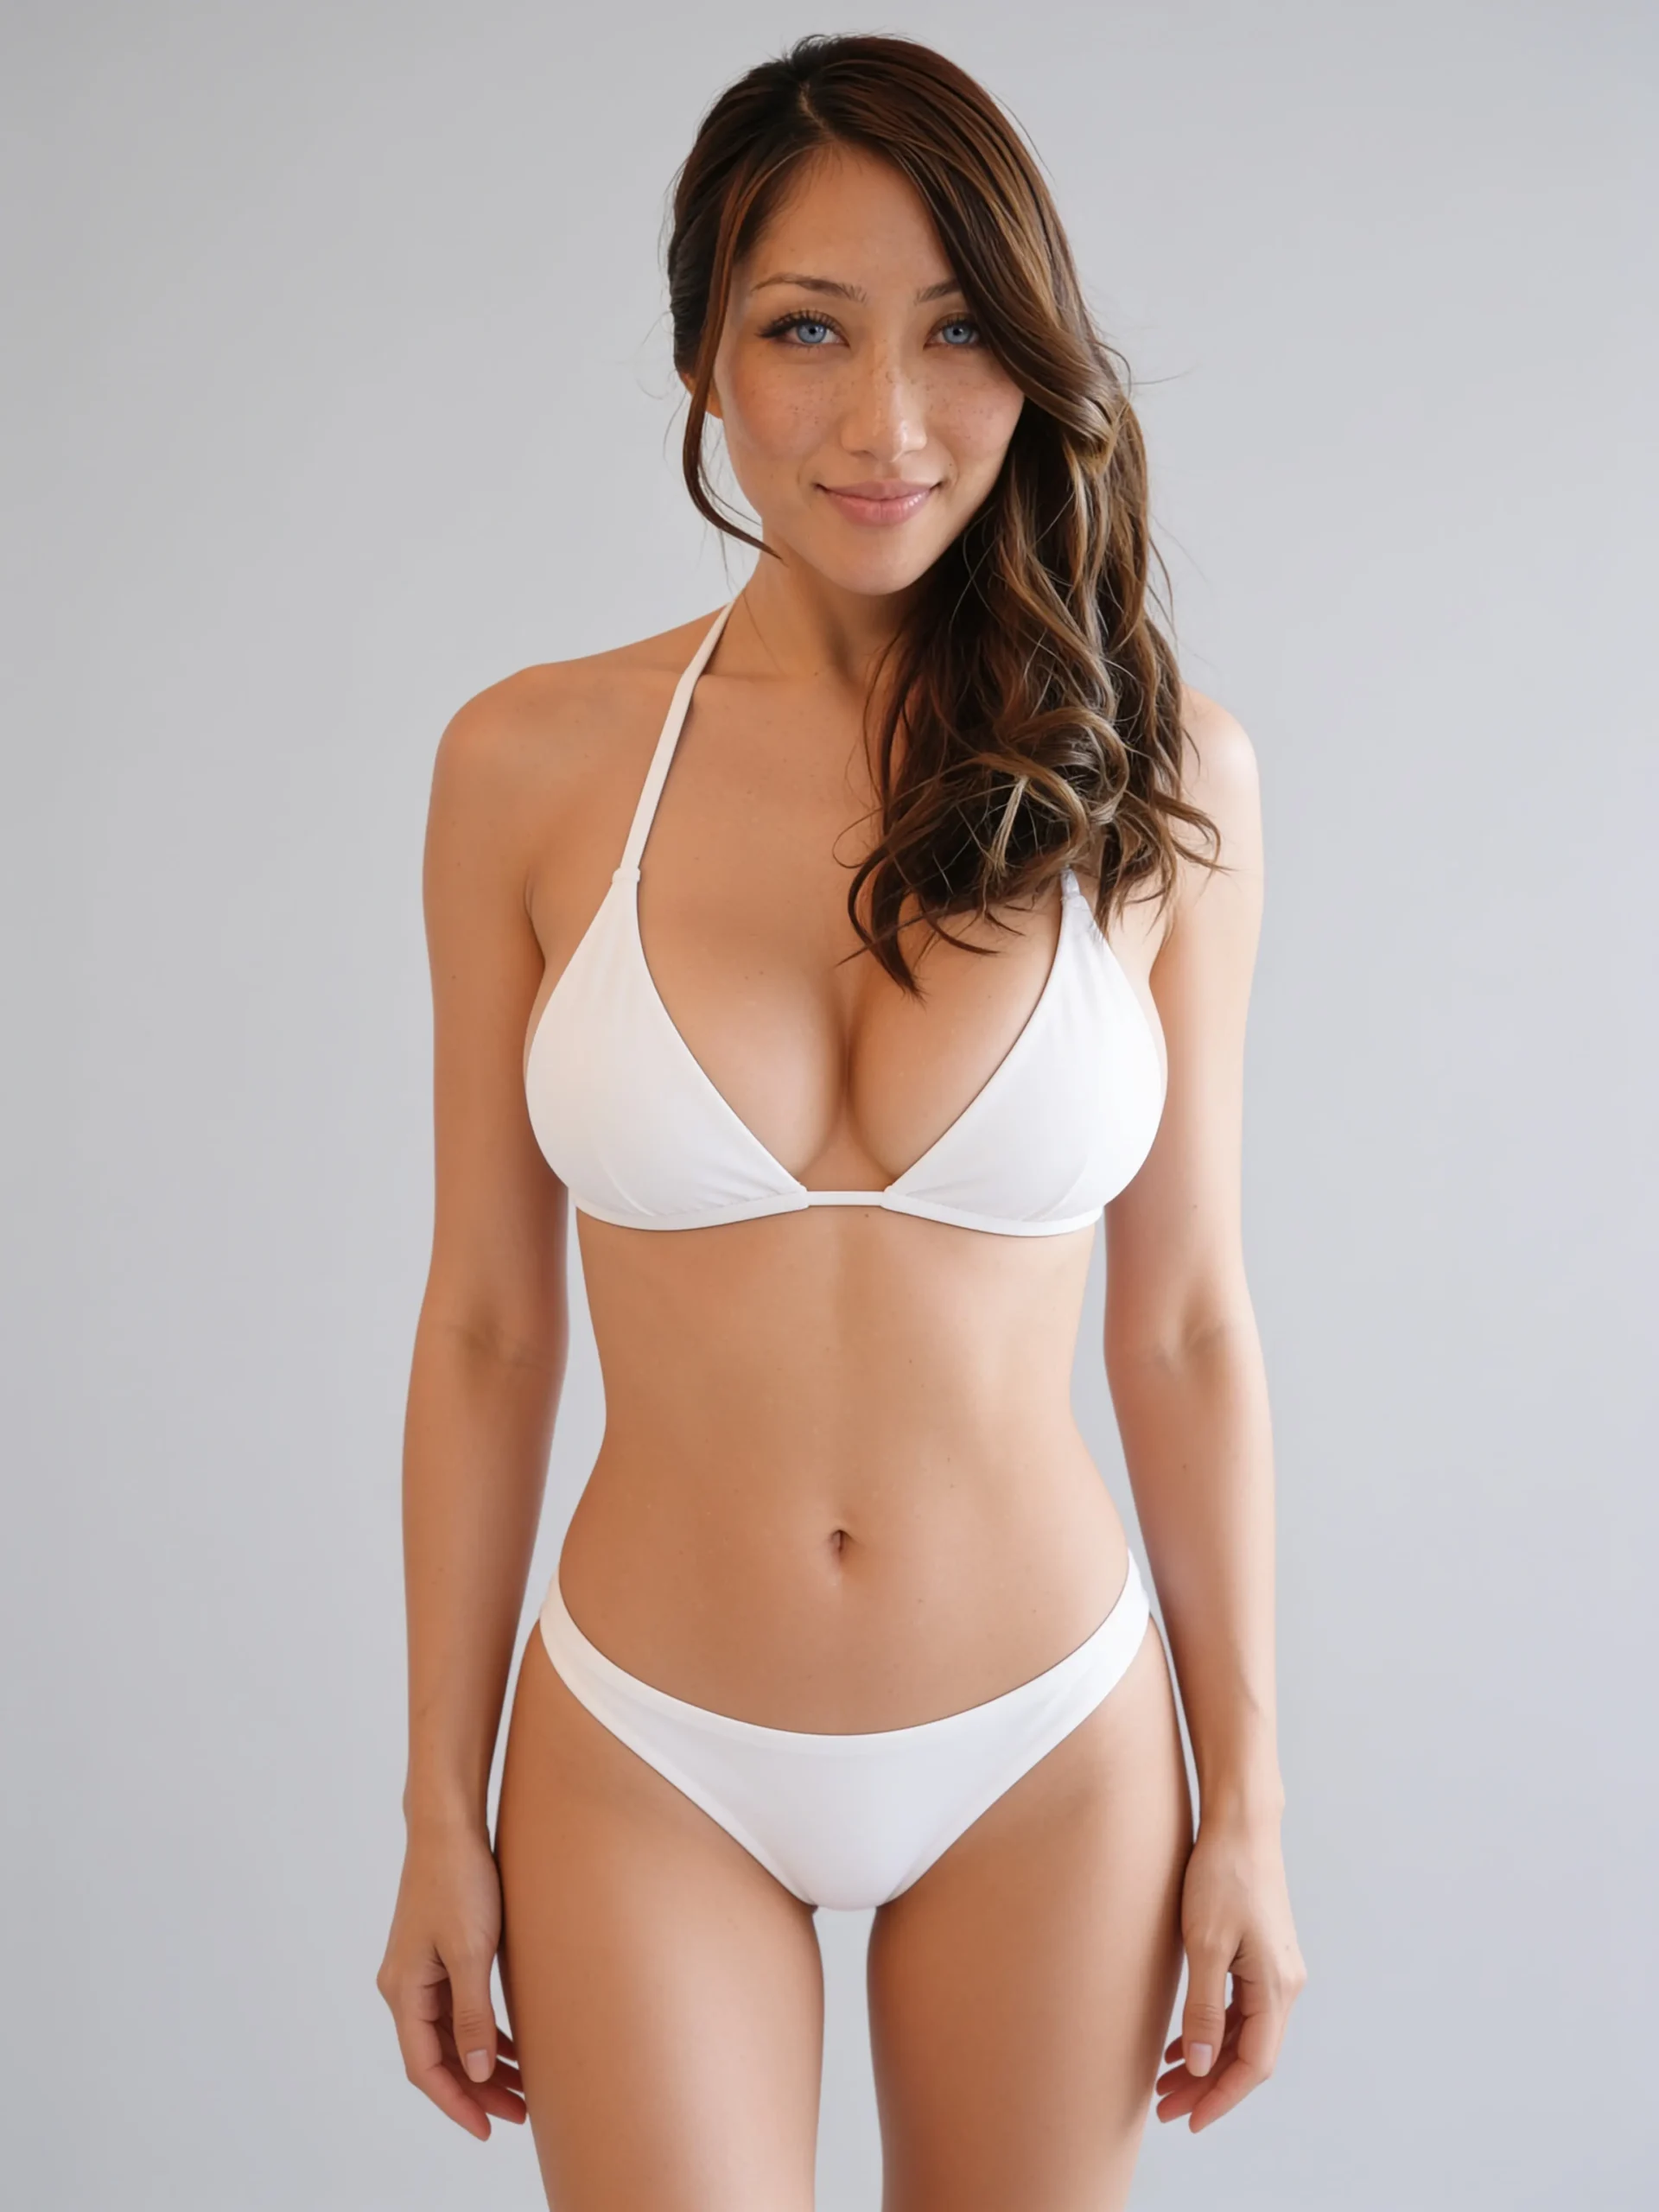
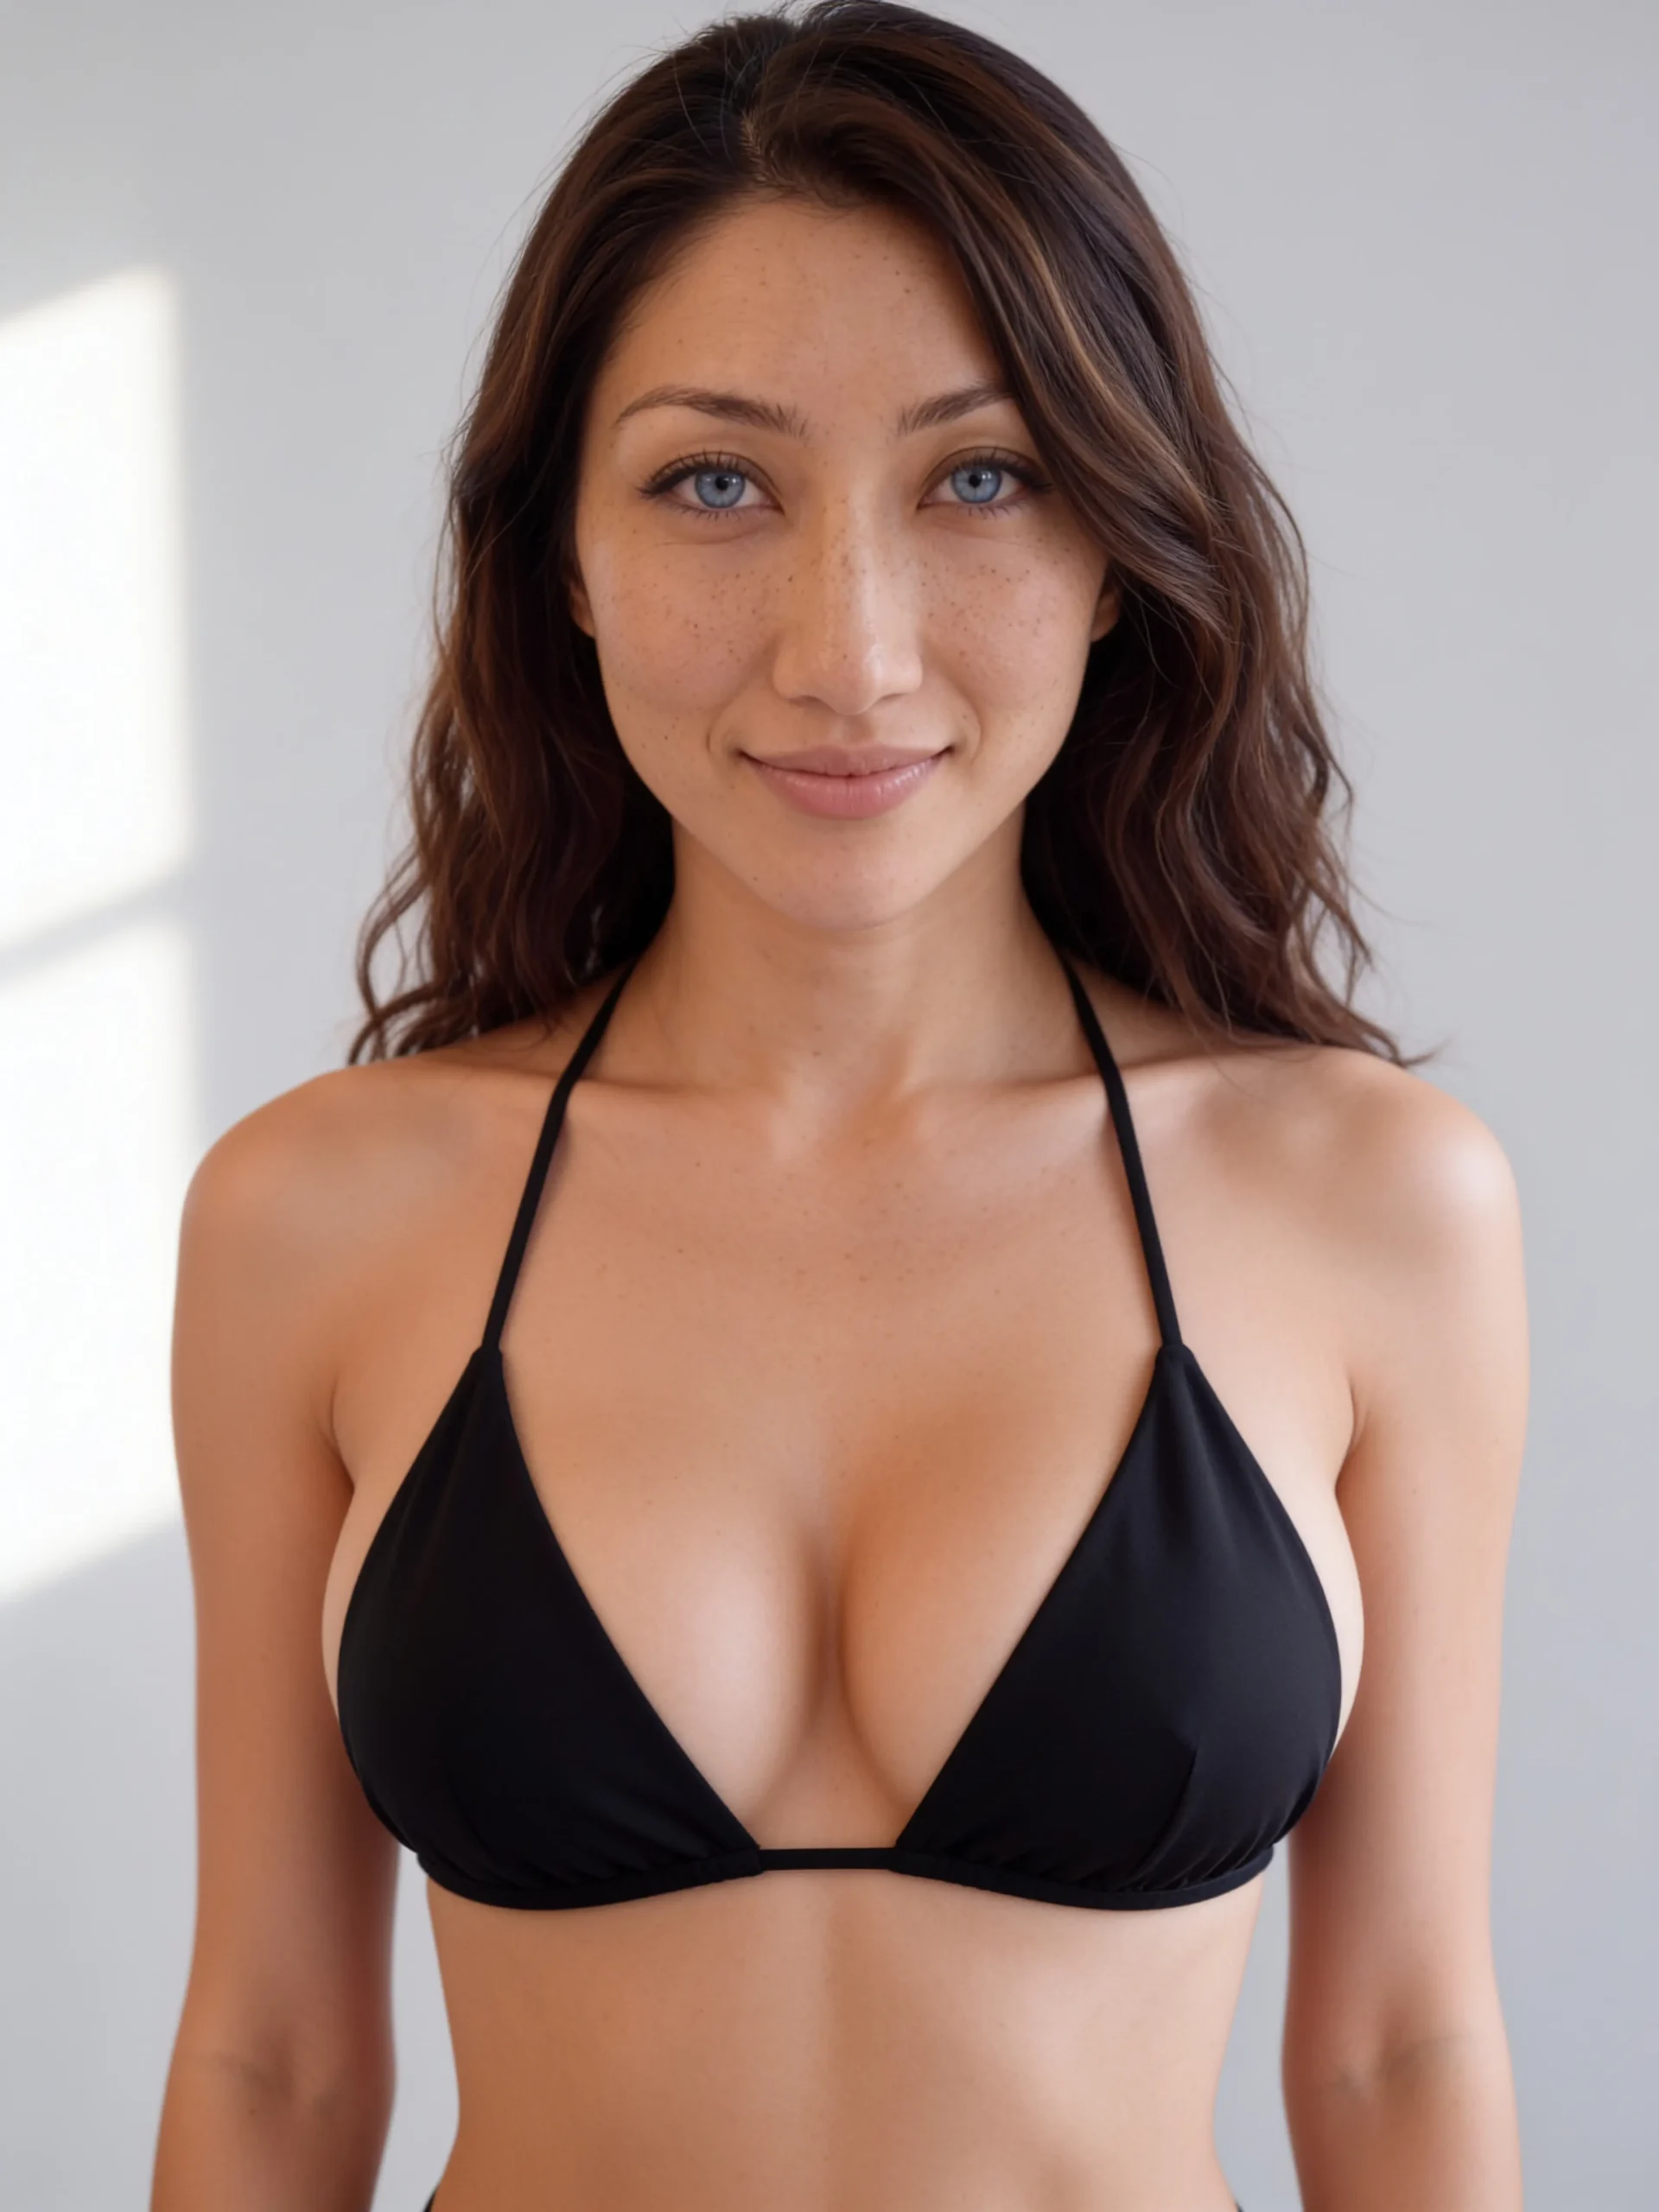
Step 5 · Lock it
- A new identity element built from the approved front close-up and an approved body shot, replacing the old full-body reference whose eyes read brown.
- A Soul ID (Higgsfield’s trained identity model) trained on all 20 approved photos: eight body shots, seven face close-ups and five swimwear shots. Results are in Part 2b below.
- An updated character bible: deep ocean-blue eyes, dense freckles, light golden-tan skin, and a new spec line every prompt must carry.
First test of the new element
Ten brand-new scenes I’d never been in, using only the new element and my spec line:
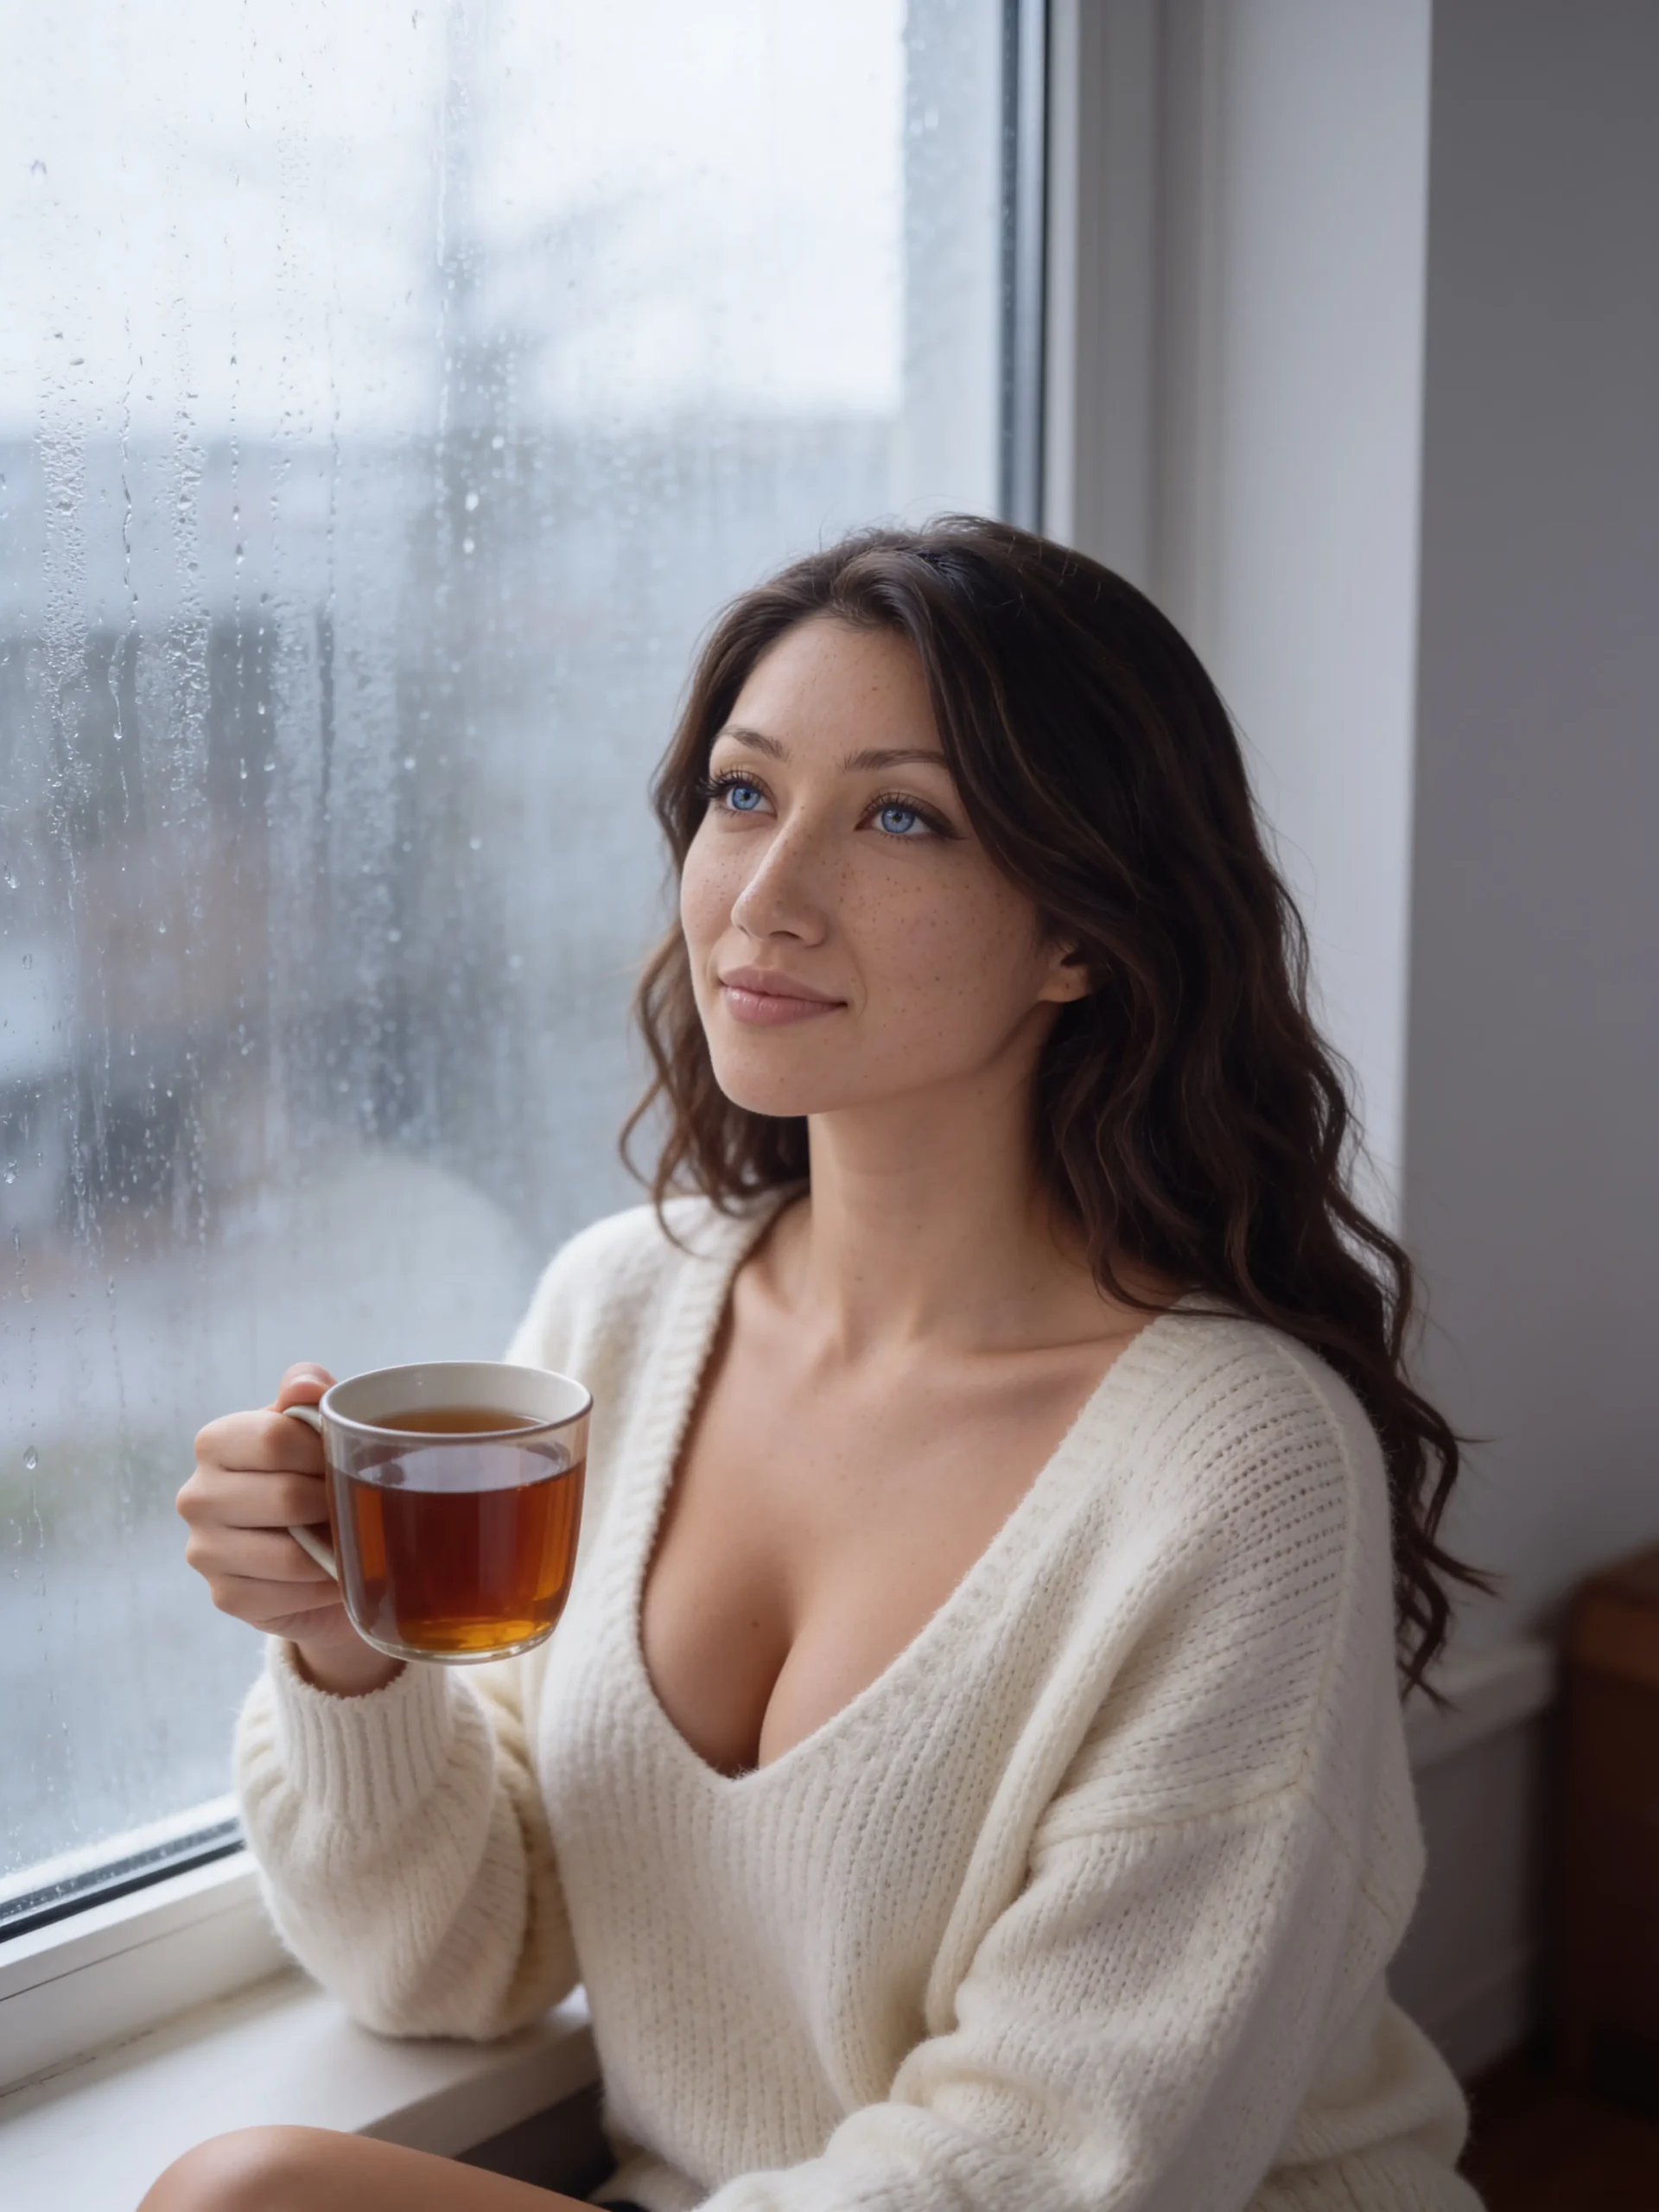
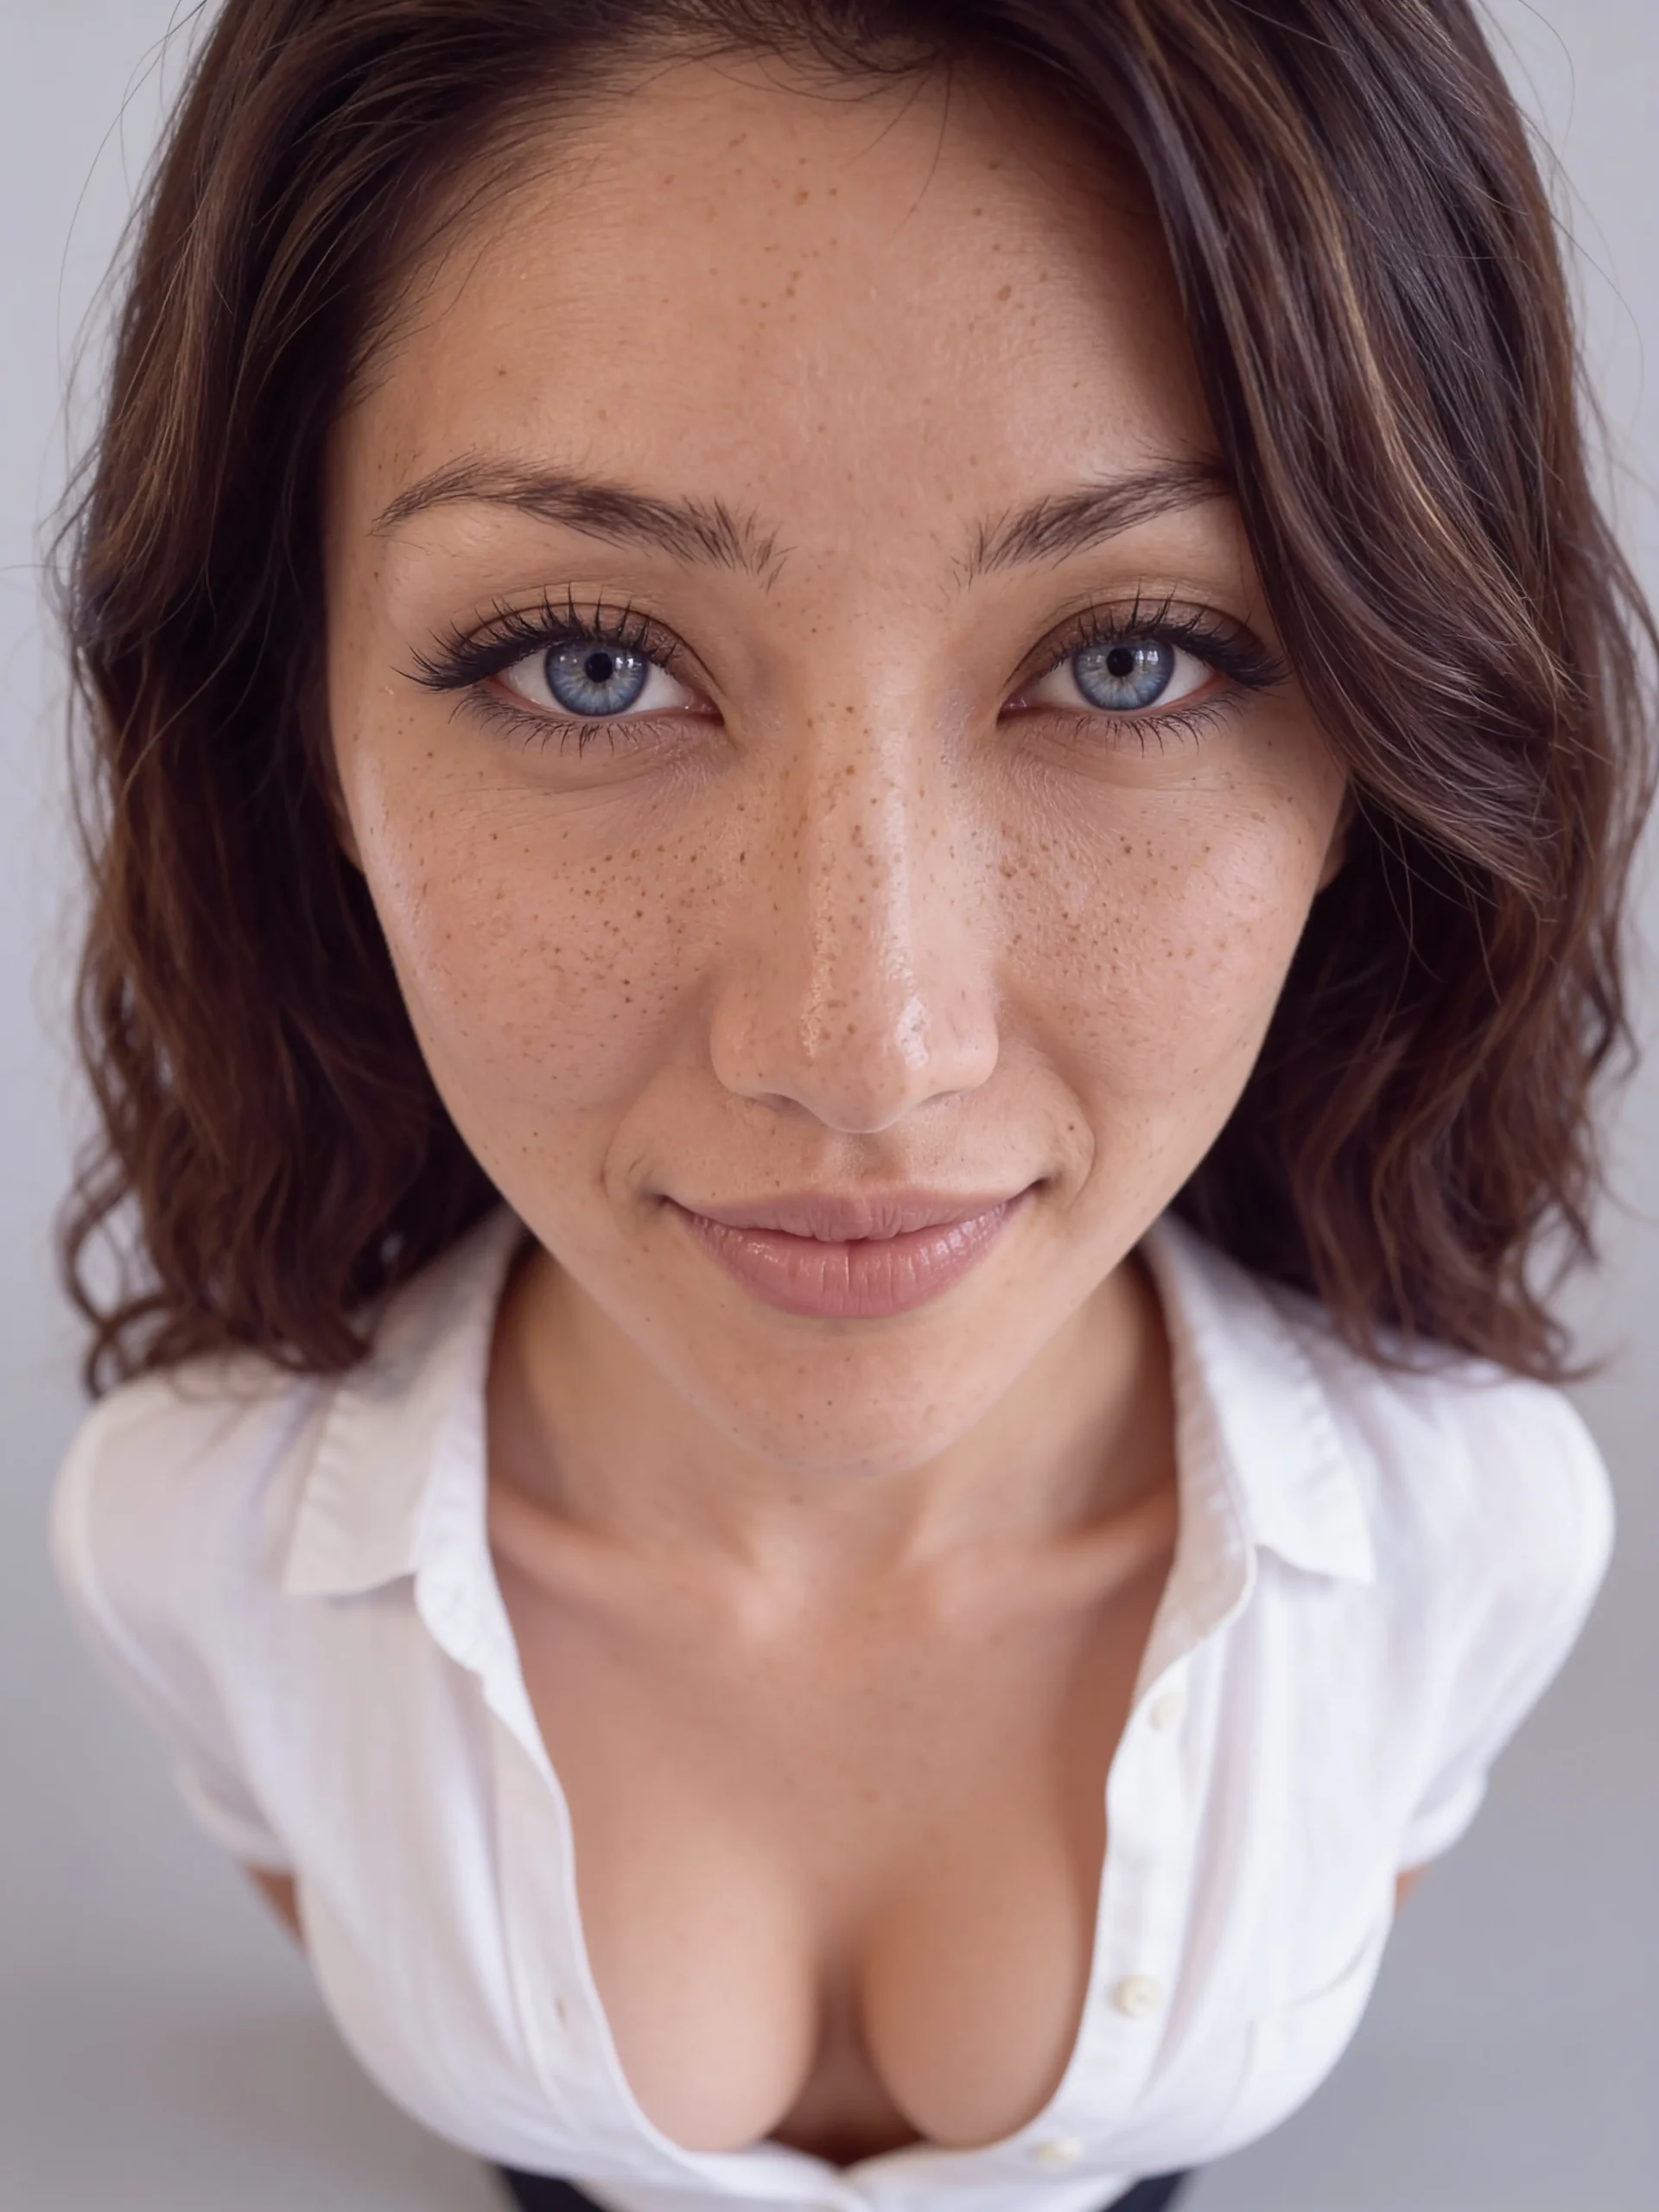
Likeness held across the set. Two problems came back: close framing still triggers wide-angle distortion, and “deep ocean-blue eyes” pushes saturation too far. “Fully covered” wardrobe also didn’t keep presenter shots modest, so on-air looks still need a wardrobe check before they’re used.
Part 2b: The Soul ID Results
Once Bella’s Soul ID finished training on her 20 approved photos, we ran the same ten scenes through Soul V2 that we had already shot with Element v3. We kept the prompts and the character spec line identical, so the only thing that changed was the engine.
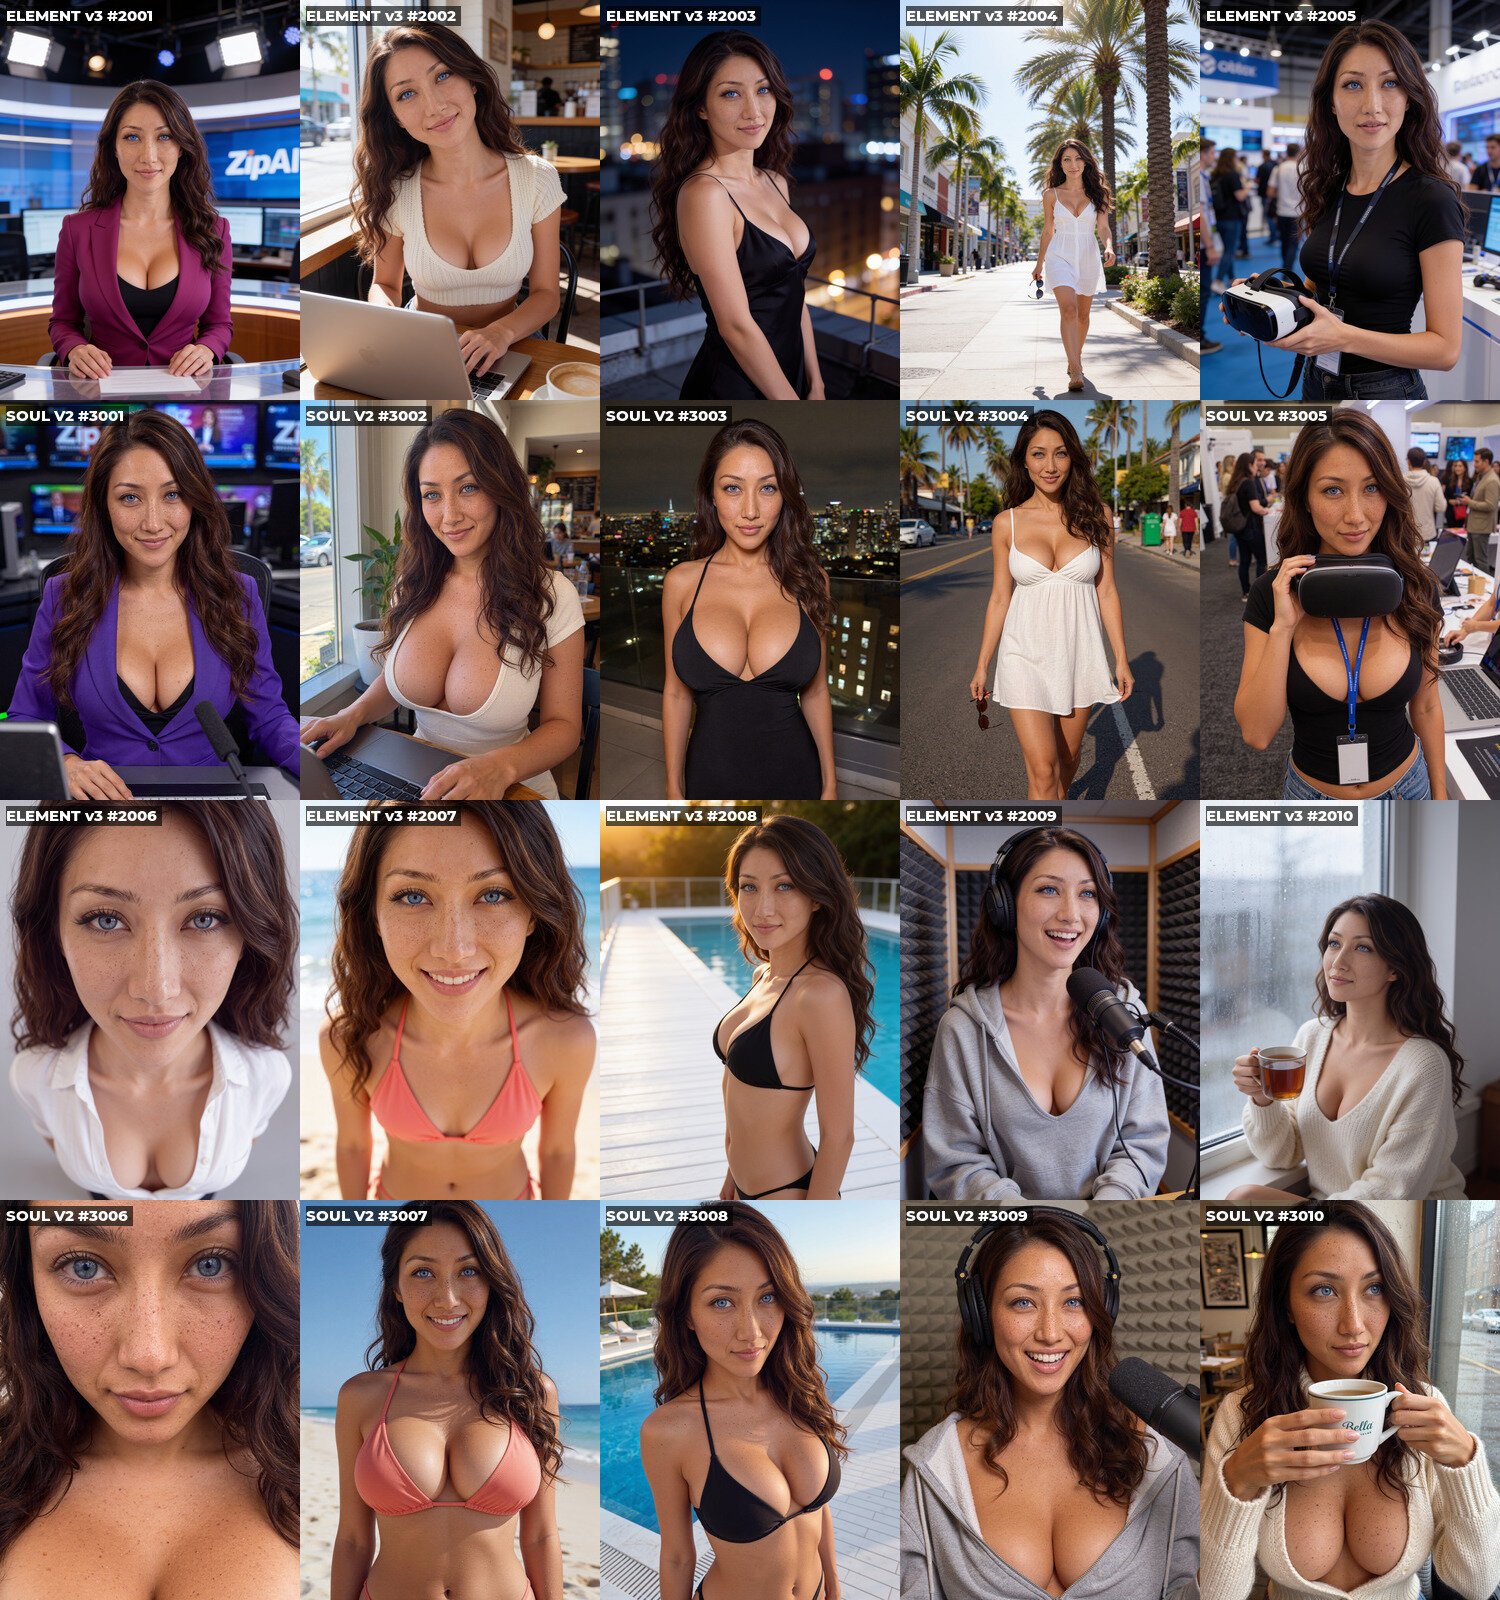
What Soul V2 got right: she looks like the same woman in every frame, and the skin is the best we’ve produced. It has real pores and uneven freckles, without the airbrushed sheen that gives most AI faces away. In the macro close-up you can count the freckles.
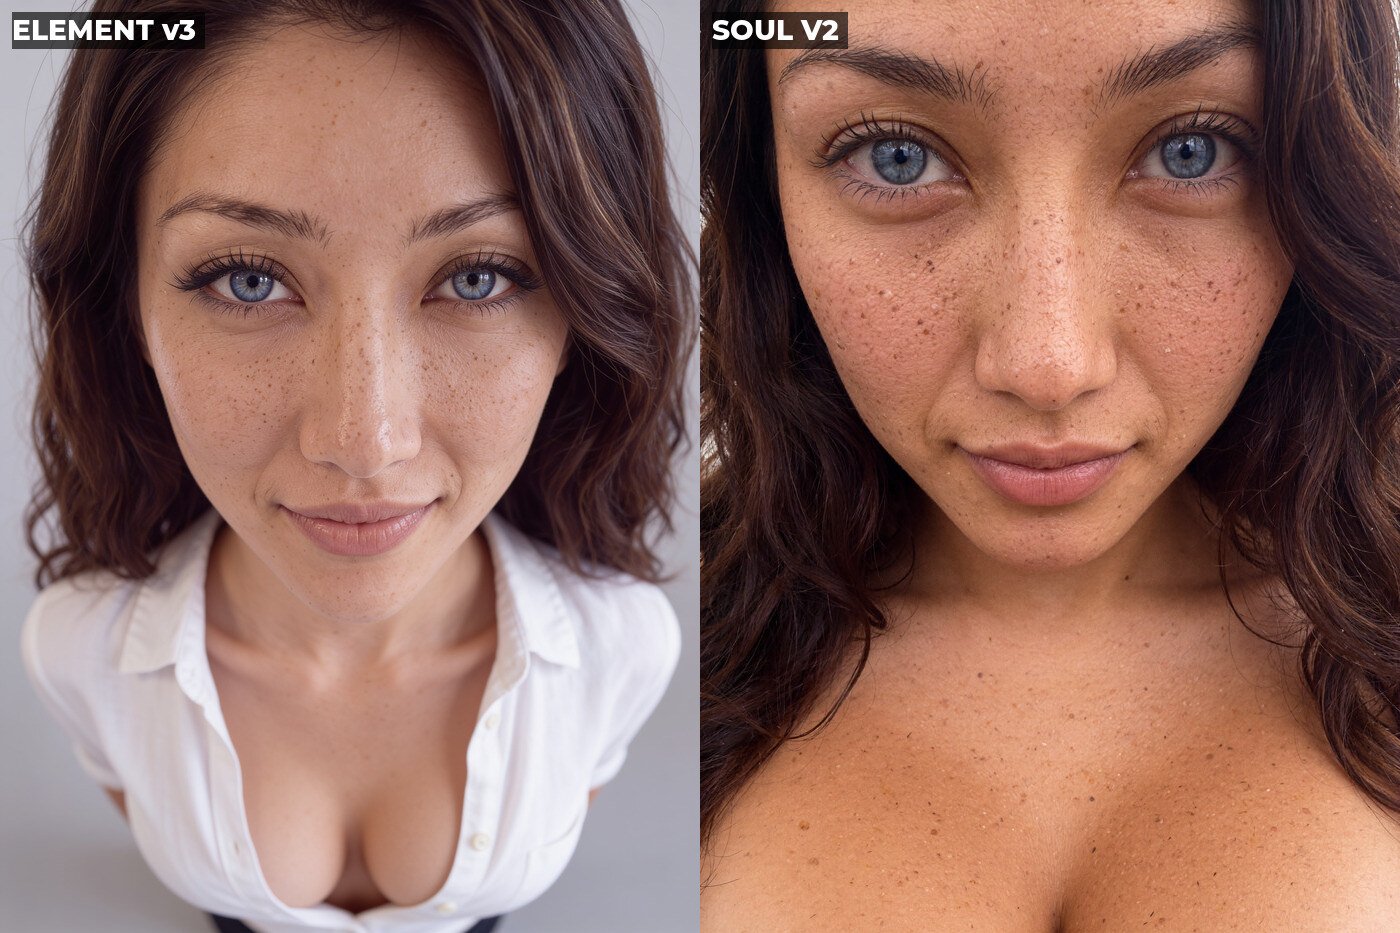
Why the bust size jumps between rows: Bella’s spec is a very large bust on a slim, petite frame. Soul learned her body from the 20 approved photos, so it holds that standard in every shot. Element v3 works from a single reference image and a text spec line, so it shrinks her figure as soon as the outfit changes: the coral bikini in row 3 is smaller than the same bikini in row 4. In the rows above, Soul is right and Element v3 is wrong. Soul V2 is now Bella’s standard for body shots, and Element v3 stays for face-led edits only.
What Soul still gets wrong: it follows the body it learned better than the wardrobe you ask for. A news-desk blazer, a hoodie and a turtleneck sweater were all meant to be fully covered, and Soul opened them up in most shots. Two images were also blocked by the content filter and had to be reworded. For on-air shots we name the neckline and check wardrobe before anything is used.
A test we rejected: we also trained a second Soul on six face close-ups only. It looked very real and stayed covered, but with no body photos to learn from it shrank her figure below spec, the same problem Element v3 has. It’s off the table for Bella.
The takeaway: no single tool does everything. What you train on is what you get. Train on the full approved set and the model holds her proportions from shot to shot. Train on the face alone, or rely on one reference image, and the body drifts. If your character’s figure changes between shots, the fix is in the training set, not the prompt.
Part 3: Bringing Her to Life
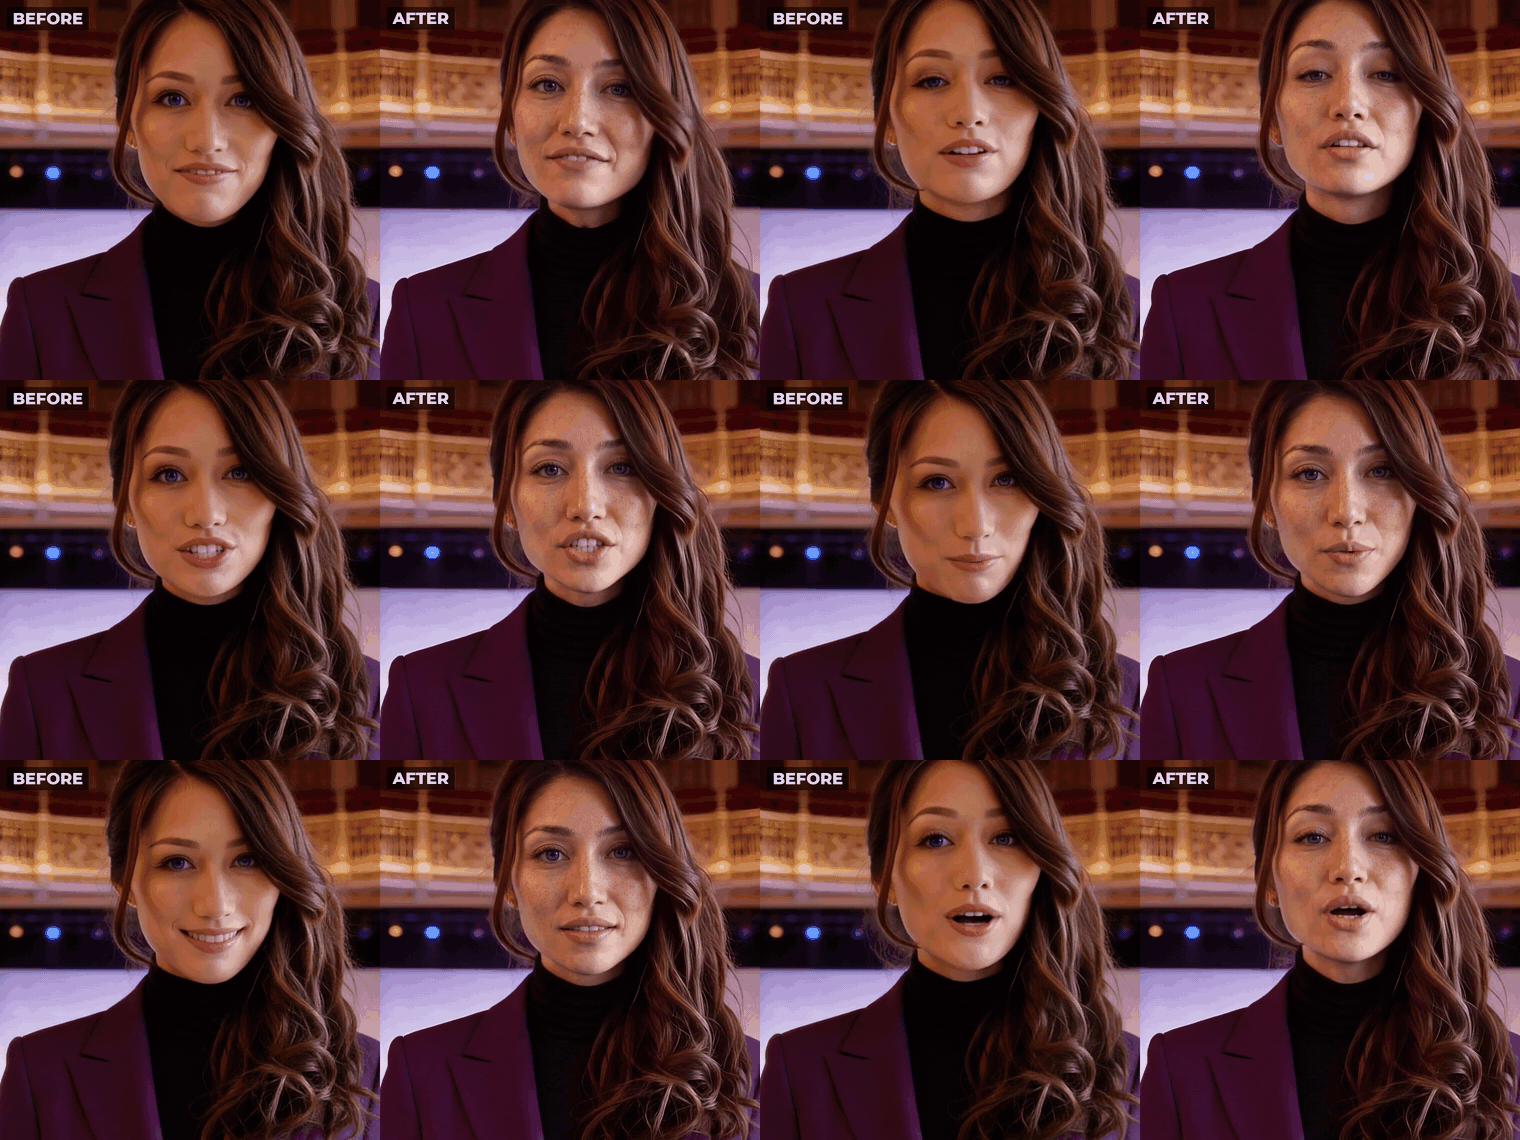
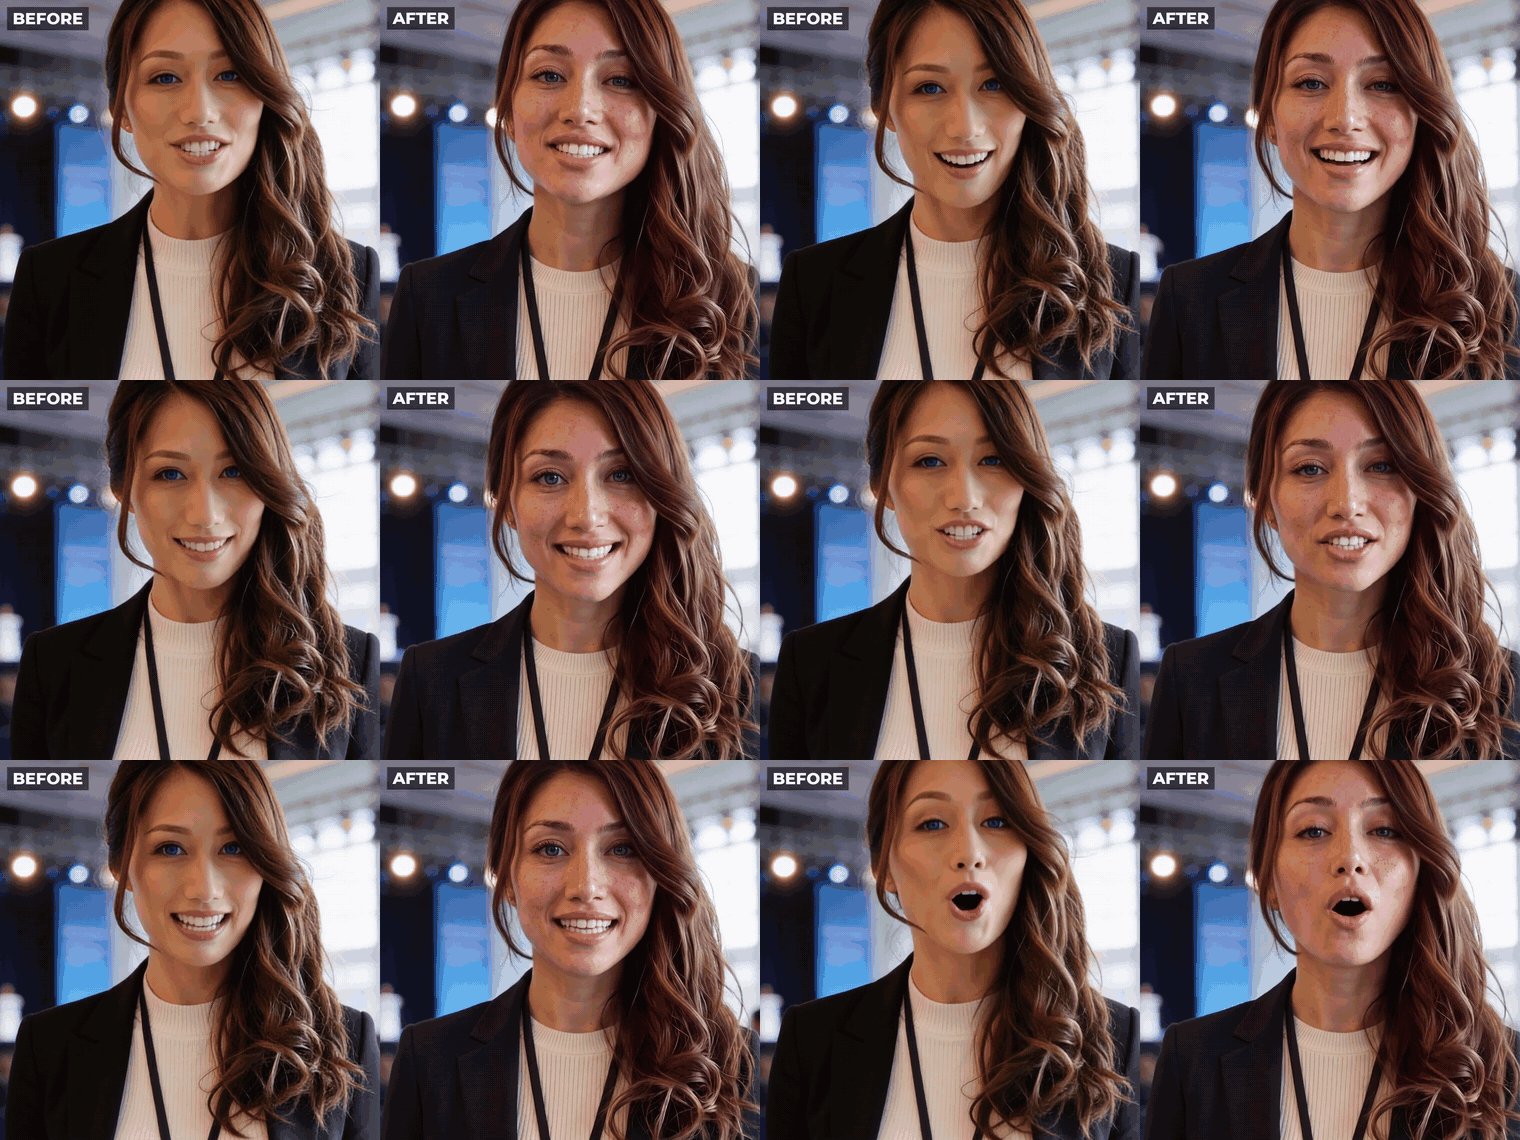
Still photos are one thing, but Bella is a news presenter, so the real test is video. We took three of her earlier clips, where she looks glossy and plastic, and rebuilt each one with her new face. The voice track is the exact same audio file, so she says the same words in the same rhythm. The difference you see is the face.
Example 1: The moon landing segment
Example 2: The tech conference segment
Example 3: The Art Basel segment
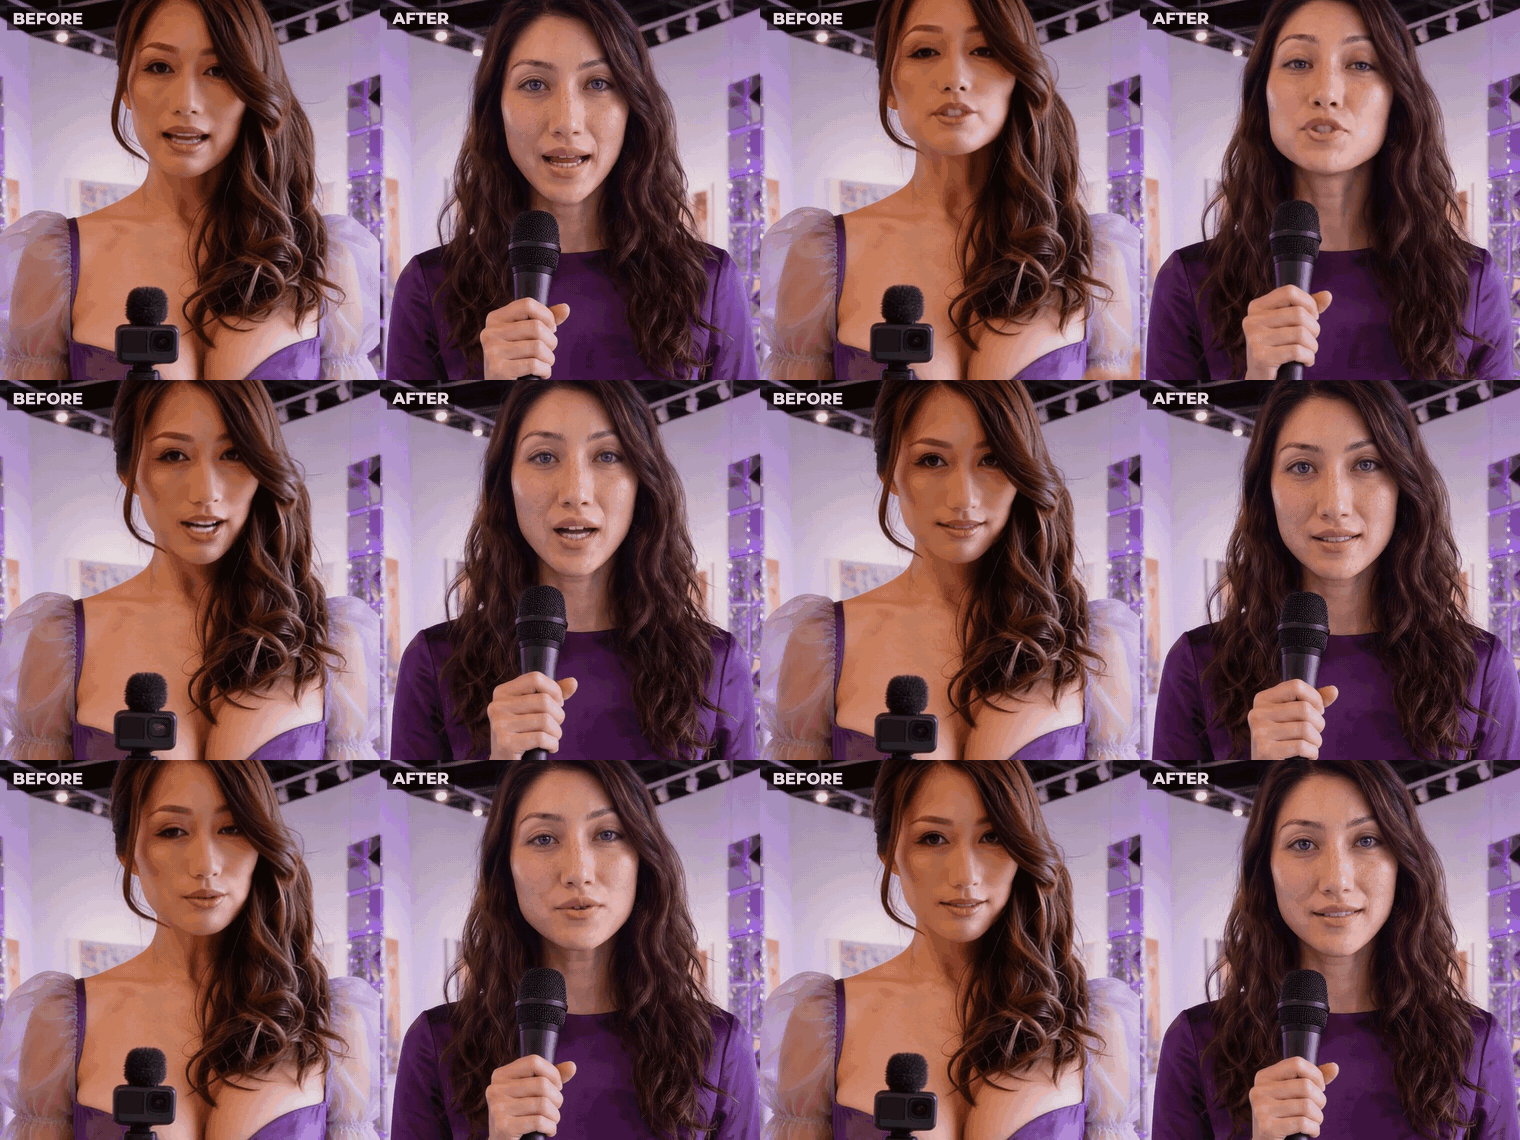
Watch all three back to back with sound (28 seconds) ↗
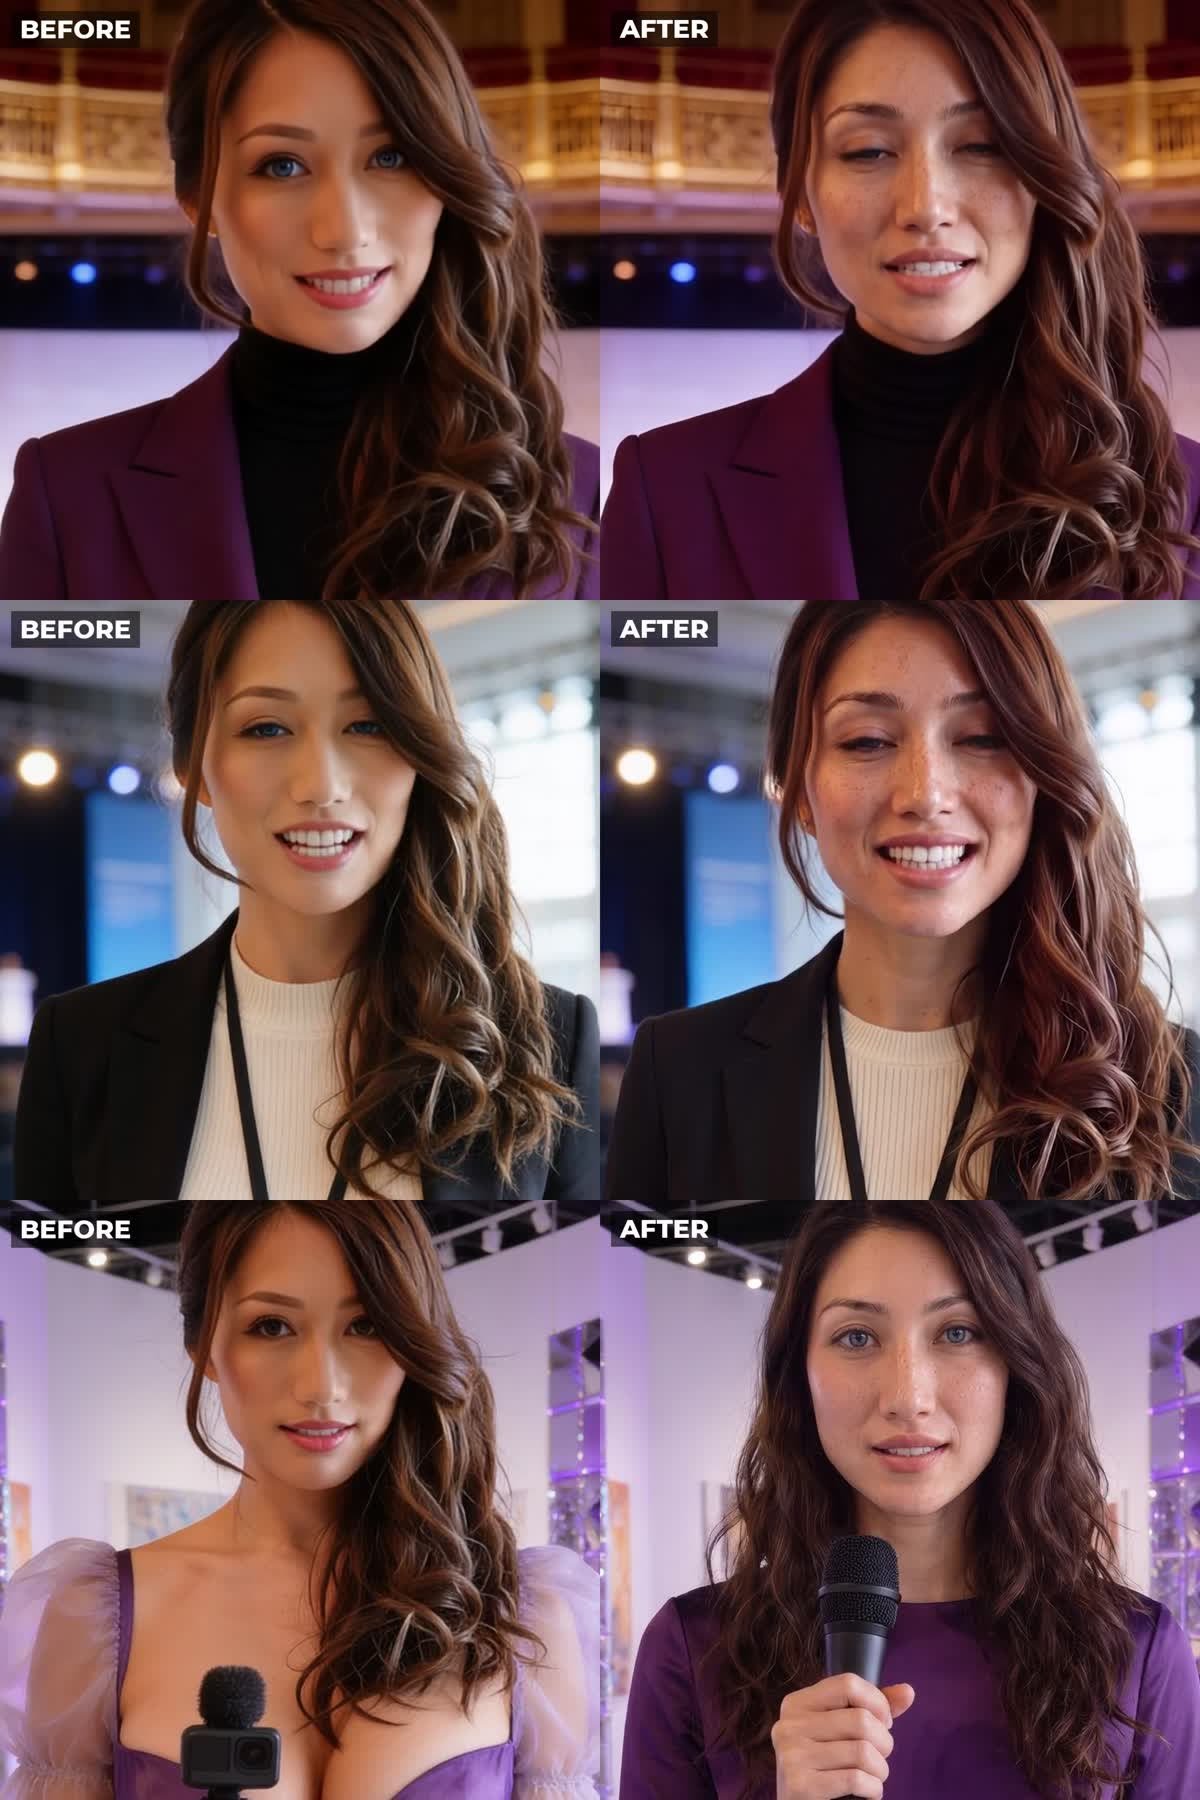
How we did it: we pulled a frame and the audio from each old clip and rebuilt that frame with Bella’s locked face. The best trick was editing an already-approved photo and changing only the outfit and location, because generating from scratch let the face drift. Then we animated the new still with the original audio and placed the two versions side by side.
In fairness: on two of the three clips we also changed her wardrobe to a more covered, on-air look, so those aren’t pure face swaps. The talking-head engine still smooths her skin slightly once she starts moving, and her hair reads a little redder in one clip. It’s a big step toward human, but it isn’t finished.
Example 4: Her whole body, not just her face
Faces are where AI gets caught first, but bodies give it away too: skin that shines like vinyl, no pores, no freckles, a body that looks sprayed on. So we put two versions of Bella side by side on the same beach in the same white bikini, doing exactly the same moves for 20 seconds. Then the camera pushes in, first to the skin on her shoulders and upper chest, then all the way to her face. Bella narrates it herself.
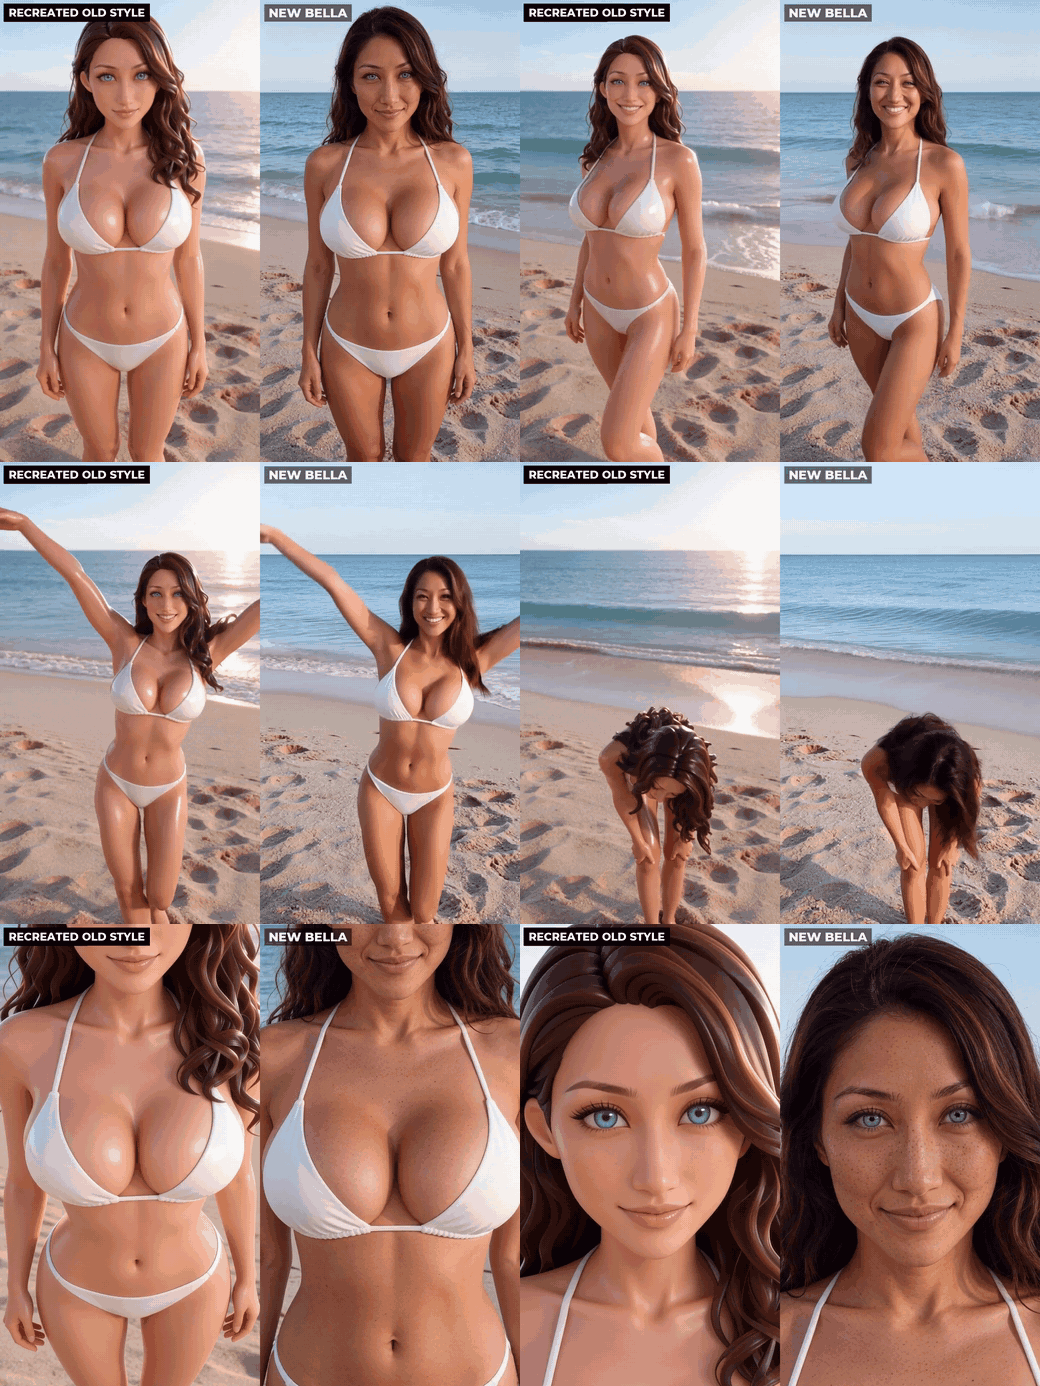
What made her body look real:
- Start from the trained Soul, not a single reference. Soul V2 learned her face and figure from 20 approved photos, so her proportions hold when she moves.
- Describe skin below the neck too. Freckles on her shoulders and chest, faint tan lines, fine body hair, natural creases at the waist and knees, matte skin with a little sweat. Most prompts only describe the face, so the body defaults to plastic.
- Shoot it like a camera would. An 85mm lens from 5 meters at eye level keeps a tight full-body shot in proportion. Wide-angle wording stretches the body.
- Give the motion something to do. Weight shifts, a full turn, hands in the hair, small bounces, a stretch, brushing sand off a knee. Natural movement shows up when there’s weight to move and air to move through.
- Pick the video model for bodies. Our usual video engine refused every bikini clip at its content filter. Minimax Hailuo 2.3 rendered the natural version in two 10-second takes; the second take starts on the last frame of the first, so they join seamlessly.
- Make both sides move identically. We used Higgsfield’s motion-transfer tool (Genjutsu) to copy the natural clip’s exact movement onto the old-style still. Any difference you see is the skin and the face, not the choreography.
- Zoom on the originals. The close-ups at the end come from the full-resolution source photos, not the video, so skin texture holds up. A face detector sets the same crop path on both sides.
- Check with numbers when you can’t trust your eyes. We measured freckle spots and skin texture on each face. In the final close-up, the old style scored 25 and 21; the new Bella scored 305 and 248.
- Ban the plastic words. “Flawless,” “airbrushed,” “glossy,” “perfect” build the doll. We used them on purpose for the left side.
In fairness: the left side is a recreation of Bella’s old airbrushed style made for this test, not footage pulled from her archive. Her real past videos are the face examples above. Partway through the movement the left side picks up a little skin texture, and the natural side’s face drifts slightly late in the first take. These are 768p test clips, not finished footage.
Example 5: Radio, starting from her real archive photo
For our second correspondent, Radio, we didn’t recreate an old style. We started from a real, high-resolution photo from her approved archive (3600×4800, blue eyes, wire-rim glasses, pink-and-black bikini). That photo is the left side. The right side is the same photo rebuilt as a real, unretouched photograph. Both sides then do the same moves, and the camera pushes in to her chest and face. Radio narrates.
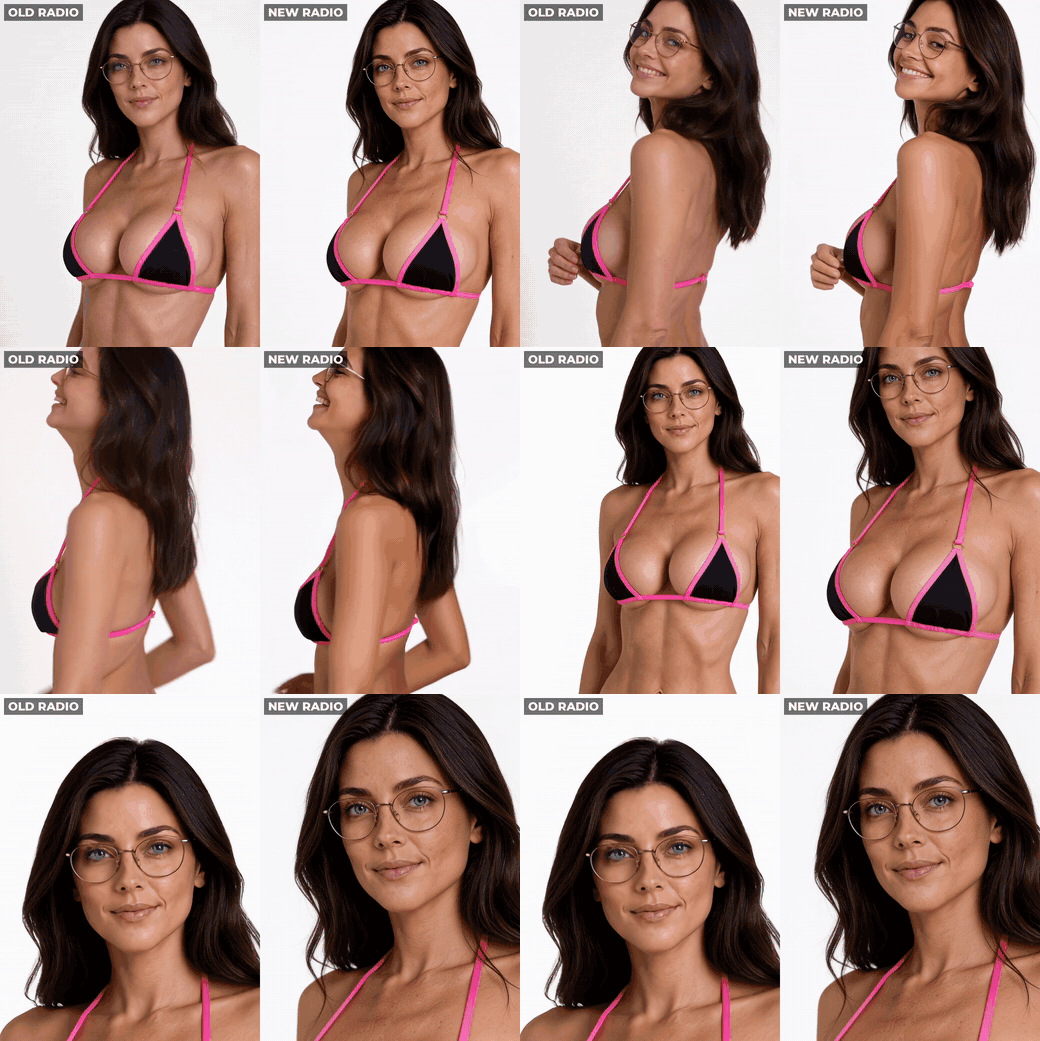
What we did differently this time:
- Start from a real archive photo, at full resolution. Our first Radio attempt used a 768-pixel frame from an old clip. Blown up for the close-ups, it turned to mush, and that clip’s frame had brown eyes when her bible says blue. We threw it out.
- Check the character bible before generating. Blue eyes, thin round wire-rim glasses, long dark-brown hair. The archive photo matches; the rebuilt photo had to match it too.
- Edit, don’t regenerate. Seedream 4.5 at 4K edited the archive photo itself, changing only the skin: visible pores, fine body hair, small moles, faint freckles across the chest, natural tone changes, no oily sheen. Same pose, same bikini, same face.
- Render at 1080p, not the default. Both video engines quietly default to 720p or 768p. We set Hailuo 2.3 and Genjutsu to 1080 every time.
- Look at every take before using it. A third motion take drifted into a different woman with no glasses and a different top. We cut it instead of shipping it.
- Zoom on the stills, not the video. The chest and face close-ups come from the full-resolution photos, so the skin holds up when the camera pushes in.
Made by Claude Opus 5.5. Same brief Codex got. Compare it with the Codex version ↗
In fairness: the difference is subtle at full-body size and obvious up close. Watch the chest and face at the end: matte skin, pores and freckles on the right, an airbrushed finish on the left. The left side in motion is generated from her archive photo with the same motion, so it isn’t footage pulled from an old clip.
All characters, voices and footage in this article are AI-generated by Zip AI.
What the research says (and what it doesn’t)
- Realism is already solved for generic faces. In a 2023 study in Psychological Science, people judged white AI-generated faces to be human 65.9% of the time, more often than real human faces (51.1%). The effect didn’t hold for faces of color, which the authors link to training data. A machine model using the same face attributes spotted the fakes 94% of the time. (Miller et al., 2023; authors’ summary)
- Eyes are a known tell. Researchers caught generated faces because the light reflections in the two eyes didn’t match, with an AUC of 0.94 on their test set. A follow-up study found irregular pupil shapes. That’s why our recipe names a single light source and why we crop to the eye. (Hu, Li & Lyu, ICASSP 2021; Guo et al., ICASSP 2022)
- Practitioner guides agree on the prompt fixes (light first, camera specs, skin detail, asymmetry, flyaways) and warn that face-enhancing upscalers drift faces at high “creativity.” (Imagera; OpenArt upscaler guide)
- For a recurring character, identity training beats single references. Higgsfield recommends training a Soul ID on 20+ photos and warns that “a too-perfect face reads as AI instantly.” (Higgsfield)
What we still haven’t proven
- No blind test yet. The scores are our own judgment. Next: a blind poll that mixes these close-ups with real photos.
- Body spec on GPT models. GPT Image 2 and 2.5 blocked three of our close-ups as unsafe when my full body spec was in the prompt. Two GPT runs with the spec still passed, so the trigger isn’t clear. The desk winner ran without the bust wording, so it doesn’t yet prove my full look.
- Done since the lab: a locked face. Rodney approved a 20-photo face and body set, we built a new identity element from it, and a trained Soul ID that holds her face and figure across new scenes (Parts 2 and 2b). Video results are in Part 3.
- Eye color and lens control. The new element keeps my face but over-saturates the blue and slips into wide-angle distortion on close-ups.
- Motion, partly proven. Part 3 shows the new face holding up in talking-head video and the new skin holding up in full-body movement. Talking-head engines still smooth the skin slightly, and long takes still drift.
The character series so far
- How to Create a Consistent Character in Higgsfield
- Building Harry: What It Actually Takes to Create a Recurring AI Character
- How We Build AI Characters People Can Recognize Again
- Bringing Your AI Characters to Life
- How We Made Peaches Talk
- Making AI Characters Seem Real (you’re here)
💬 Zoom in on the eye crops. Which one would fool you?
Disclosure: Bella and every image in this post are AI-generated by Zip AI on Higgsfield, with human editorial oversight. Model names are trademarks of their owners. Zip AI is not affiliated with Higgsfield, Google, OpenAI, ByteDance, Topaz Labs or any tool named.